Okay, so my labors in repairing the sailboat are nothing compared to that of creation. Nor is the labor close to that of slaying the Nemean Lion However, it is one of my longest unfinished projects, so finishing any of the tasks to get the boat into the water is a big accomplishment for me.
Then again, a 40 year old boat is probably never a finished project.
Today I created light. Well, at least I hooked up lights. I installed the new switch panel and battery. I had run new wires to the bow light and the interior cabin lights. I tied in the old wiring to the stern light and the masthead light. I turned on the switch, and there was light.
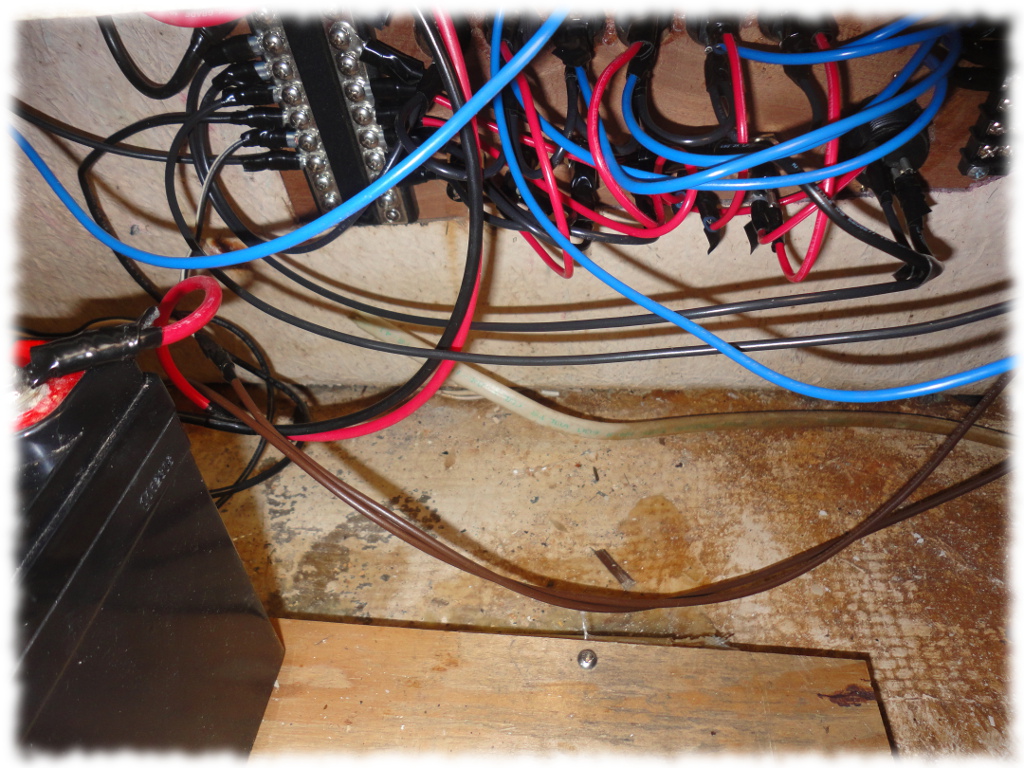
All the lights have either LED bulbs or are low draw bulbs (such as the masthead light). The battery I have is a 35Ah AGM battery. It isn’t nearly as big as most boat batteries, but I figure we won’t be using that much power. And there is room to put another battery the same size next to the current one.
The battery sits on a wood (plywood) platform on wooden supports that I fiberglassed onto the hull. I have a strap holding the battery down to the platform.
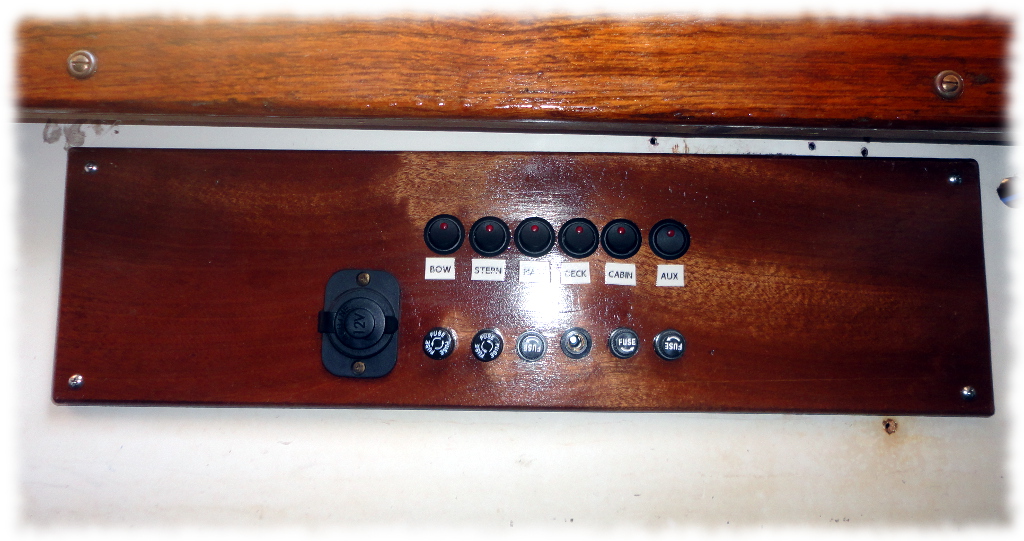
The switch panel was made from sapele and has 6 circuits, each with independent fuse holders under the switches.
I used round panel mount switches and panel mount fuse holders. A couple of lessons learned:
- Use good components. I got cheap fuse holders, and I hate them. The good ones I picked up from Defender were well worth the couple of bucks I spent on them.
- I couldn’t find a good source of high quality switches, so I ordered them off of eBay. Get spares. The quality isn’t always the best – I found one of my switches arrived broken, and don’t have a spare.
- I’ll probably add a dedicated USB charger one of these days (before any long days out).
- The wood panel is much thicker than the panel mount hardware is able to handle. I needed to drill out a recess behind the fuse holders so I could thread the nut to hold them in. I should have drilled recesses behind every hole prior to drilling the holes. The switches would have snapped in better if I had a recess behind their holes. As it is, I had to use a drop of epoxy to keep the switches from rotating and popping out.
- I used all 16ga wire. I probably could have gotten by with using 18ga wire for all the lights, but it wouldn’t have saved much money anyway.
- I think I would try to put the negative bus bar and the terminal block strip on the same side of the panel. Right now the positive connection for each circuit is at the forward end of the panel, and the negative bus on the aft end. That makes the cabling a little messier.
The switch panel is relatively simple. The to cables from the battery go to a double bus bar. All the negatives return directly to the negative bus. All the switched circuits go from the positive bus to the fuse holder, and then to the switch. From each switch I ran a wire to a terminal block strip. That allows me to build the entire switch panel in the workshop, and just connect each load to the appropriate terminal block (and negative bus on the other side of the panel).
Since the switches are lighted, I also needed a negative from each switch to the negative of the battery. The negative terminals for each switch are connected in a daisy chain back to the negative bus.
Currently the only electrical connections in the boat are the navigation lights, a pair of interior dome lights and a single 12V outlet.
In addition to making light, I was able to make progress on some other boat projects. Susanna helped me install two more toe rails (I have one left to complete). The boys and I made a run to the Defender warehouse to pick up some more hardware (a couple of shackles and padeyes) as well as pick up Ben a short sleeve wetsuit. Both boys saved their allowances and purchased sit-on-top kayaks (I won’t complain, it is better than spending it on electronics, and we were able to find them for a steal online). The kayaks should show up in two weeks, so I figured getting some warmer water clothes may be good for this spring.
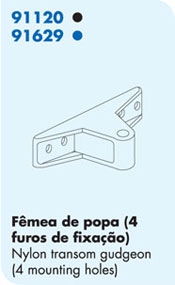
I am also making a plan on how to step the mast without killing myself. I ordered two parts from Nautos to help make the supports I need, a pair of nylon gudgeons:
More on that project when I finish it…. Hopefully tomorrow.