
Approximately two months ago I decided to enter the Sawdust Chronicles 2010 build challenge. Here is the writeup from that project.
Here is the final project:
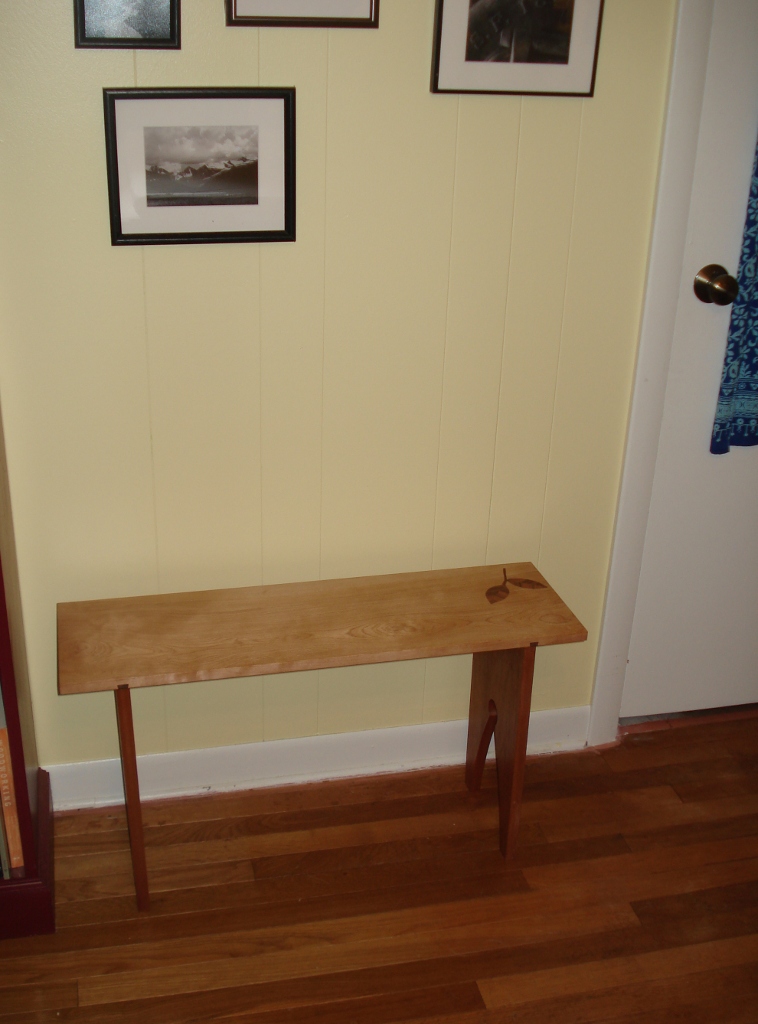
I finished the build project. I wasn’t sure if I was going to make it (it has been a busy month). But I was able to do the final assembly and finish today… I may decide to do another coat of varnish on the top of the bench at a later date, but it is completed and added to the furniture in the house.
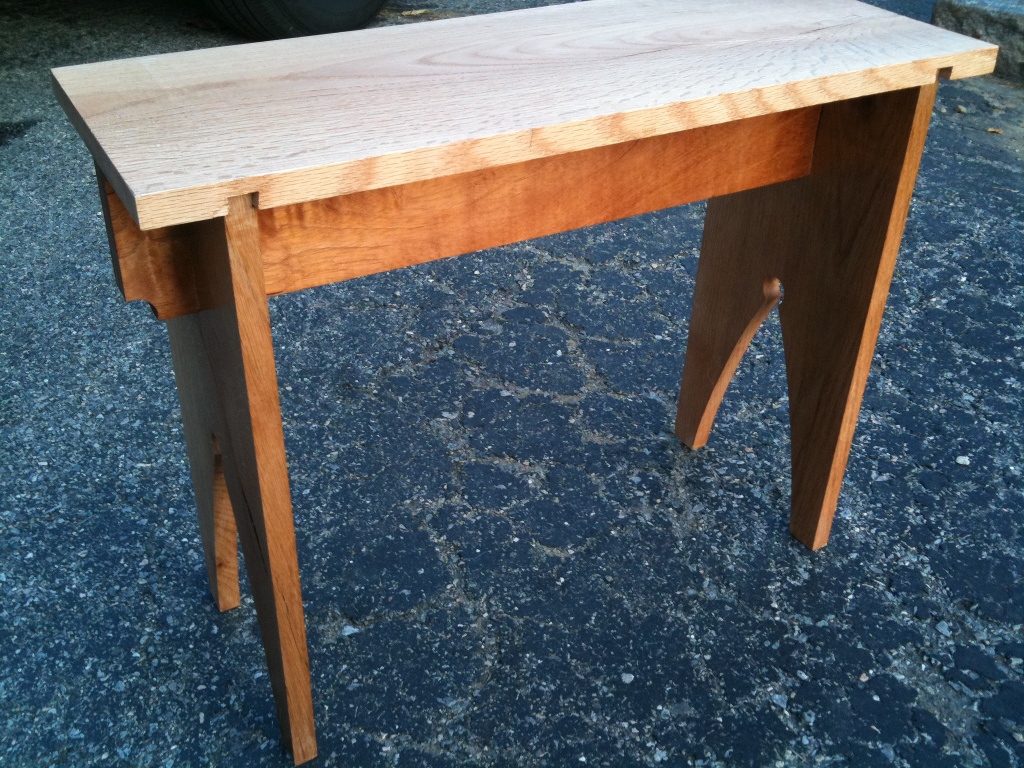
What were my challenges? I had initially thought of doing a bench out of red oak with an inlay. However the oak is turned out pretty plain (too mid-toned – I wanted a lighter shade of wood for the top). So I used the oak to make a prototype bench. What a great idea. It was a technical challenge – I had never constructed something like this before – and a design challenge – I didn’t really like the original design/proportions. Overall it was a great learning project, and even better to have a deadline to work to to force me to finish it, even if I had to work a little faster than I liked by the end.
After I constructed the prototype, I posted it for comments on lumberjocks.com. Based on those comments (and my ideas), I decided to change the design of the bench:
– I would keep the legs with the same curve, but add a bigger diameter hole.
– I made the stretcher a lot smaller, more in proportion to the legs, and added a gentle curve to the stretcher.
– I made the top longer (32″ long) – It would fit the location better.
– I made the stretcher the same thickness as the stock from the legs, it seemed to be a better proportion.
The first step of the construction was to make the top, and inlay the leaves. I made the top of birch (I believe). I cut the leaves on the scroll saw and cut the inlays with the router (based on a podcast by Marc Spagnuolo). It turned out to be more challenging than it appeared by the podcast, but overall I like how the inlay turned out, and will probably incorporate that type of inlay into future projects.

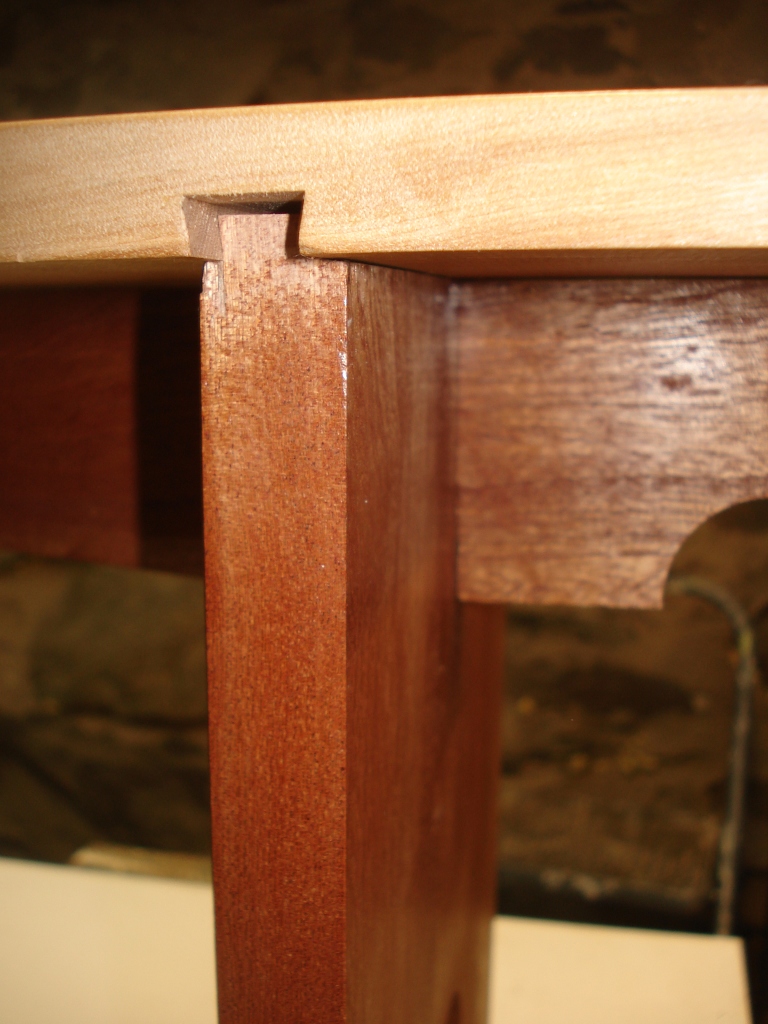
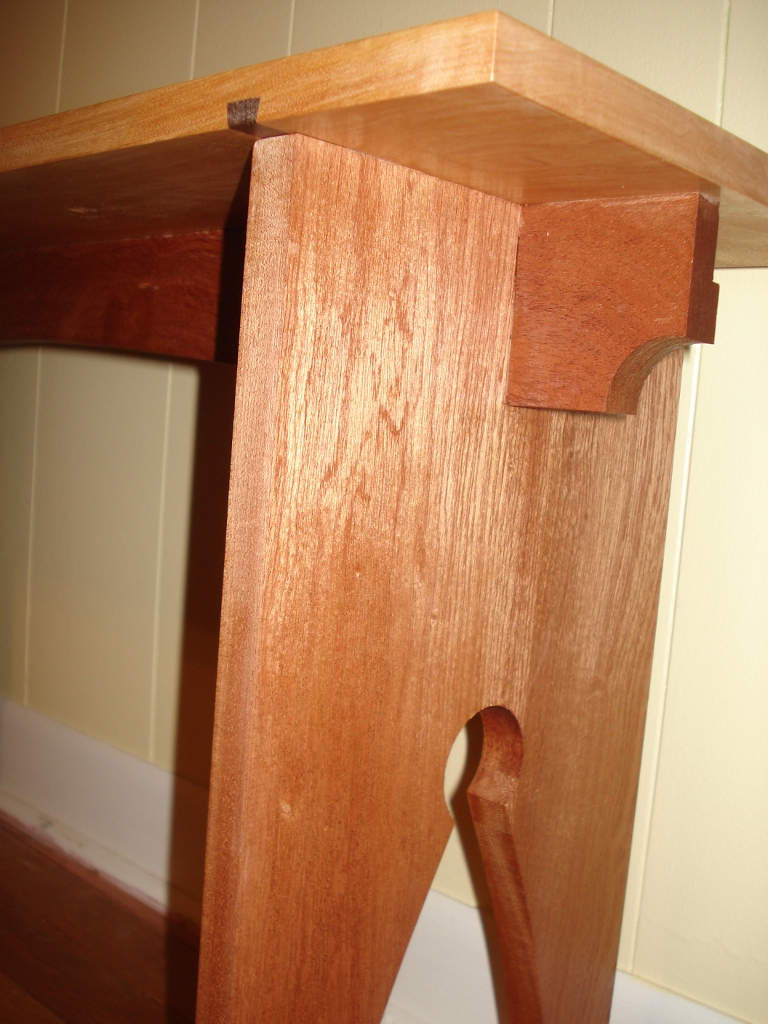
I routed the sliding dovetail slot on the top. On the prototype I made a stopped dovetail, on this one I made a through dovetail and used a piece of scrap walnut as a filler for the front of the dovetail. I didn’t fill the back of the dovetail (so the bench can come apart, but not easily right now). I think if I had more time I may have added one for the back.
I then glued up the legs from sapele and milled the stretcher from the same. I believe it is sapele, but I have acquired a lot of lumber from a friend, and it wasn’t all labeled very well.
I cut the dovetail on the legs on the router table. I did cut the legs a little long, to ensure that if I cut too much off in making the dovetails, I could start over and not have to throw the legs away. After routing the dovetail on the legs, I cut the legs to length, and then drilled the hole and used the same template I used on the prototype to make the legs. I rough cut the curves on the bandsaw and used a pattern bit on the router to get the final shape.
I cut the curve on the stretcher and used a pattern bit to rout the curve to final shape.
The stretcher and legs are joined by a half-lap joint, and then the while leg/stretcher assembly is then attached to the top using a sliding dovetail. I used an American Woodworking project as inspiration for the construction method. I cut the slots for the legs/stretcher on the bandsaw and cleaned up by hand.
What did I do wrong? I made a couple of technical mistakes on the final project. The half-lap joints aren’t as clean as I would like them to be. I had the same problem on the prototype. I may have been rushing a little bit to get the project out the door on the final project. I also started to drill one of the cutouts at the end of the stretcher on the wrong side. It is on the back so isn’t very visible, but if I had more time, I would have cut a new stretcher and started over. I also finished the top prior to assembly, but didn’t have time to prefinish the rest of the pieces. I think it would have been easier to finish if I had prefinished all of the pieces.
What would I do differently the next time? Maybe use wood that would contrast even more (maybe ash for the top and walnut for the legs). I would prefinish all the pieces. I would try to get the half-lap joints tighter. I really liked the idea of building a full-sized prototype to help with construction and design ideas (I included a picture of the prototype to show the differences).
What were my costs? I purchased the red oak at $1/bdft, and the birch and sapele for about the same. Even if I had to pay market for the lumber, I didn’t use much lumber to create the project, maybe 8 bdft. Total cost for lumber I’ll say is $50. Plus $15 for a can of wiping varnish and $5 for glue and sandpaper for a total construction cost of $70.
The only tools I purchased for this was a new dovetail bit for the router (maybe $20).
Below are pictures of the project
Chuck Curtis