After a couple of evenings in the shop, I have the charging station nearly complete. The glue-up is finished and the piece is mostly sanded. I do have to decide if I am going to add a piece on the top to hide where the power strip will go.
I also have to route two groves in the back to allow wires to run up and down the box when it is hung on the wall. Which leads me to the final decision I’ll have to make. How to hang this on the wall… But I don’t have to make that decision today.
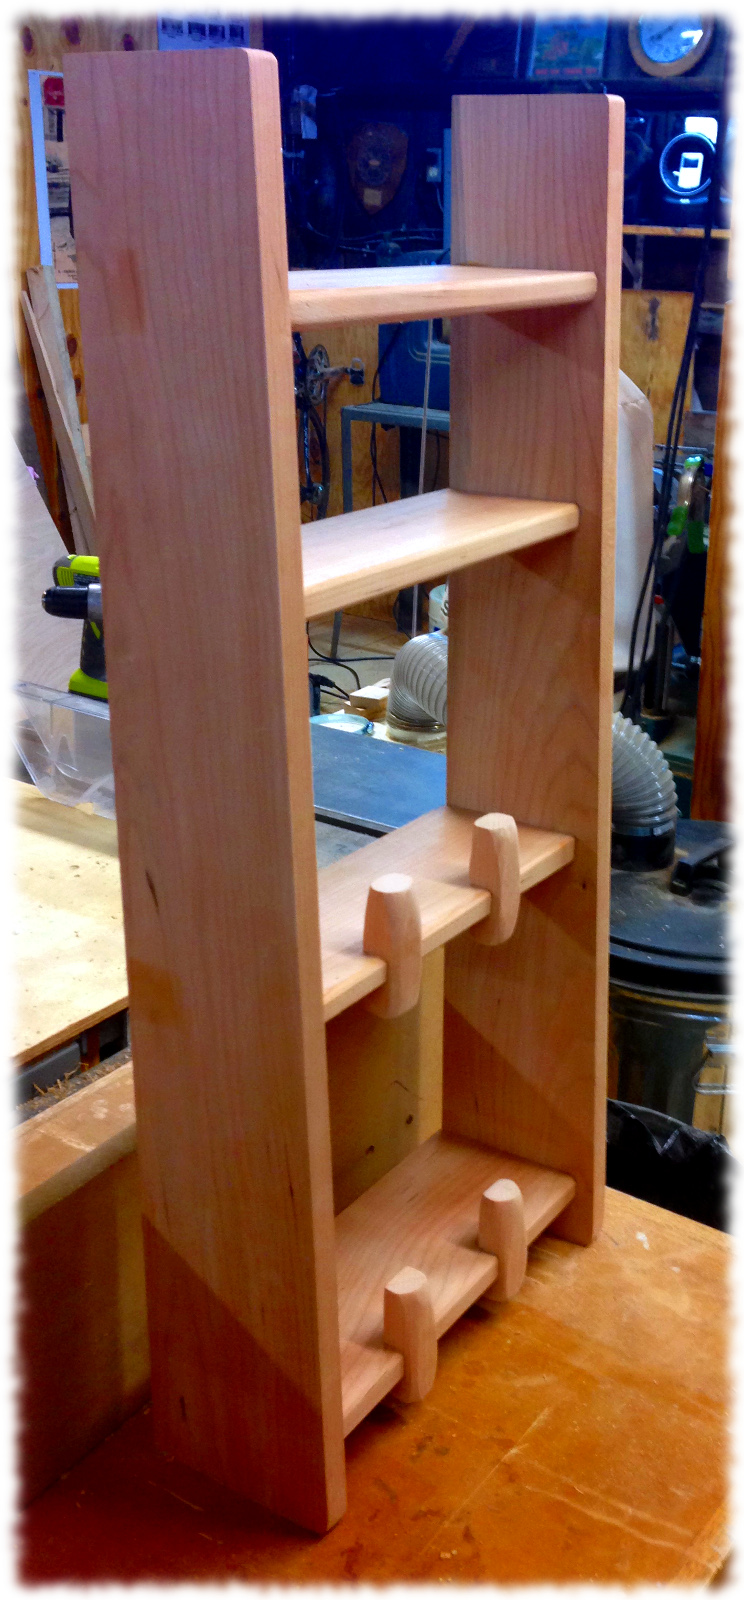
I added short wood pegs on the front edge of the bottom shelves to keep tablets from slipping out. The third shelf will hold phones, and the top is for the power strip.
I’ll finish the piece with a coat of shellac topped with a couple of coats of wiping varnish. I should be able to hang it early next week.
I’m not 100% sure on how it looks, but I’ll have to wait to see how it looks hanging on the wall. I tapered the sides, but think maybe a larger taper would look better. And the shelf spacing isn’t perfect. I think the top shelf could be maybe an inch higher. Though maybe I could just clip the top inch off of the sides to make it look right. Thoughts?
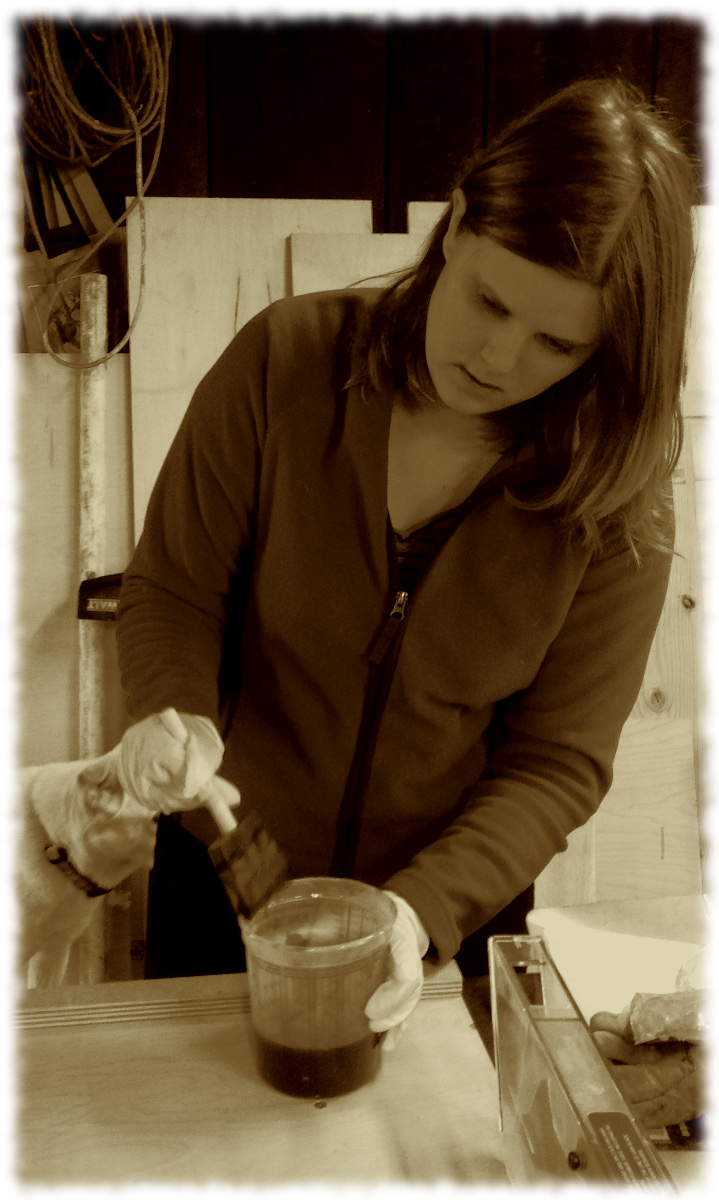
Susanna putting a varnish finish on the second toy box for her preschool.
Today was a good workshop day. Normally workshop time is alone time, but sometimes it is nice to have company. While, I did get most of the day alone in the shop, Susanna joined me after she came home from work. I had put the first coat of varnish on the toy box last night, and she sanded and put the second coat on this afternoon (while I glued up the charging station).
I took the morning to get started on the charging station for the new mud/laundry room. Our kitchen counter is a tangled mess most of the time (and all the time when the boys are here), so I’m constructing a simple wall mounted charging station.
The design is pretty basic. It is just a couple of shelves to hold iPads and phones. No hand cut dovetails or drawers. No back. About as simple as you can get.
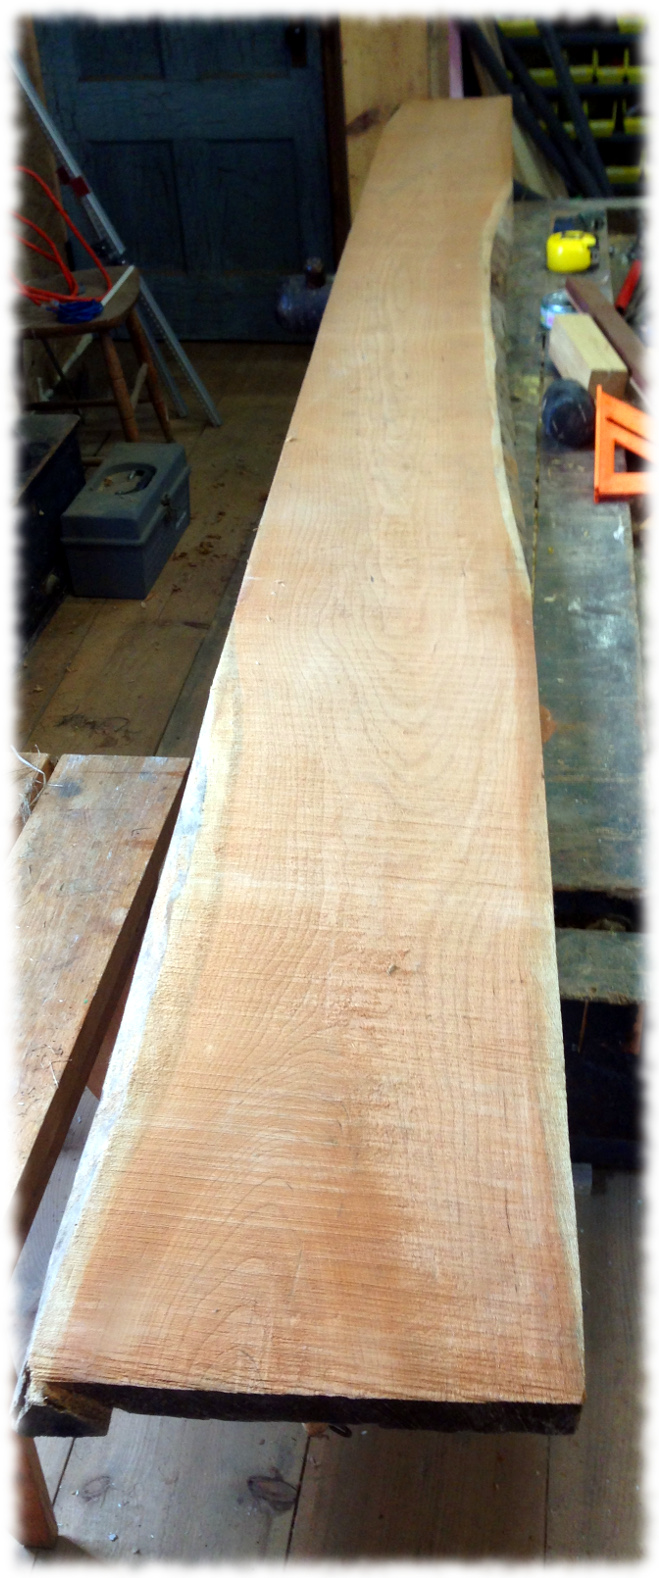
The first step was to pull out a piece of cherry. The board I pulled out of the loft was about twice as much wood as I needed, but I didn’t feel like digging for a smaller board. Anyway, I have lots and lots of cherry, so no need to stress.
Rough cherry board for today’s project.
I milled (half of) the board into two sides that are 5″ wide and 30″ long. I milled the lumber to a little less than 3/4″ thick – I think it will look nicer just a little lighter than the normal 3/4″. The sides taper from 5″ wide at the bottom to 4″ wide at the top. I milled four shelves at the same time, varying from 4 1/2″ to 3 1/2″ in width and about 12″ long.
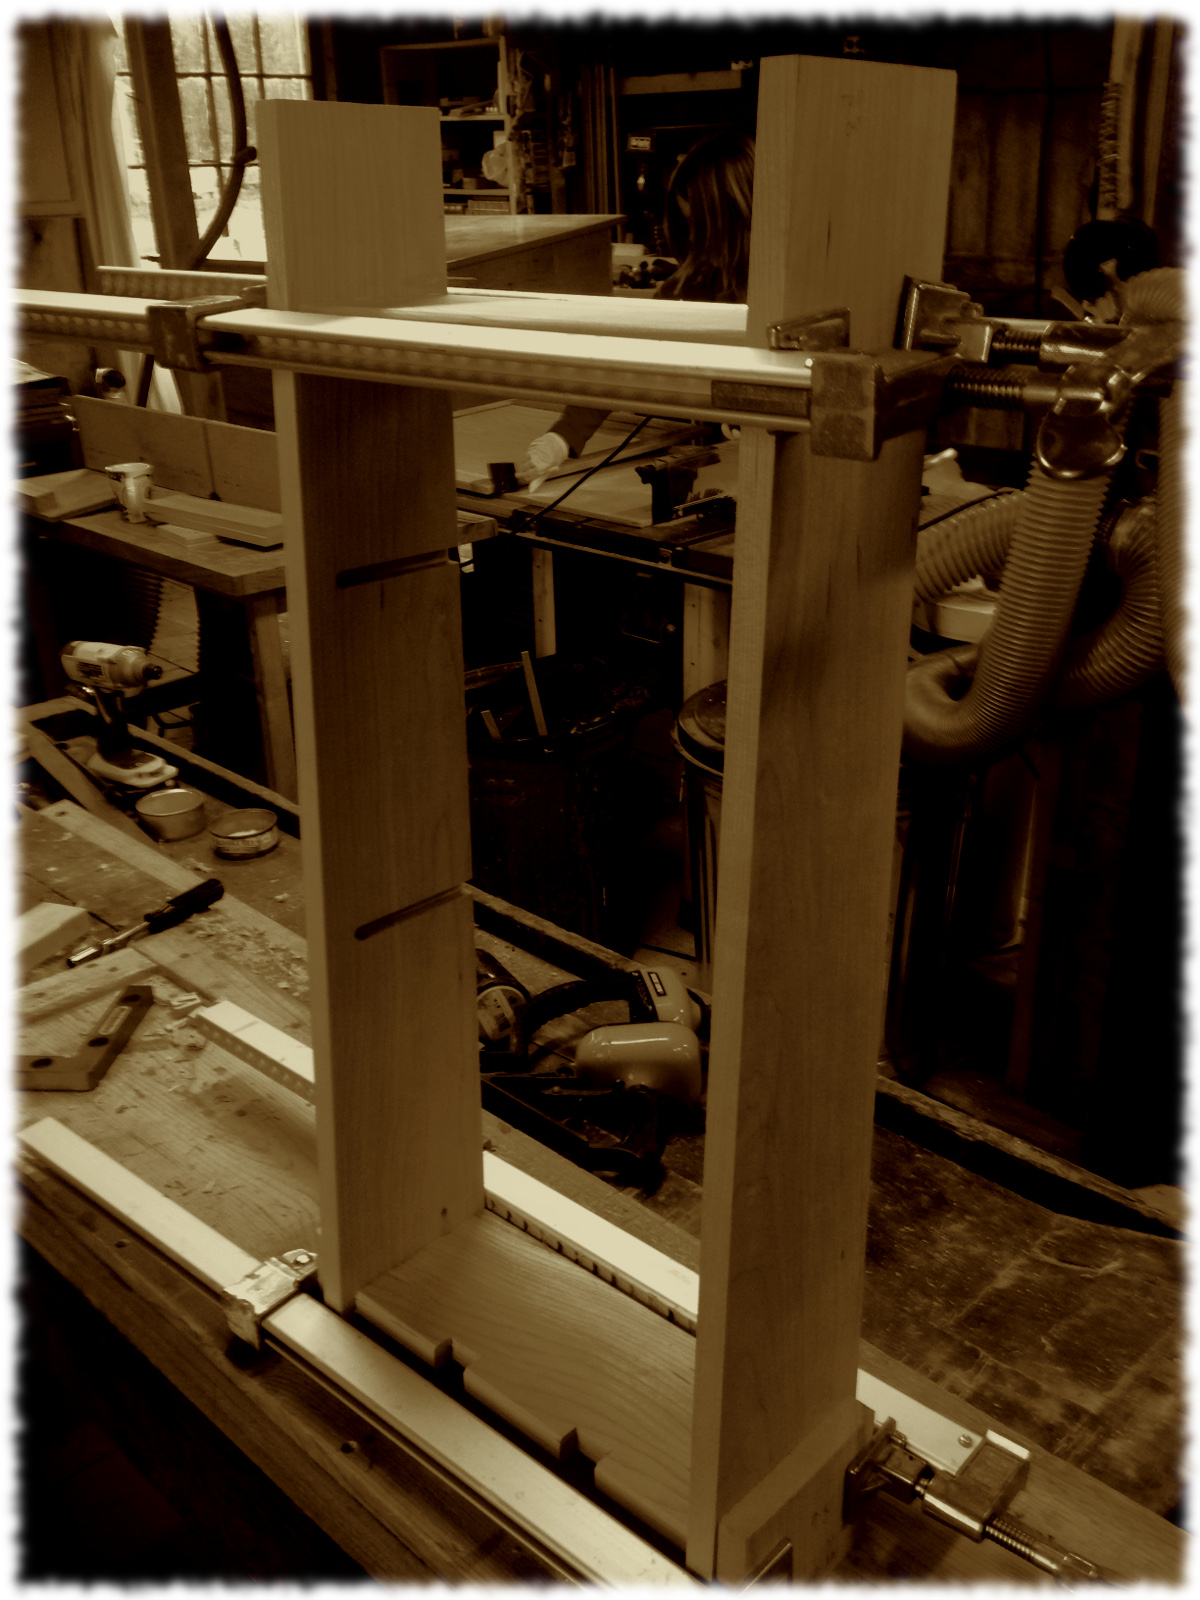
I clamped the sides together (back to back) and cut four stopped dadoes for the shelves. The dadoes are 3/8″ wide – I picked it because 1/4″ seemed too small, and 1/2″ seemed to wide and I happened to have a 3/8″ router bit.
I set up the router table to cut the tenons to go into the dadoes. I was wanting to use the table saw, but my dado blades had a carbide tooth fall off (so I’m stuck having to get the blade repaired or order a new dado stack). Anyway, the router table worked fine.
Finally, I cleaned up the tenon cheek with a hand plane and chisels. I cut off the front of the tenon (for the stopped portion of the dado) with a hand saw and glued up the sides and the top and bottom shelf. I’ll add the two middle shelves tomorrow. I can’t do much work in the shop while the varnish dries on the toy boxes.
This is the first real project I’ve made from cherry (I made a bookshelf from cherry veneered plywood but that doesn’t count). I can see why everyone likes cherry – it is an easy wood to work with. My hand tools love cherry. It isn’t as soft as pine, but it is much easier on the tools (and me) than oak.
Charging station glue up. The middle shelves will be fit into the case tomorrow.
I was looking for a quick project to build with the boys in the workshop. I needed a project that they could do most of the work on – they were planned to be gifts. I saw an idea earlier in on Matt’s Basement Workshop – and it seemed like a pretty simple quick project. Our lives this fall have been pretty crazy, and I didn’t think that I could get them to put enough work into a much more complicated project to finish in time.
The clipboards only took a couple of nights to finish in the workshop. We built a total of 4 clipboards, they took one each and left two here.
The project required picking out some scrap – we found a piece of yellowheart in the wood pile. The lumber was milled and glued up into panels. We then cut out 4 boards from the panel – in hindsight I think we should have made the boards a little smaller (though it is never too late to remove wood)- a 5×7 picture seems a little small on the clipboard. The keyhole hanger was inserted in the back (we removed the waste using a drill and chisel). The boards were finished with a coat of varnish and the hardware was installed.
A completed clipboard with a picture added.A simple keyhole hanger flush mounted on the back.
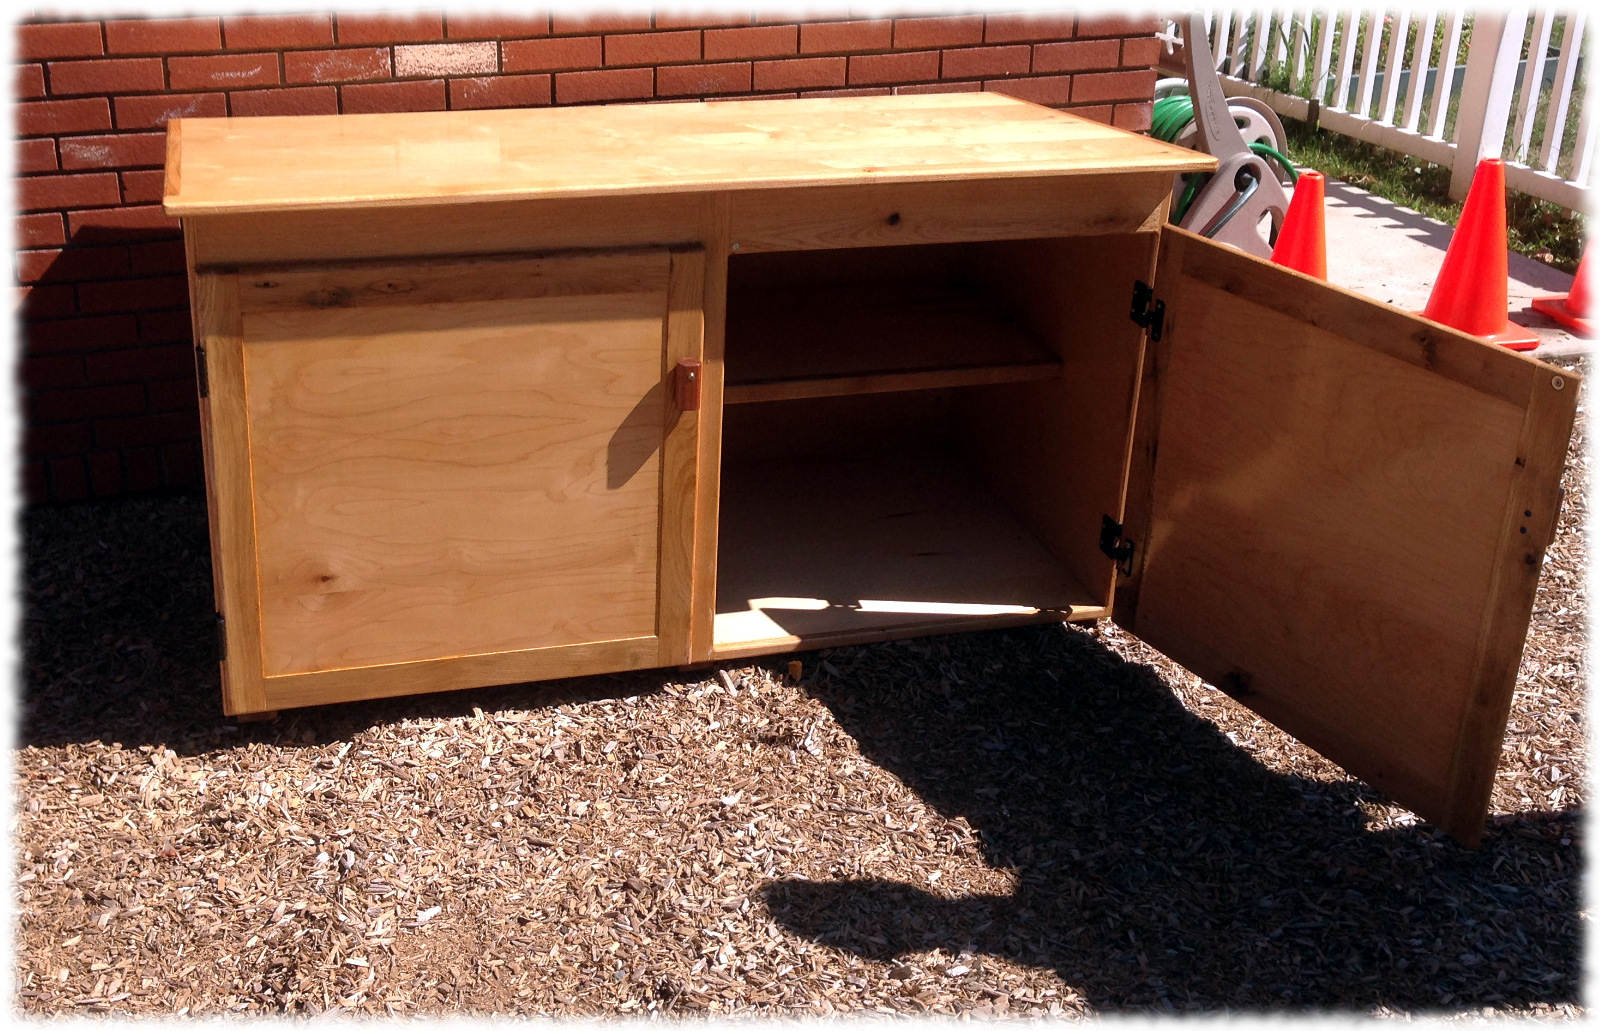
At the beginning of the summer, Susanna asked me to make three outdoor toy boxes for the her preschool (her classroom shares the three playgrounds). The school paid for 9-sheets of plywood and some wood varnish. I donated my time, some additional lumber, hinges, and screws as needed to finish the project. This is my first commission project – even though I’m not getting paid, there is a customer involved.
The plan was to finish all three and deliver them at one time. However, the summer was busy, and I don’t have that much space in the workshop, so I am working on one at a time. I finished the first one last week and delivered it today.
I learned some lessons on the delivery:
Next time make sure to bring some tools to tighten up any fasteners that loosen up on the drive.
I should have removed the doors for the drive, the doors are heavy and it is a pretty bouncy drive down to New London.
The magnets are too weak. I’ve ordered new magnets to hold the door shut.
I should bring some equipment (rakes, etc.) to level the area where the boxes are to be placed.
I’ll have to head back next week and tighten fasteners and change out the magnet holding the door shut with a stronger magnet. Despite all that, it feels good to get a project out the door.
The boxes are 5-feet wide, 3-feet deep and almost 3-feet tall and are constructed from hardwood plywood (from the box store) with a mix of red and white oak for edging. The hinges allow the doors to swing all the way open and are held open by magnets on the sides of the boxes – hopefully having the doors out-of-the-way will keep the kids from hanging on them. I think these boxes would hold up longer if they were constructed from MDO – but the materials could cost twice as much, and I think I would have to paint the MDO.
Now onto the next box. Maybe I’ll change it up a bit and use maple for the edging. Or sapele. No wait that I’m saving that for the boat. I’ll be pretty tired of building boxes when I’m finished… but heck, Susanna wants one for up on the patio. Anyone else interested in outdoor boxes? Considering a sheet of good (i.e. non-box store) plywood costs over $100, it would certainly be much cheaper to get plastic boxes from the box store, but the wood boxes look much nicer.
The 4th of July (or “Colonial Insubordination Day” as my friends in the Royal Navy like to call it) calls for hot weather, barbecue, beer and fireworks. However, this year, thanks to Hurricane Arthur, we get cold and rain, though as I write this, it sounds like someone is trying fireworks in the distance. Not sure what there is to see in the rain tonight. And don’t worry; even cold, rainy nights can support beer.
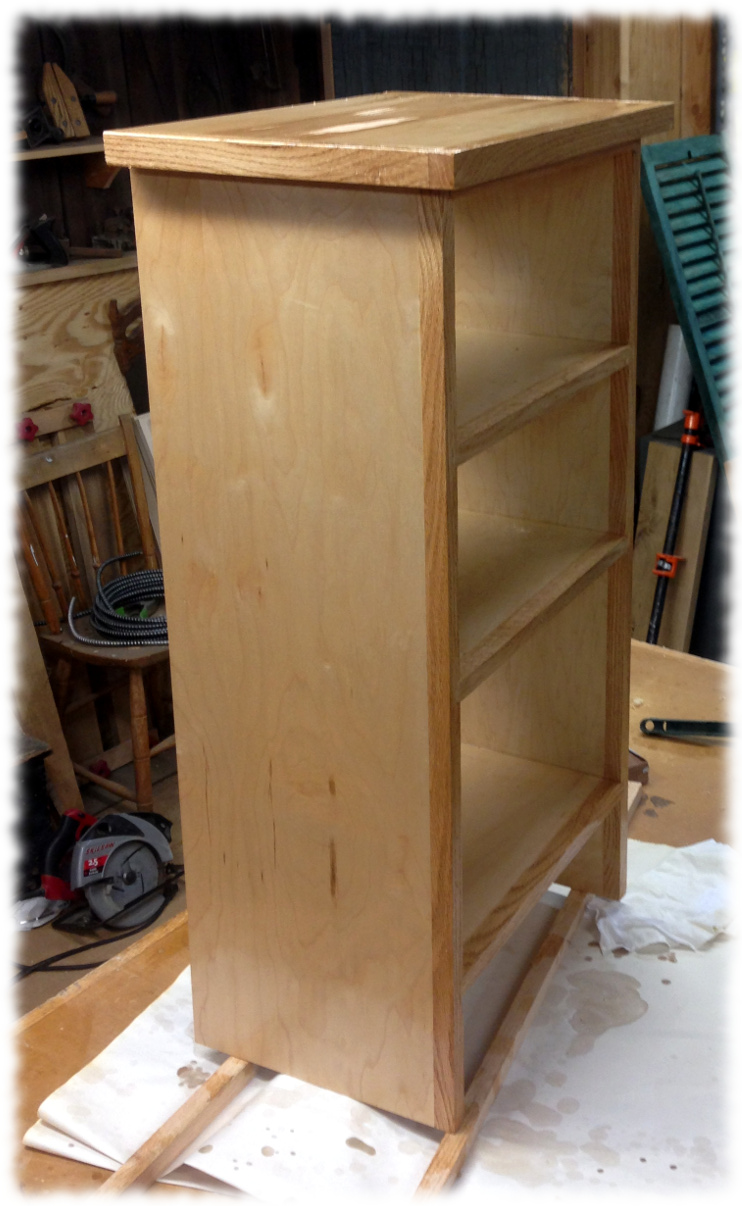
Study storage shelves (plywood with red oak face-frame)
Today I got an escape from my chores to spend the day in the workshop. I’m building outdoor toy boxes for Susanna’s preschool. Three boxes from 10 sheets of plywood, so I have lots of left over plywood scraps and decided to build a small (16″ wide x 12″ deep) storage shelf for the office. It is also a good chance to test out the finish that I plan for the toy boxes. The shelf was a quick, taking less than a day in the middle of another (larger) project and was a good reminder to prep surfaces as much as possible prior to assembly. I finished the shelves with a coat of shellac followed by a coat of spar varnish. I’ll probably be lazy and only apply one coat of varnish to the shelves (unless they look like crap tomorrow after the varnish dries).
I’ll post pictures of the boxes when I get them done. I have one box (sides, top and bottom) glued up. Tomorrow I’ll sand the interior and put in the shelf. I need to mill more red oak for the face frame and door edging. And when I’m done with the boxes, I’ll need to get back to finishing the dinghy build. At least the barn swallows are enjoying the half-finished dinghy in the garage as a place to hang out.
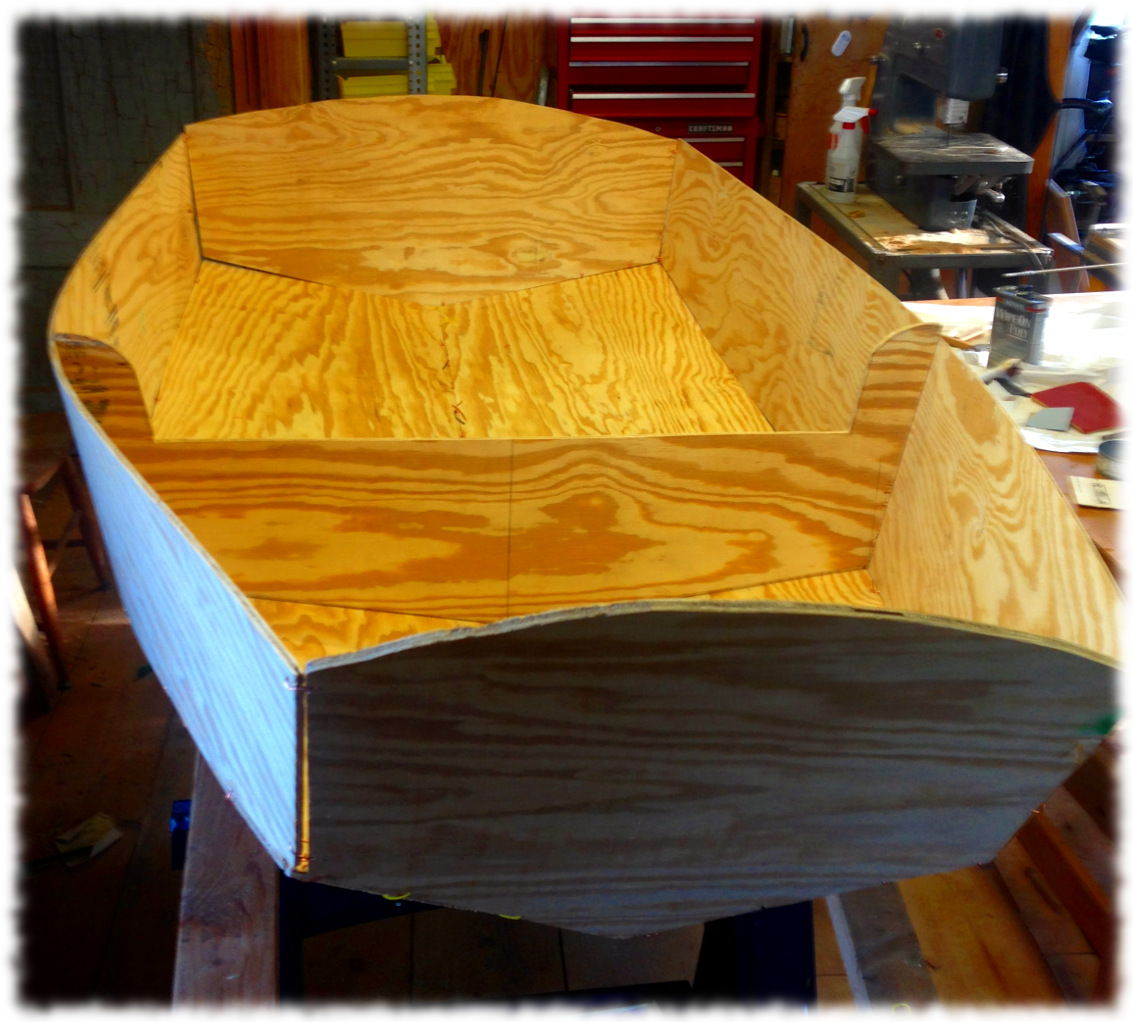
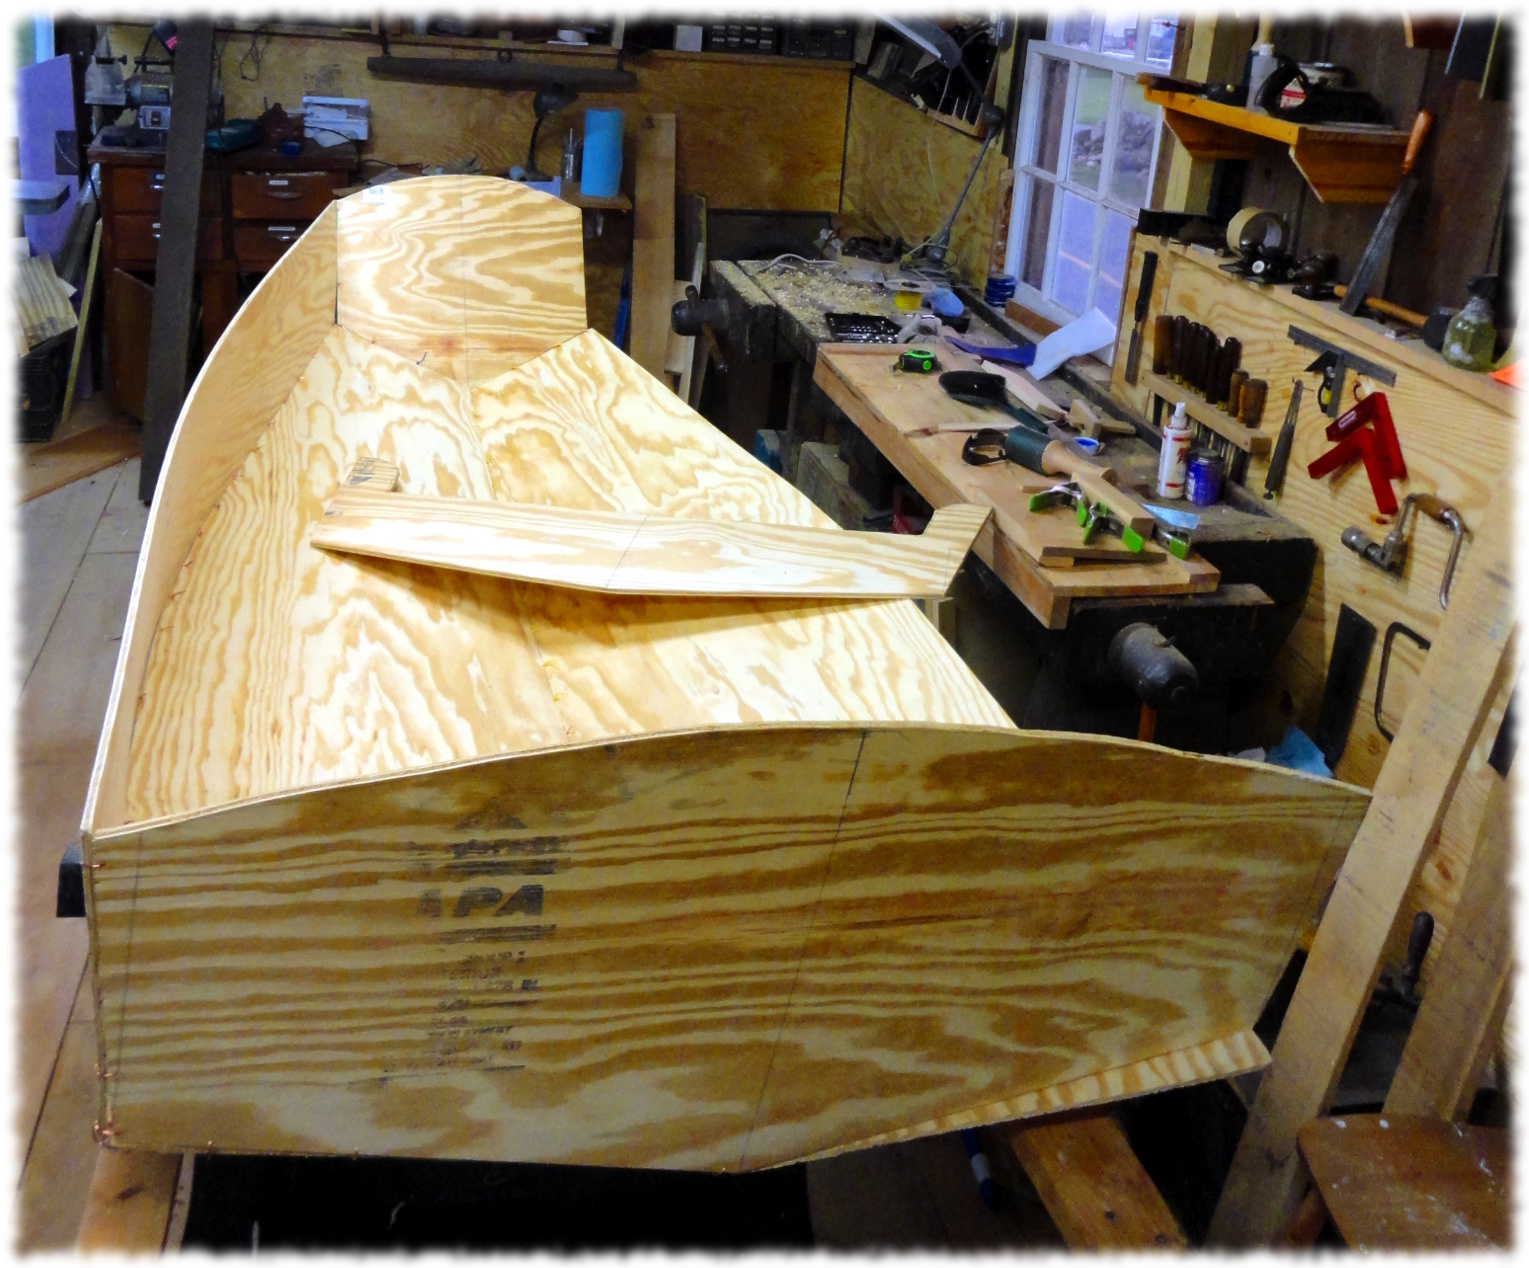
The rough shape of the boat begins to form with all the major pieces stitched in place.
This afternoon I installed the starboard side and the middle frame piece. The boat shape is starting to show – though it looks a bit skewed in the picture – I think that is the angle of the camera. I need to add all the wire stitches and make sure that the shape is even before gluing.
But, I think I’m finished for the night. I’ve been fighting a cold all weekend and want to take it easy tonight.
The next project is moving along. I spent a two hours this afternoon cutting out the last two pieces from the 3/8″ plywood sheet and started to stitch up the panels into a boat.
It will be interesting to see how the final shape turns out. My plan is to work a little bit each night this week and maybe I’ll have a boat shape by the weekend.
After the panels are stitched up I will apply epoxy glue to the joints and cut away the wire stitching. I’m not sure what the proper order for assembling the panels, so I’m just doing it counter-clockwise from the bow. It seems to be working so far.
This is the third time; I hope good luck lies in odd numbers.
– Shakespeare from Merry Wives of Windsor
After yesterday’s first attempt to make the drawer to complete the second nightstand I decided to take the night off. I needed to be more careful marking the dovetails out, and I figured that a break would make me less likely to mess up the joint a second time.
Tonight I headed back into the workshop to tackle the drawer again. I shortened the offending drawer side and cut the tails from the existing pins. I even got the top side right. Not that it is the cleanest joint, but my dovetails are getting a little better.
The next step was to cut the half-blind dovetails where the sides meet the drawer front. I cut the tails on both sides at the same time and chopped the waste out with a chisel. I then carefully marked the lines from the tails to the front panel so I could cut the pins. I even put an “X” in the spaces I should remove. However I got mixed up again (probably rushing a bit again) and put the “X” in the spaces that should have not been remove. Which required me to mill a new front for the drawer. Good thing I had some spare oak sitting around.
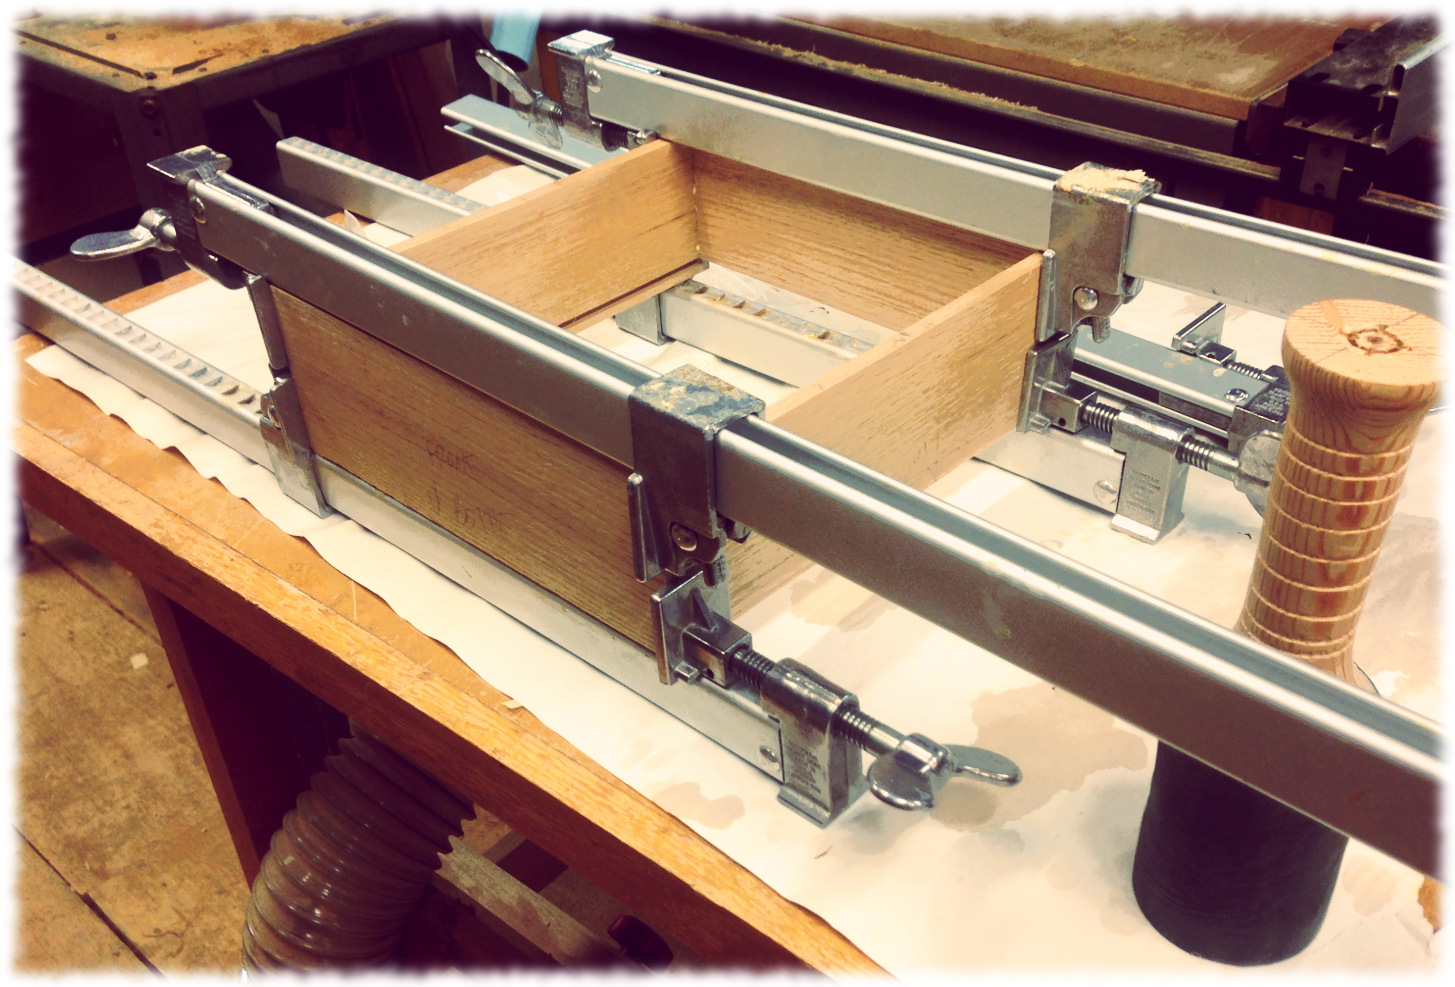
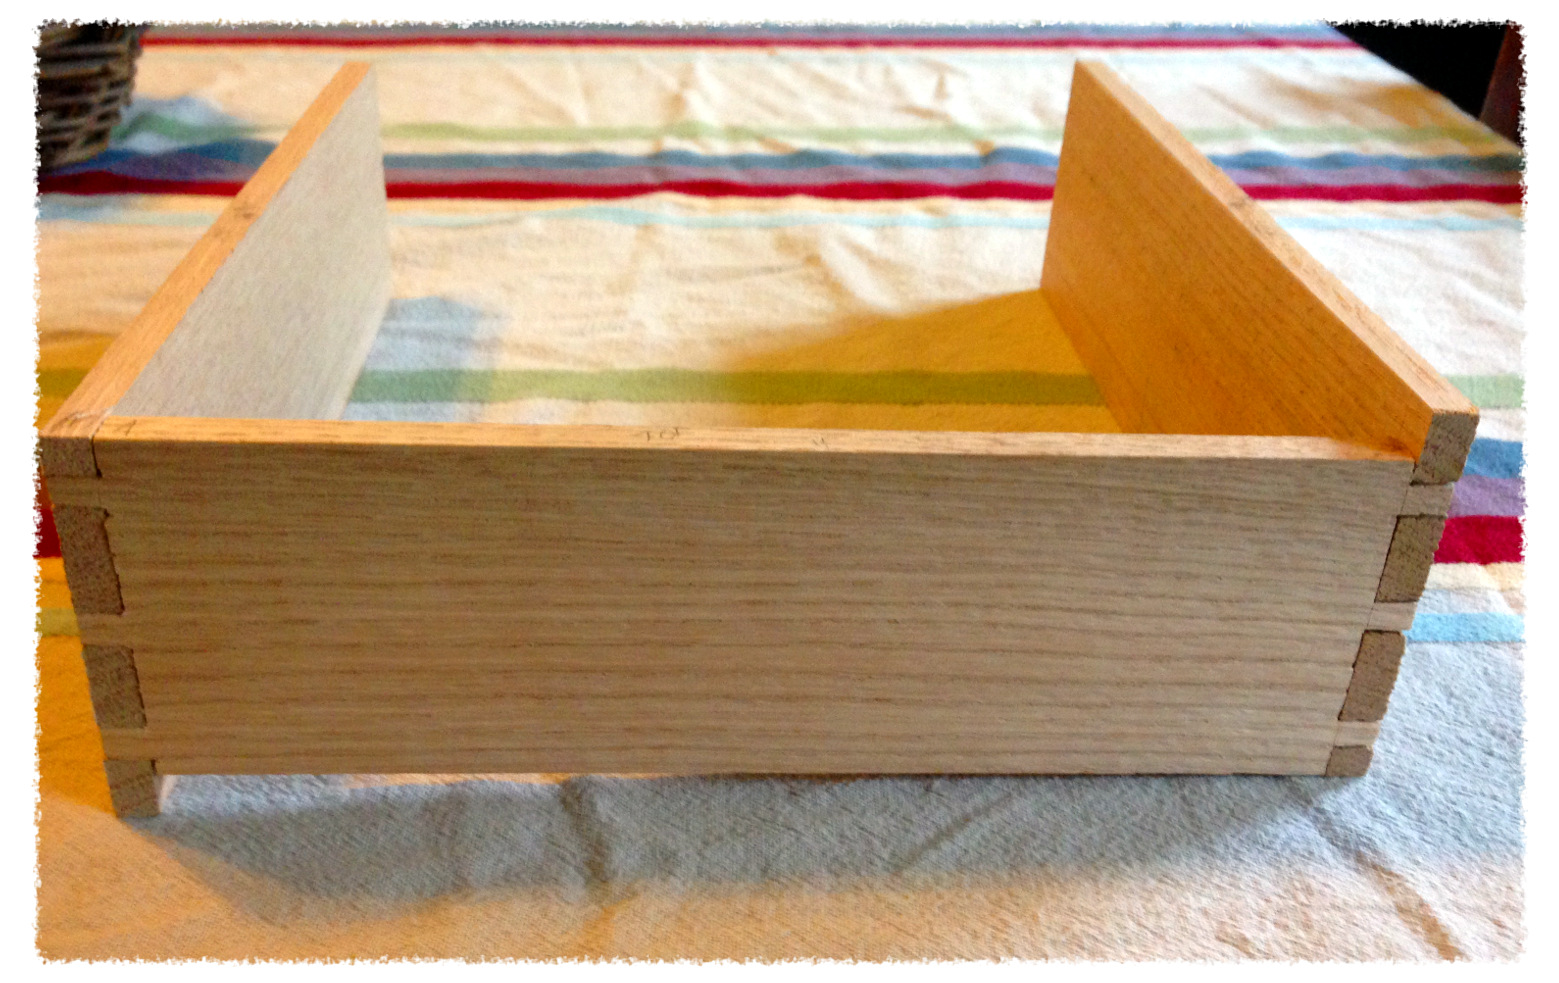
So, as they say, the third time is the charm. I even more carefully marked the pins and cut away the waste. After a little chisel work, the sides and the front fit together. I then went to the tablesaw and cut a dado for the bottom to slide into. I applied a little glue to the joints, assembled the drawer and then clamped the piece for the night.
Tomorrow night I should be able to cut and fit the bottom panel into the drawer. And hopefully this weekend I can sand and finish the second night stand and give it to Will.
A problem with the drawer back. I should have been more careful cutting the dovetails.
That drawer back doesn’t look right…. The two sides are supposed to be taller than the back. The drawer bottom needs to be able to slide under the back after the drawer is assembled.
So where did I go wrong? I wasn’t being careful when I marked out the dovetails. I should spend a little more time drawing out the layout before starting to cut.
So what do I do now? I think I will just shorten one of the side pieces and cut new tails to match the pins on the back side. I’ll then have to cut the front end of the other drawer side to make them the same length. The drawer will just be a little shorter than the drawer in the other table. It should be a little bit of a challenge. I have been making the dovetails “tail first” and haven’t made any “pin first”. But I need to learn sometime.
Oh well, that is what I get for rushing. The question is: Do I go back into the shop tonight and fix this, or decide that I’m not being careful enough and call it a night….
Finally the weather is warm enough for long enough to get some time in the shop. The boys didn’t have school today, so I took a day off of work.
This afternoon I cut the remaining tenons and glued up the second nightstand. The first nightstand is in the loft above the workshop waiting for a finish. I figure I’ll apply the finish for both of them at the same time.
Next I will finish milling the pieces for the top and glue up the top. I also have to install a pair of cleats on the inside of the side aprons to attach the top and a pair to act as slides for the drawer. After the table is assembled I will need to construct and fit the drawer. Hopefully I can make progress this week and next weekend on the remaining steps.