Friday night in the workshop

It is much quieter around the house with Susanna and Isabella out of town. My evenings are pretty open without having to juggle getting Isabella to go to bed. Tonight I decided that I would be happier if I did something other than watch a show after dinner, so I headed out to the workshop. I’m sure I’ll get plenty of TV time over the next few weeks until Susanna and Isabella return. Yes my life is that exciting.

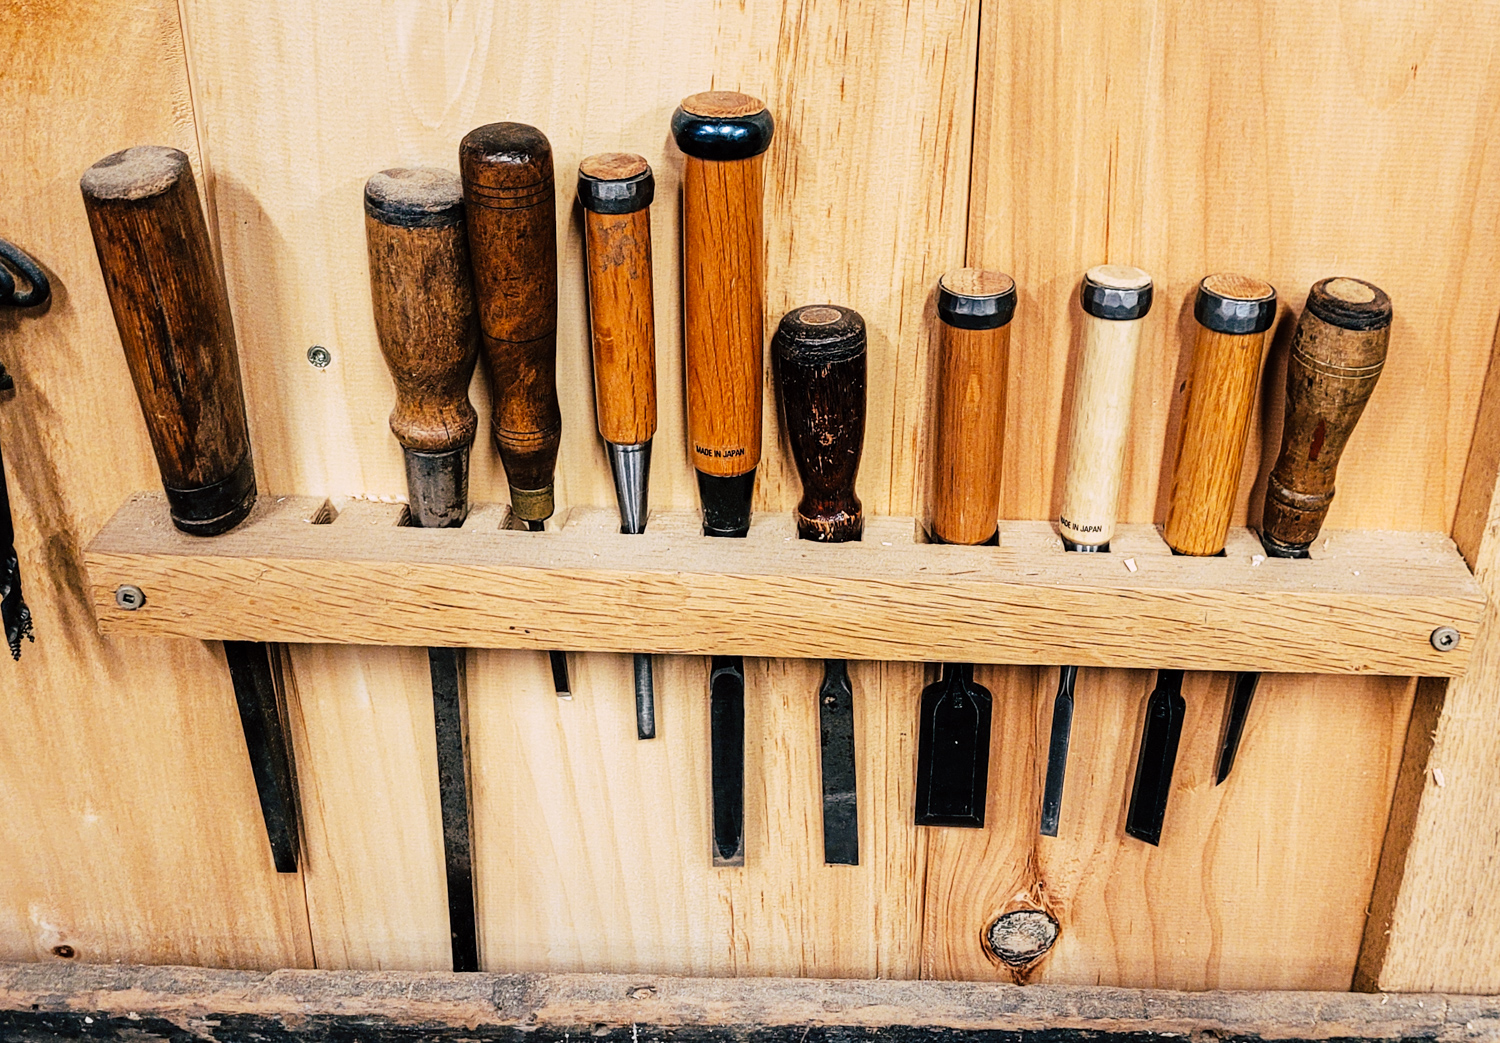
I decided that my next workshop project was to replace the rack I built to hold my chisels. Chisels stick in the current rack and can be difficult to get out. Plus it doesn’t look very nice.

My existing chisel rack made from a spare piece of white oak.

I headed up to my loft and pulled out a piece of cherry lumber. I was in no mood to dig out a piece of exotic lumber after the pain of working with Yellowheart. Cherry is very nice to work with. Not too hard and not too soft and darkens to a nice color with exposure to the sun.

I decided to do as much by hand as I could. I cut a 25″ piece off of the board, and ripped (by hand) a 2″ wide piece off that cutoff. I flattened one face by hand, but there was no way I was interested in milling to thickness by hand, so into the planer it went. I used a handplane and scraper to finish the surface

Cutting the openings to the holes.

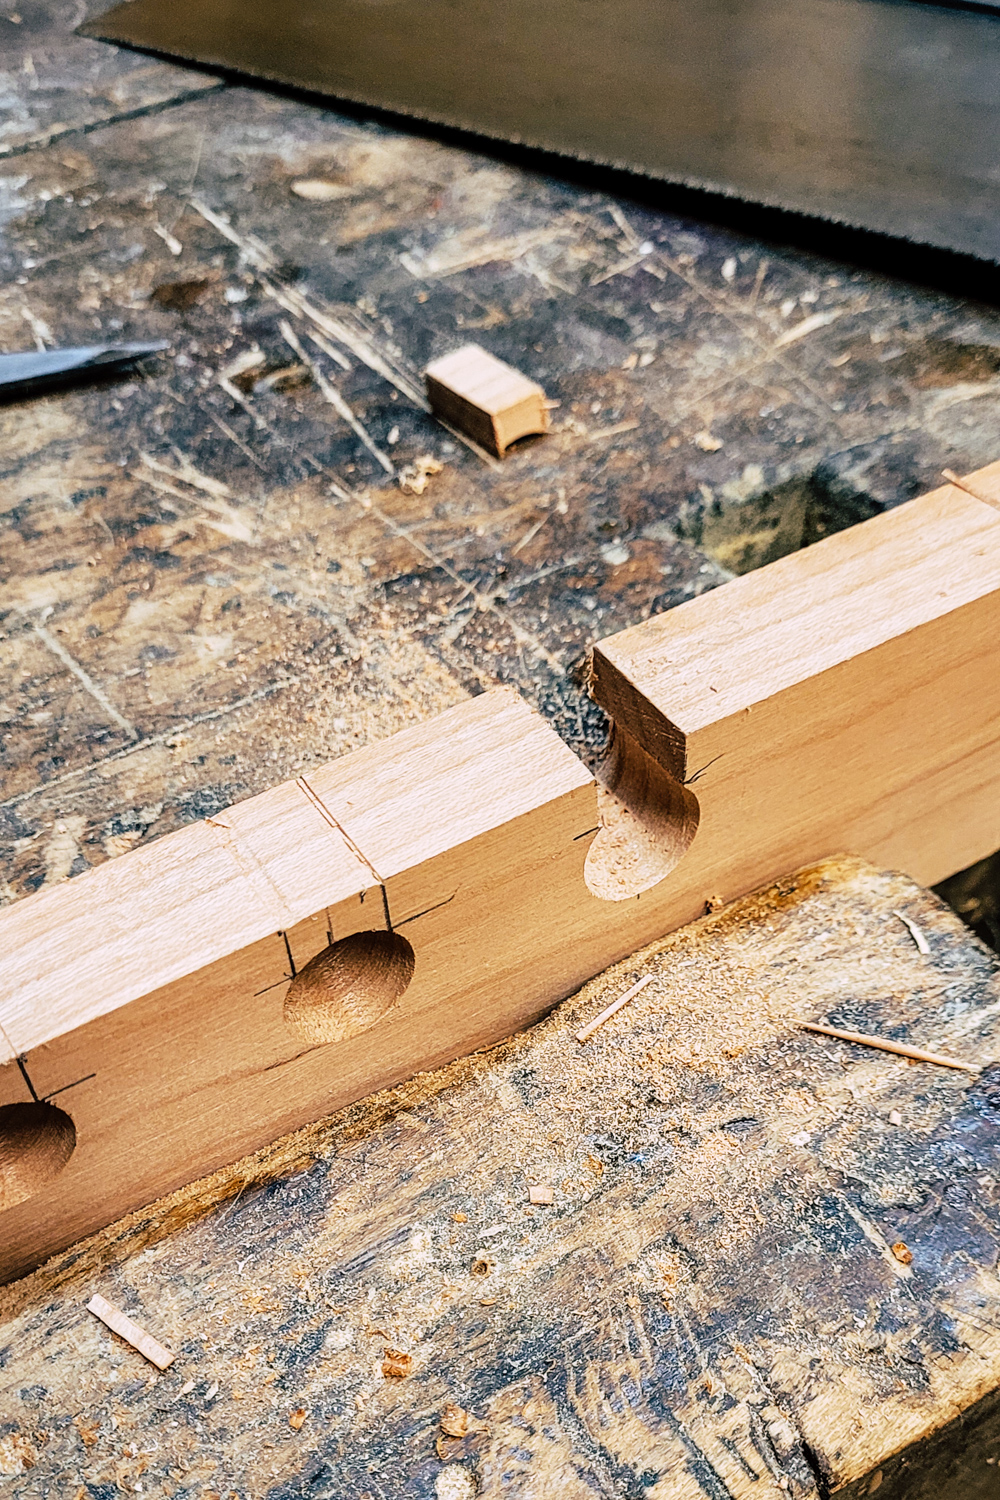
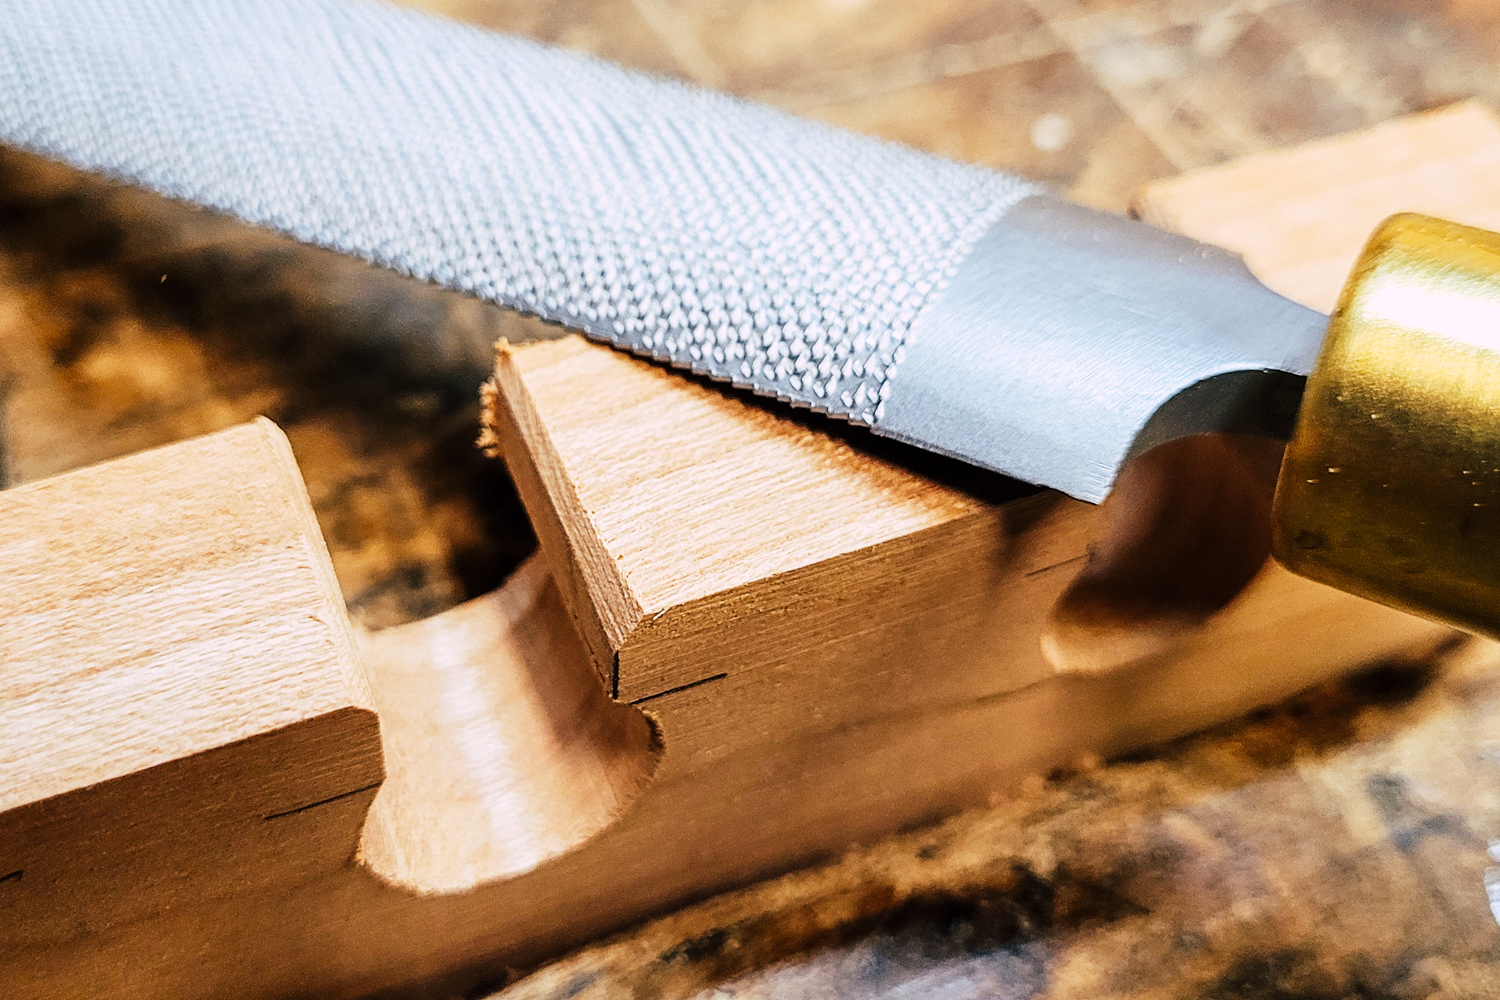
I edge jointed the board by hand. It felt nice to get the handplanes out again. I marked out and then drilled the holes using the drill press; I had already setup the drill press for a test piece and don’t think digging out the bit and brace was really worth it tonight.. The slots were cut by hand and then shaped with a rasp.

Shaping the holes using a rasp.

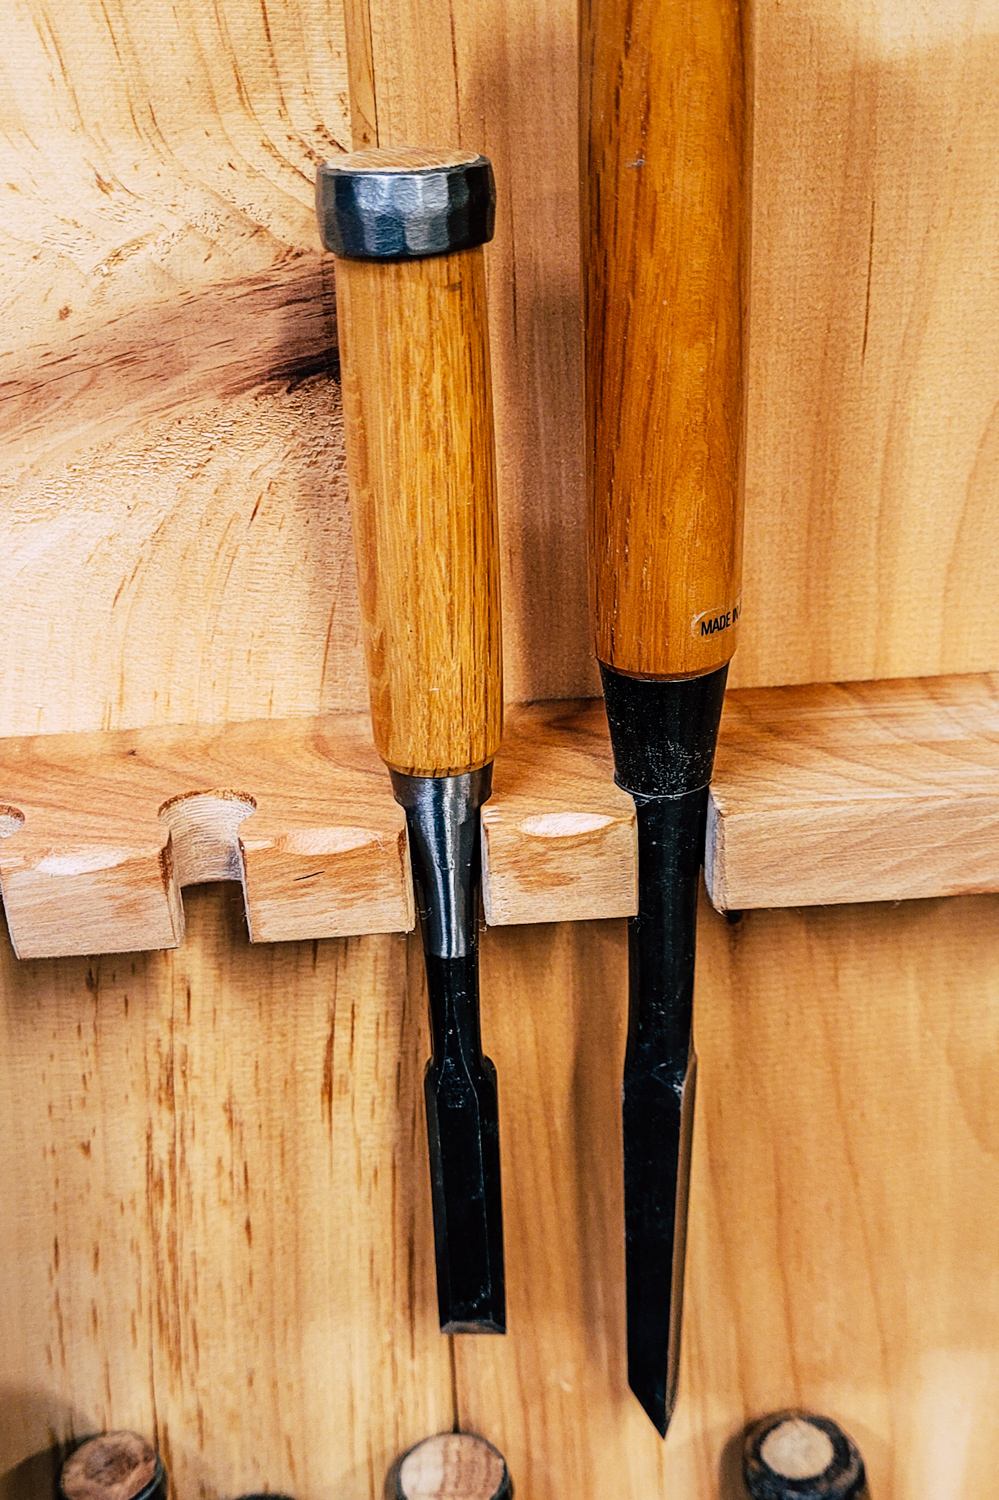
Finally I lightly sanded the entire piece and softened the edges, wiped it down with mineral spirits and put a few chisels in it for a test fit.

Test fitting the new chisel rack.

The next step is to mill a backing board with rabbet to allow me to mount the rack to the wall and apply some sort of finish to the project. I’ll probably also put some sort of ledge below the chisels to keep hands from bumping into the sharp edge of the chisels. I also don’t think my mortise chisel (far left on top picture) will fit in the holes I made, so I may have to modify or add another spot for that chisel. The final step will be to acquire more chisels. Maybe make the set match better, because matching tools are always important.

Now I just need to think of a project to build for the house.

And… the bookshelf is done (how I love my Earlex spray station)

The finished bookshelves in the study

I finished the final two shelves for the bookcase last night.  I love the spray finish and spray system.  A step that would have taken nearly a week with an oil-based finish can be finished in a couple of hours.  When I used a wiping varnish, I had to let the project dry overnight between coats.  With the spray finish it takes 15-30 minutes to dry between coats.  That means more coats in a single night, and fewer dust particles on the project.  The water-based finish also leaves much less of a smell in the house (and no smell on the project after it dries to the touch in 30 minutes).

It will be a nice addition to have book storage in the study.  I’m okay with how the bookcase turned out.  I can see some of the mistakes I made – I probably should fit the shelves after the carcase is constructed and need a proper shelf-hole jig.  But overall it feels pretty sturdy and looks not too bad.  Last night I bet Will a quarter he couldn’t find two mistakes in 5 minutes on the project.  Of course the first mistake he found was one that I hadn’t noticed before – it is good to find another honest critic in the house.  No sense in building projects for the house if I don’t try to make myself a better woodworker from each project.

I also have been making some progress on rearranging the workshop.  My first attempt to reorganize failed (having the planer between the jointer and table saw made for a much too long walk around the jointer to feed wood into the planer).

Today we are planning a chore day.  I will get some concrete to pour a footing for an additional support post for the workshop, and then work on making a small patio/step in front of the door to the workshop – I have been using the workshop enough that all the grass is dead – it is now a mud pit.  I am using some lumber I have left over and the remaining concrete blocks from the patio.  So it is a double bonus.  I use up some materials I have sitting around and get a new entrance step to the workshop.

Of course I am expecting to get all these projects done and still have time to hand out, maybe paint the new door to the workshop, maybe work on shelves for the workshop.  However, I am learning (yes, it does take a long time to learn) and am only planning the two outside projects for today.  Anything else will be a bonus.

Workshop wall after reorganizing. I removed a workbench that was only used to store junk - now to build proper storage for that junk)

Never Enough Clamps (or Bookshelves Part 3)

It seems in the workshop one either needs one or two clamps at a time for a project, or two shops worth of clamps for a glue-up.  Never anything in-between.  I’ve had to glue the face frame to the bookshelves in individual pieces because of my limited number of clamps.  However, the current arrangement of the workshop makes it nearly impossible to walk all the way around the case when it is on the saw horses.  So maybe it is good that I didn’t have enough clamps to attempt a big glue-up at once.

Attaching one side of the face frame to the shelves

The project overall is coming along pretty quickly.  It is amazing how quick a project can be done when using sheet goods (can you say no milling of lumber).

On the down side, the top that I glued up isn’t deep enough with the face frame attached.  Luckily, I have a spare piece of cherry milled and ready (hey, I do eventually learn – to mill up extra lumber) to cut and glue to the top to get it deep enough.  Now if I had more clamps to do the glue-up while the face frame dries.  I guess it doesn’t matter – I can’t get to the table saw with the case in it’s current location.  And I don’t want to move it with the glue drying…

I was able to finish two of the shelves (build, glue edging on, one coat of shellac, and 2-3 coats of spray varnish).  They turned out pretty nice.  Cherry is pretty light colored right after finishing.  A couple of months exposed to light and hopefully it will turn darker.

Shelves after spray finish (plus a table leaf that had been sitting in the basement for years just waiting for me to finish).

Writing in my blog – a good way to spend filling the time between the glue-up and when I can take the clamps off (and move the shelves).  I think it may be time to get more clamps.  Maybe a pack of 24-inch clamps from USA Clamp Company.  I have 5 clamps made by them, and I love them.  Plus they are way cheaper than the bar clamps purchased at most woodworking supply stores.

Low Cost Bookshelves (part 1).

I started a new project this weekend.  We are in desperate need of a set of bookshelves for the study – all the books are in boxes on the floor for now (or in the barn).  I had been searching the web to find a simple plan that allowed a set of shelves to be made from one sheet of plywood.

I found this link.  I am using the same basic dimensions for the bookshelves – however the construction of the carcase is using pocket-hole screws not biscuit joints.  I looked at picking up plywood from GK Woodworking in Griswold.  Susanna and I discussed either making the shelves out of red oak (total cost about $125 – I had plenty of red oak on hand for the face frame and top) or cherry (total cost of about $250).  We decided to go with red oak.

On Saturday morning I called GK Woodworking and asked about picking up some red oak plywood.  He had sold his last 3 sheets of red oak that morning (apparently he sells very little red oak, but of course in one day he had two people interested).  So cherry it was.  Will and I headed off to pick up the lumber (while Susanna took Ben to his piano lesson). Twenty minutes and $245 later I had a piece of 3/4″ cherry plywood (for the shelves), a piece of 1/4″ cherry plywood (for the back) and 9 bdft of 4/4 (1″ thick) rough cherry.  Not exactly low cost bookshelves – but I imagine that to purchase shelves already made would cost much more.

Cherry Lumber for bookshelves
Cherry lumber for low-cost bookshelves

Saturday afternoon I spent a couple of hours cutting up the 3/4″ sheet of plywood (2 sides, 1 top, 1 bottom, and 4 shelves). I cut the rabbet on the two sides to hold the back, drilled holes for the shelves (I will use pins to make the shelves adjustable) and assembled the carcase.  I will use solid cherry on the top to cover the top piece of plywood (and hide the ends of the sides).

The pocket-hole joinery is quick and easy – if you can hide the screws.  On this project the carcase is made from two shelves (top and bottom) and two sides.  The pocket hole screws are on the top side of the top.  That surface will be covered with a solid cherry top (not yet sure how I’m going to attach the top yet – but hey, why plan everything at once).  The screws are attached from below the bottom shelf.  That shelf is 2 1/2″ from the bottom of the sides, but won’t be visible unless one turns the shelves upside down.

Shelf pieces cut from cherry plywood
Shelf pieces cut from plywood sheet

Tonight I milled the lumber for the face frame and the shelf fronts.  The next step is to clean up the face frame, cut to length and glue the frame to the carcase.  The glue is plenty strong to hold the face frame to the carcase.

A couple of things I have noticed so far in this project:

  • My shop is not designed to easily handle 4×8 sheets of plywood.  When I rearrange, I will have to leave a space large enough to cut down sheet goods.
  • The 100 tooth saw blade that came with the table saw does a beautiful job on cutting the plywood.
  • The cabinet grade plywood is MUCH nicer to deal with than the crap you get at the home center.  No voids in the middle, and the veneer is significantly thicker than the cheap stuff
  • I had to crosscut the sheet with my circular saw – the blade on that saw did not leave the nicest edge

I have a couple of variations of this shelf in my mind to try.  The shelf might look good with corner posts, though I would do them a little differently from the Woodworkers Guild of America link above – I would make them out of the same material as the shelves, and most definitely taper the legs.  I might make the decorative top out of plywood, edged with solid wood – it would make attaching the top simpler and more sturdy.  The problem with attaching the solid top to the plywood carcase is that the solid top will shrink and swell with the room humidity.  The plywood is stable with changes in humidity (which is why the carcase and shelves are made from plywood – much better for this type of project than solid wood).

I think a shelf pin drilling jig, such as this one from Woodpeckers would make drilling the shelf pin holes much simpler and more accurate.

Looking ahead, I am thinking about building a kitchen island. Again, I want it to be simple and inexpensive – so I’m still thinking of options.