
We have an old house. That means never ending projects. Over the past couple of years, we have made progress and renovated (or at least repainted) most of the rooms in the house. However, we have a couple that we haven’t touched yet. And those rooms suck.
The worst room is probably the mud room/laundry room. The walls and floor are in bad shape. We have talked about doing that room later this spring or summer, but we will have to see if we have time to get to that project. But, I figure, if people enter the house through the ugliest room, then they will be more impressed with the rest of the house. As long as they stayed out of the bathroom…
The bathroom is the next ugliest room. There is only one bathroom in the house (which does cause some fights). We also need to replace the walls in the guest room, but it isn’t a frequently used room, so it can wait. I won’t even mention the basement, but that doesn’t really count as part of the house (it would probably be a good place to bury a body – but that is a story for another day).
I would love to gut the bathroom and totally redo the room, but, with only one bathroom in the house, that isn’t really an option. I would really love to pay someone to gut the bathroom and redo it. But what is the fun in having a project done quickly when one can drag it on for months? Our long-term plans include adding a bathroom on the second floor; gutting the first floor bathroom will occur after the second bathroom is completed.
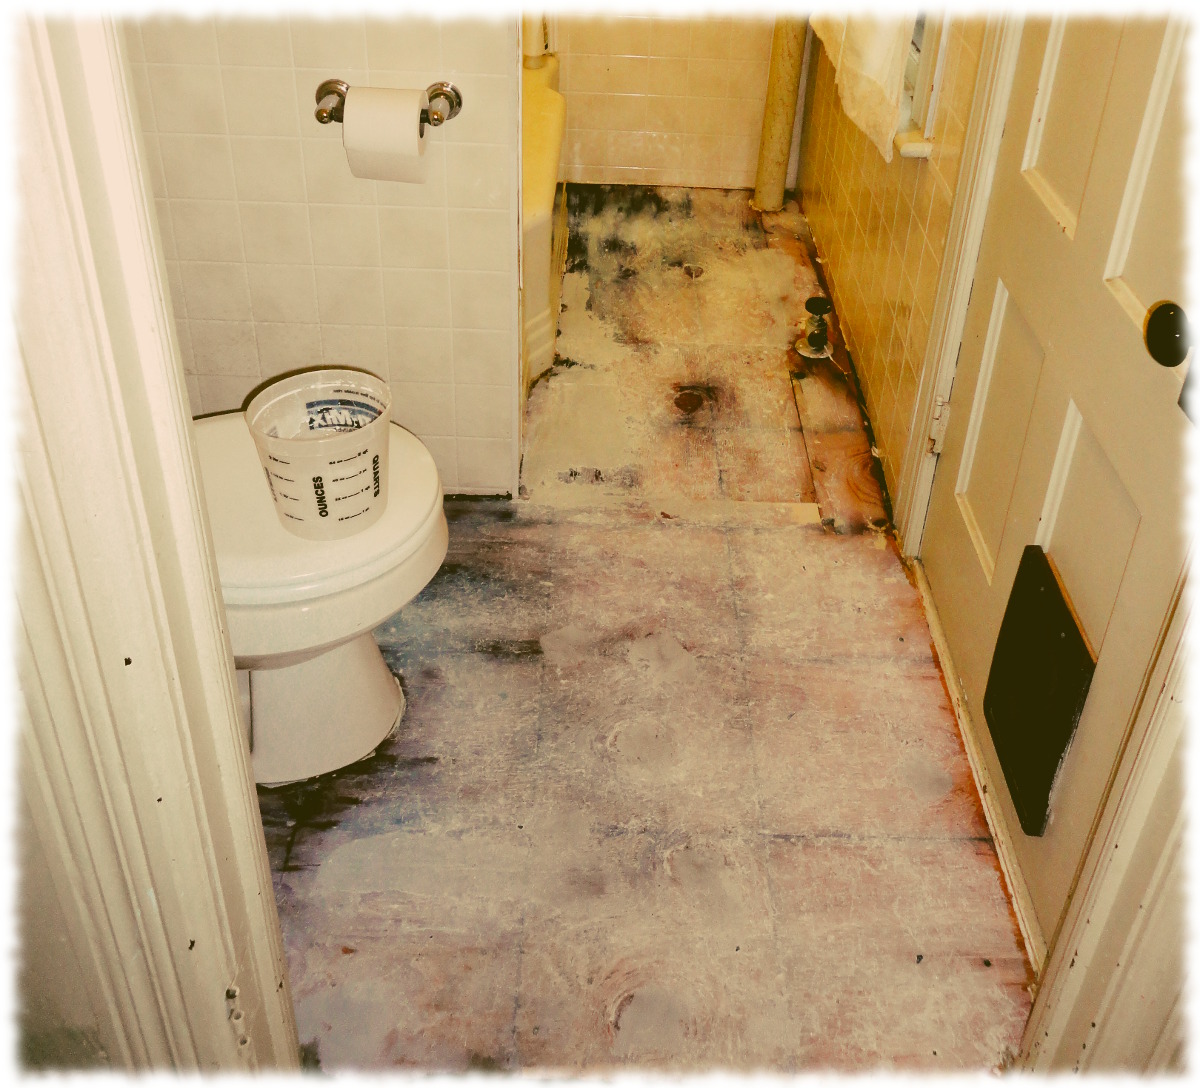
The floor in the bathroom is vinyl tiles installed on top of a plywood subfloor. The tiles are the cheapest self-stick variety that was available to whomever last redid the bathroom. In addition, the plywood was never sealed prior to the floor being installed. Add humidity and water, and the tiles start coming up and the plywood gets soft.
Susanna and I decided to replace the vinyl tile in the bathroom this weekend. It should be a quick weekend project and hopefully make the room look a lot better. Or at least not so embarrassing.
I removed the old tile in the evenings this week, and used epoxy to repair the plywood where it was rotting. Last night I washed the floor with TSP and filled the low spots with a floor leveling compound. I let the floor dry overnight and used a latex primer/sealer on the plywood this morning.
I’ll probably do a second coat on the primer shortly. I’ll pull out the toilet just before I install the tiles. It is warm out, so it wouldn’t be bad to use the woods, but an indoor toilet is just so much more convenient.
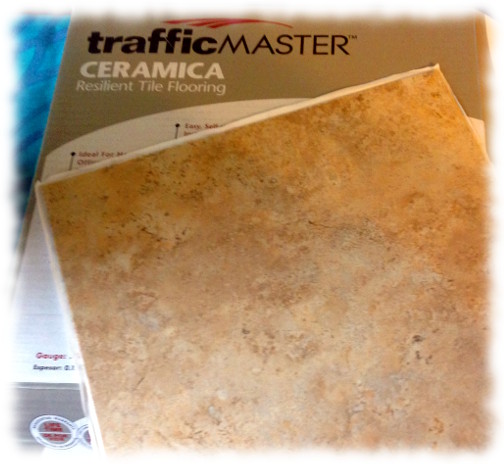
I prefer ceramic tile to vinyl, but the long-term plan is to gut the bathroom, and removing ceramic tile is a pain. So I am replacing the cheap vinyl with a higher quality vinyl tile. I purchased TrafficMaster Ceramica self stick tiles. These are vinyl tiles, but are thick – almost half the thickness of a ceramic tile. They can be grouted to look more like real ceramic or stone.
The tiles weren’t much more expensive than the cheap vinyl tiles, and will hopefully hold up better than the previous ones. You can come visit in a year or two and see how they look. But you would probably just notice how crappy the fake tile walls look and ignore the floor.
My plans today are only to replace the tiles on the side of the bathroom with the shower and toilet. I’ll replace the tiles on the side with the sink another day. It would have been a long weekend project to pull out the sink as well as the toilet. I also didn’t want to head out-of-town next week and leave Susanna with an unfinished bathroom. I’m just nice that way. Sometimes.
Tomorrow we are talking about adding a wall and shelves to the bathroom closet. I think the project (at least adding the wall) can be done in one morning. Adding storage in the bathroom will go a long way to improving the space. We can also remove the crappy shelves that were above the toilet.
Now all we have to do is figure out what to put above the toilet. Maybe a nice set of shelves, similar to what I put in the boys rooms. Or maybe a big mirror.
Total cost for tiles and supplies for this project: Under $100.