“Yesterday was as glorious a day as any of us in New England has any right to expect: nearly fifty, partly sunny, an eight-knot breeze, and the waters of Fishers Island Sound a soft, rippled carpet of blue” – From “Moon Wind at Large, Sailing Hither and Yon by Matthew Goldman aka Constant Waterman (Breakaway Books, Halcotssvile, New York, 2012)
I was going to take some time this evening to write about my weekend. Instead, I decided to open the doors and windows and let the cool New England breeze push the heat out of the house, take a seat outside with a glass of wine and read a bit. I am halfway through Matthew Goldman’s book; the book is a wonderful collection of local sailing stories. If you are down to reading this blog, then clearly you are out of anything half-interesting or even coherent to read – go take a peak at “Moon Wind at Large.”
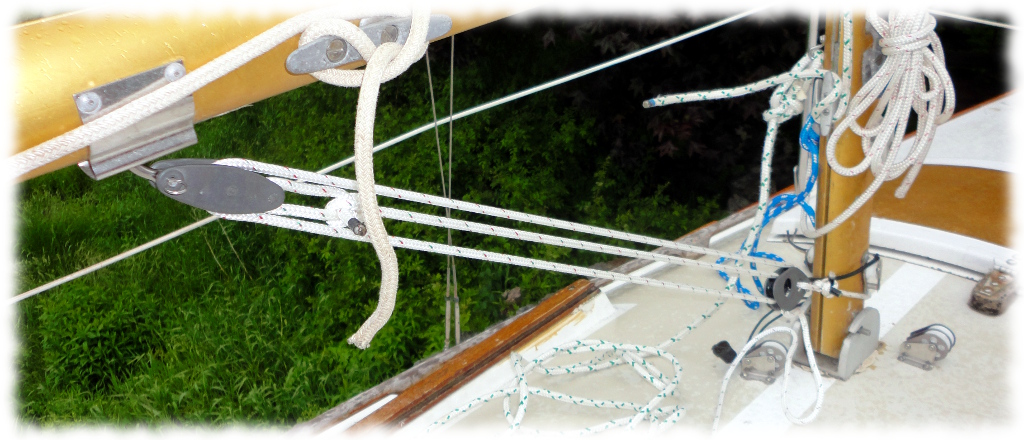
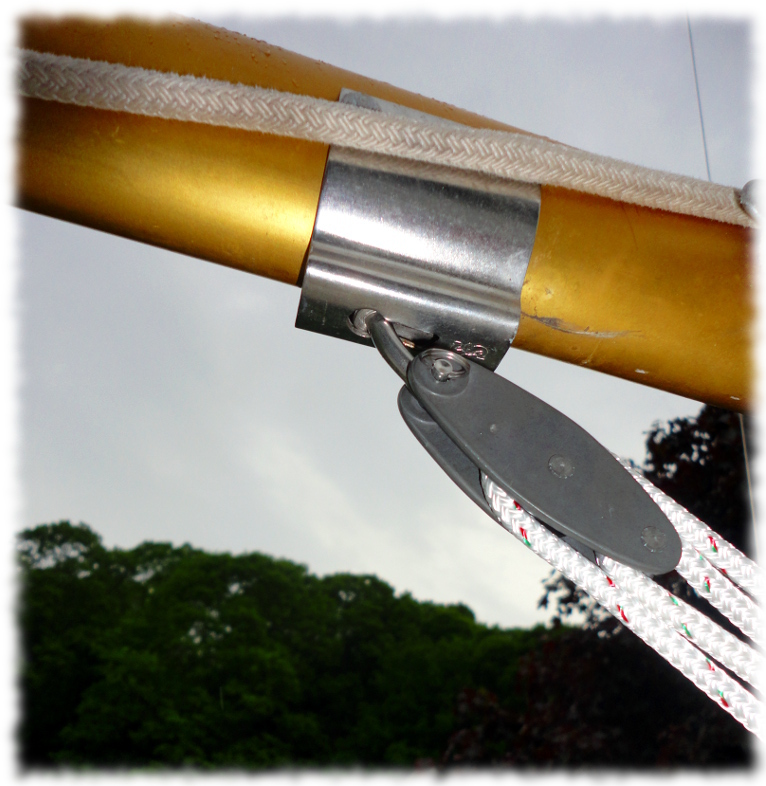
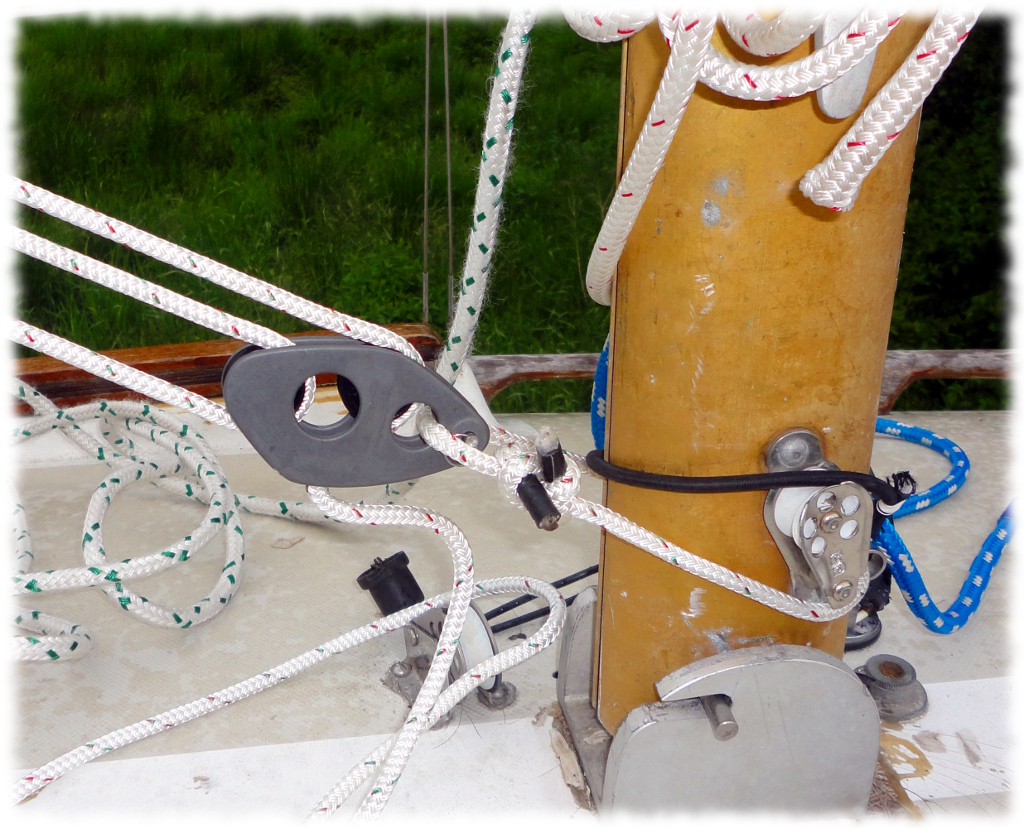
Tonight the parts arrived from Nautos – USA for the boom vang. I took a few minutes to install the hardware tonight after work. The mast looks like it has a connection for the vang from before. The only part that doesn’t fit quite right is the curved key to fit in the boom. It is a little too large for the existing setup. I’ll keep looking for a slightly smaller key to replace it with (they are cheap). I got the rope as a remnant at Defender Marine over the weekend.
Boom vang installed on the O’day 22. The blocks are from Nautos and are laser replacement parts.Where the vang connects to the boom. The key is a little large for the slot – I’ll keep looking for a slightly smaller keyThe vang attaches to the mast with a line looped around the mast (and run though an eye strap on the forward edge of the mast)
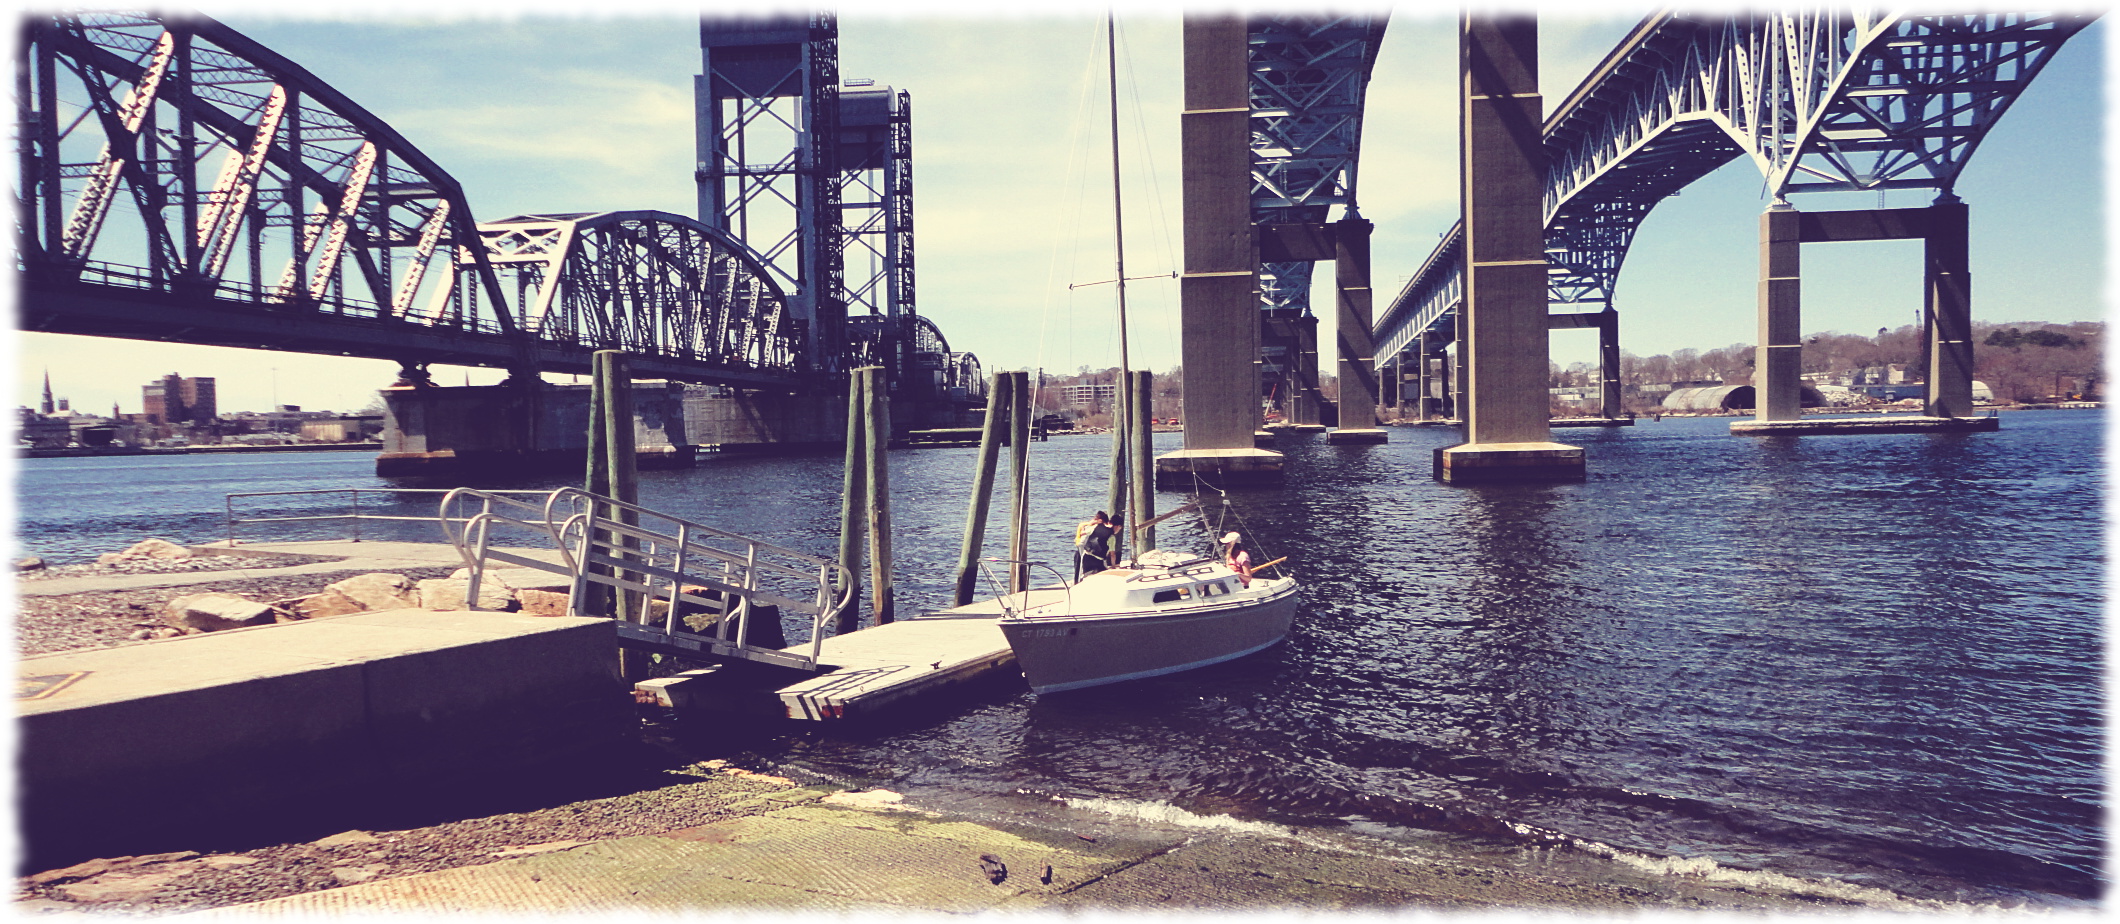
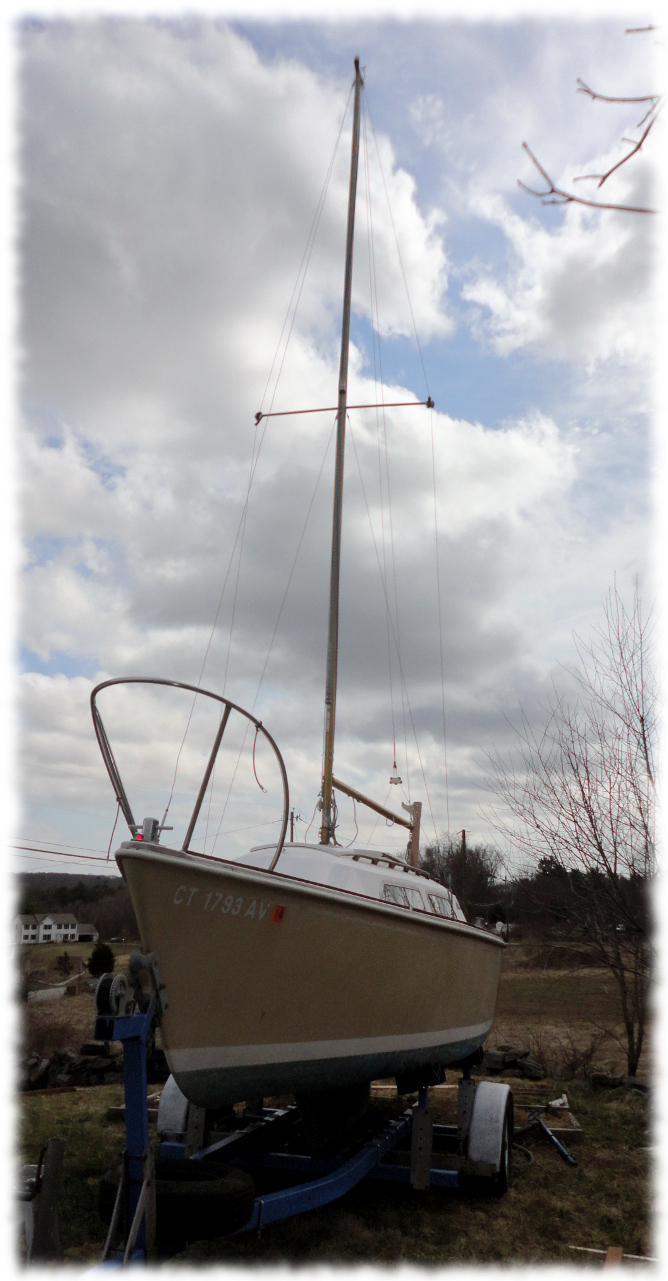
Our O’Day 22 sailboat in the Thames river for the first time
Our sailboat has spent many years, first sitting next to the garage in Ledyard, and then (mostly) inside our garage here in Preston. I got the sailboat before William was born, so it has been sitting around for over 10 years. Getting the boat in the water has been one of those great ideas. But for so many years, it has been just a dream. I loved thinking about sailing. I even loved working on the boat, but after a while, it would get old, and I would lose momentum on fixing it up.
Something always came in the way. First it was kids – it is a crazy change in how much free time disappears after kids (but it is well worth it). And then a second kid. It sat through a move, a divorce and my own ADHD. And pieces and parts that I had taken off wandered away, lost in all the transitions, and the trailer rusted away under it.
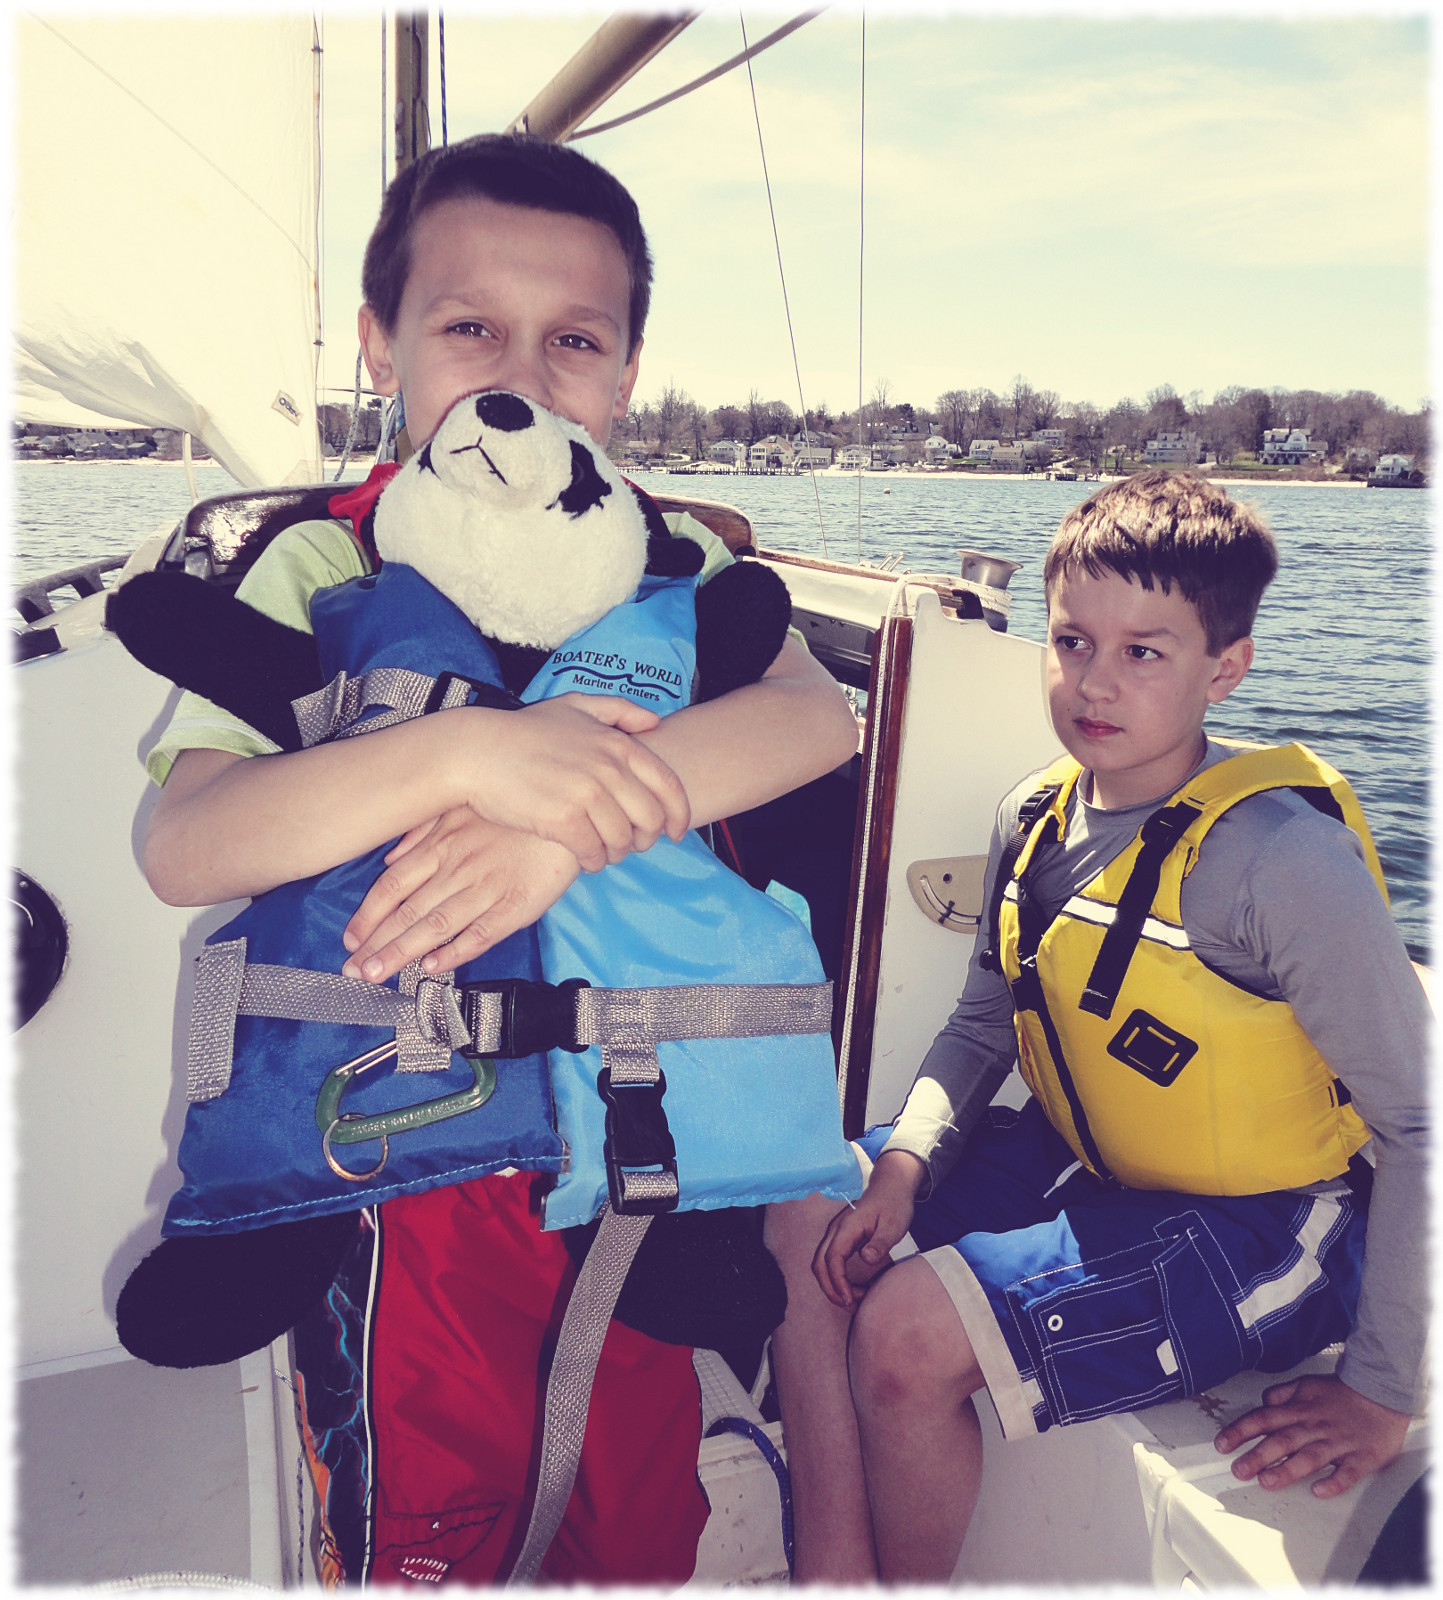
Will and Ben (and Panda) enjoying the day
I wanted to get it in the water last summer. But of course summer got in the way. There is always lots to do in the summer. And I’m not good at finishing things. Certainly not good at finishing things when there are lots of distractions (like in the summer). But I was able to get the trailer fixed last year.
So, this year I decided to pick a date to put the boat in the water. The boat didn’t have to be perfect. It had to float. Enough of the hardware had to be reinstalled or replaced to get it sailing. The trailer had to make the 10 mile trip to the launch and back.
My goal was to get it in the water on the 17th of April if the weather supported it. And, yesterday, I made that goal. We launched the boat near the head of the Thames river in Groton, CT. The boat launch is directly under the I-95 bridge over the river. We then motored under the railroad bridge (with a couple foot clearance for the mast) and put up the jib and sailed out towards Pine Island.
The weather was perfect for a first sail. The wind was very light – perfect for a first try. We didn’t have anywhere in particular to go, so we could just slowly move along. It is also very early in the season, so there was almost no traffic on the river (a couple of passing ferries, and an outbound submarine with coast guard escort).
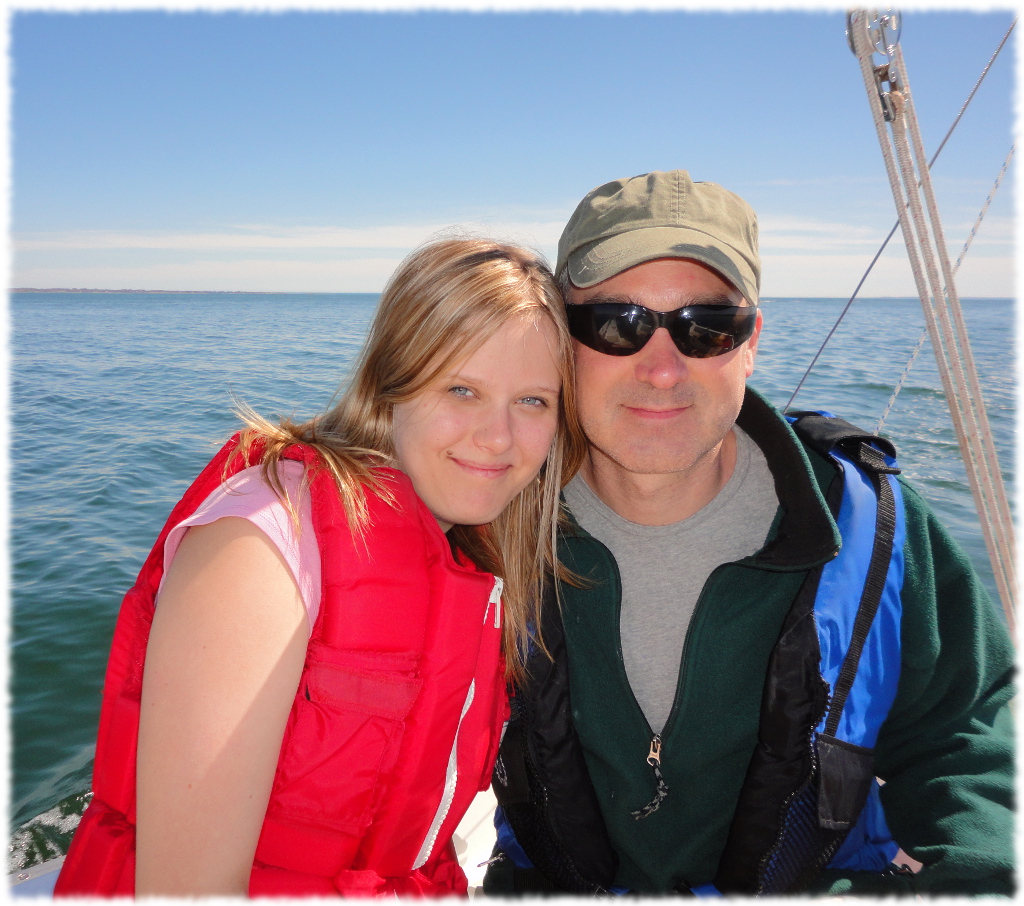
Susanna and I enjoying our sail
After reaching Pine Island we headed for Ledge Light and then back up the river. The wind was heading directly downriver and was light. I had a lot of trouble trying to get the boat to move upwind at all – something I’ll have to work on. Eventually we gave up and started the outboard and motored the rest of the way in.
The light wind and bright sun made the ride warm and enjoyable. I had been worried that everyone would freeze on a mid-April outing.
Of course, a couple of things learned from the day out:
Stepping, launching, retrieving and unstepping the mast is a lot of work. I think we will try to find a place to keep the boat in the water for a month or two this summer.
The mainsail is in pretty rough shape. I’ll need to replace it before next season, but I want to figure out how to best use the headsails this year, so I won’t worry too much about the main.
We need a long dock line for launching the boat. The 20′ dock lines are a bit too short.
The cabin needs to be better organized. That is Susanna’s job.
A couple more cleats would make life easier topside.
I’ll need a way of telling how fast we are going if I am to ever figure out how best use the sails.
Before we go to sea again, I’ll reinstall the life lines. Not a big problem on a day like yesterday, but it will make everyone more comfortable going forward.
We need a curtain to give some privacy to the porta-toilet.
The boys are on spring break this week. And finally, it seems that the spring weather is here.
I am on vacation all week. However, Susanna still has school this week – so it isn’t really a vacation for everyone. But, even with Susanna in school, we have a busy week planned. I’ll need a vacation to rest after this week.
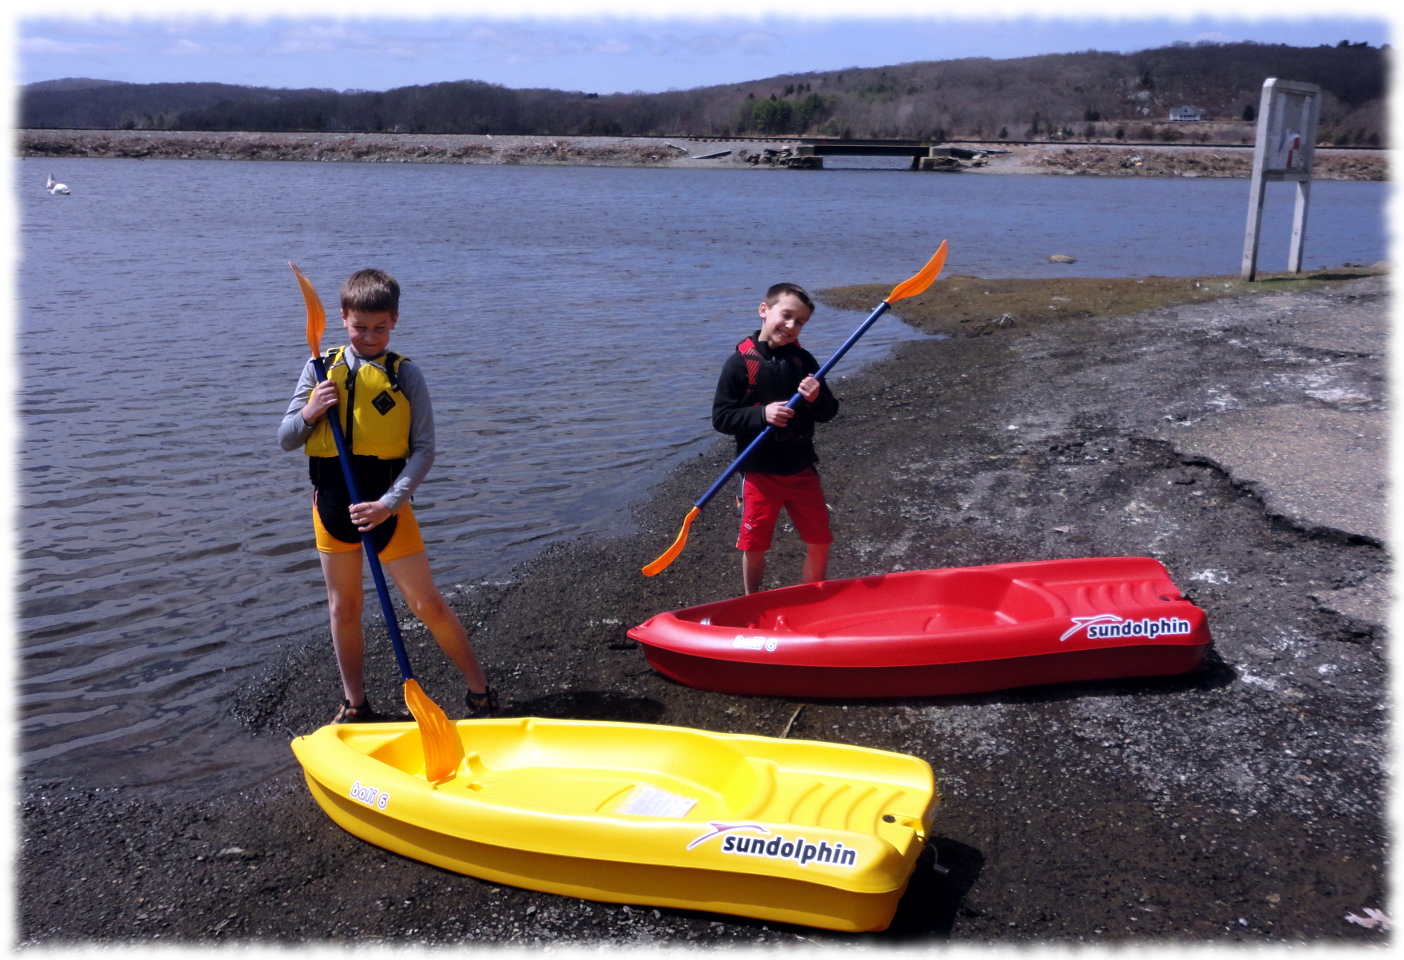
Getting ready to try out their new kayaks
This morning the boys and I ran errands (while Susanna ran her errands) – which included hair cuts for all of us (and a surprising long wait to get our hair cut) and dropping off recycling.
This afternoon I took the boys down the road to one of the local boat launches on an inlet off of the Thames river. They both had saved their allowances and purchased kayaks earlier this year. They were very excited to try them out.
It isn’t summer yet, and the weather was only in the low 60s today, and the water is very cold, so not a good day to swim. They both wore a wetsuit (shorty wetsuits) and several layers of clothes to keep them warm. Luckily the inlet was protected from the wind (and current of the river), so they could explore without freezing.
The kayaks are perfect for them. They are light enough that they can work together and carry them. They are also short enough to fit inside the sailboat (though barely). The only problem is that the paddles aren’t the best. I will probably glue them together – they kept rotating on the boys which made it hard to paddle for a long time. But what do you expect for $100 (including shipping).
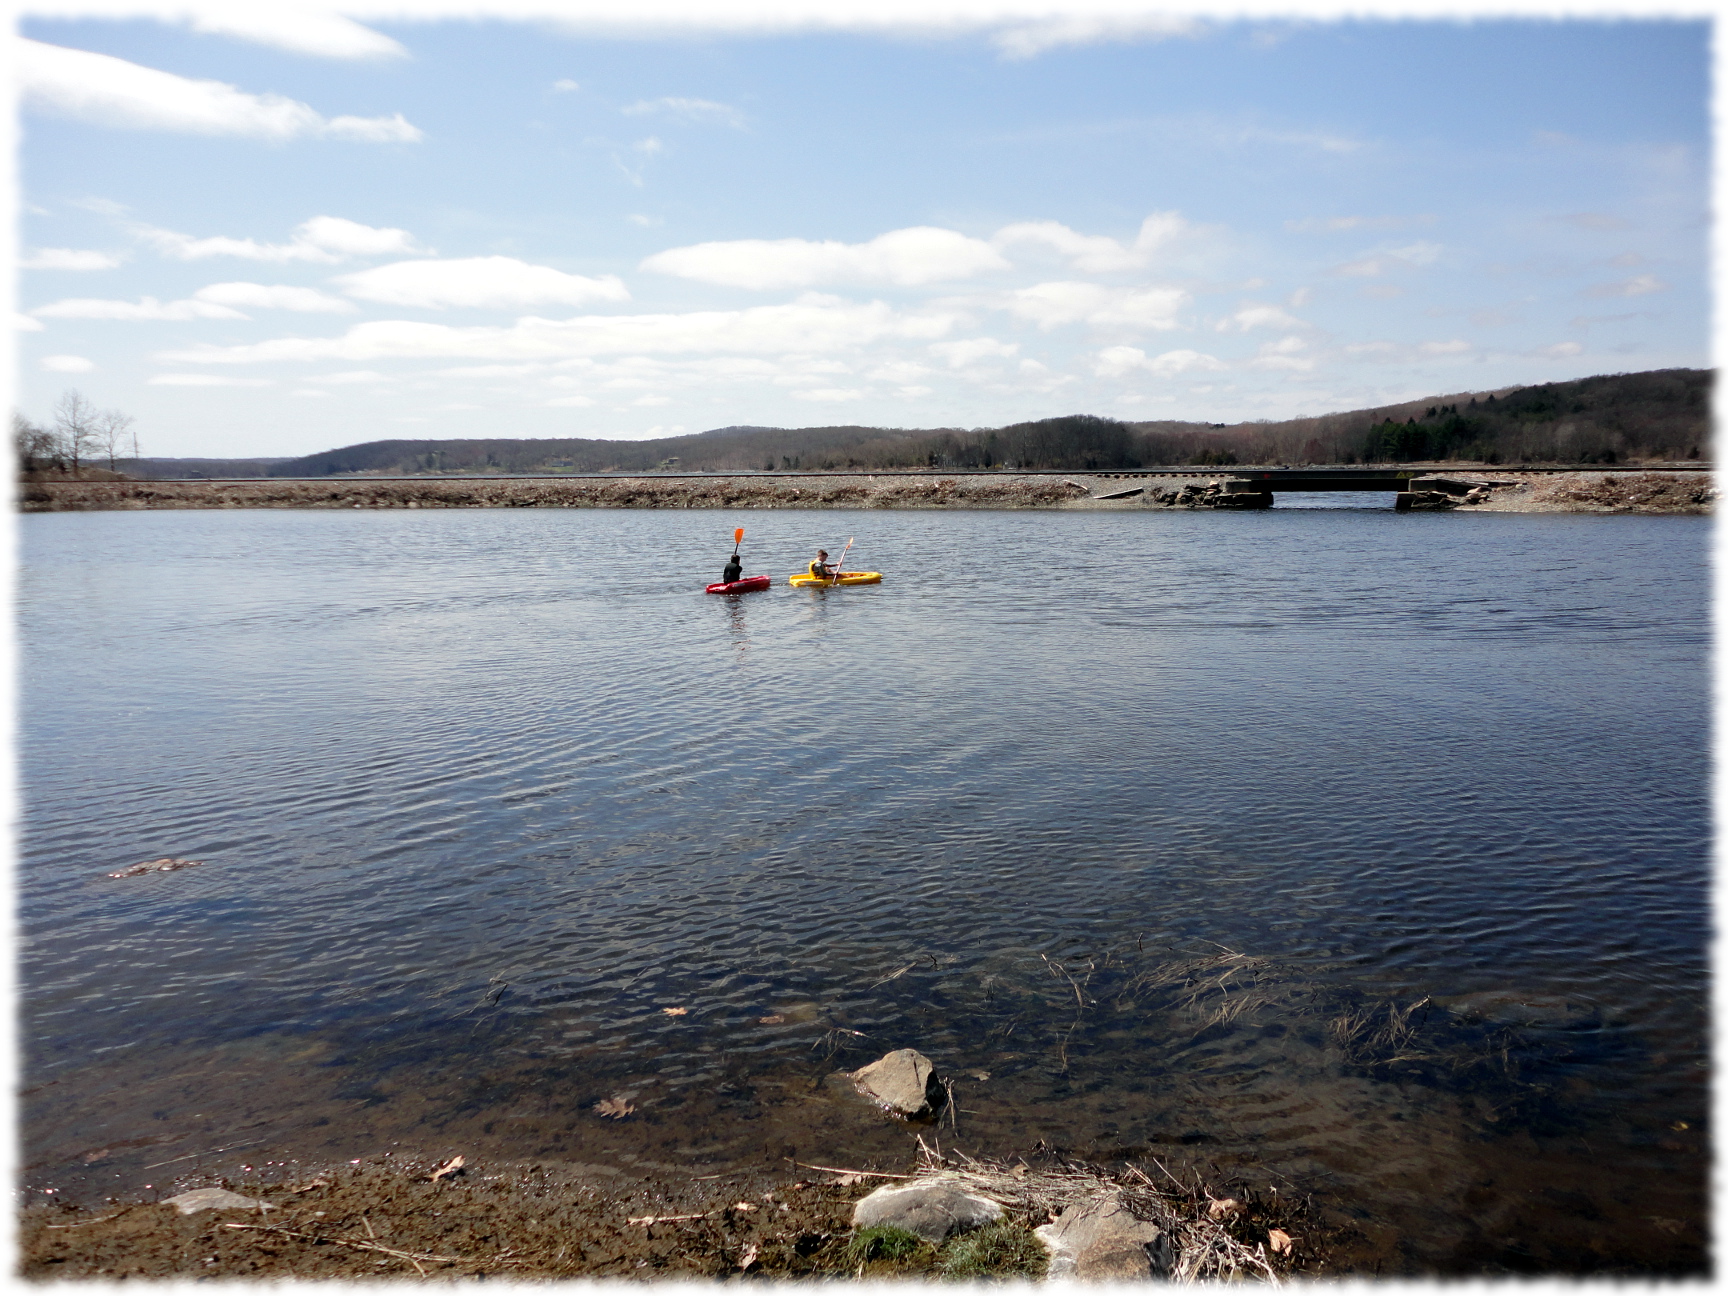
Will and Ben kayaking.
Tomorrow we are planning on putting the sailboat in the water (I’ll keep my fingers crossed). It seems that the boat is ready, or rather, as ready as it will get this year. I have the mast down and tied for transport.
Tomorrow morning I have to get the last few things put together on the boat, and will head down to the boat launch just before lunch. Will and Ben will help step the mast, and hopefully we will enjoy a short sail to Pine Island. Though, looking at the forecast, we may have to motor to Pine Island (not much wind forecast for the afternoon). Either way, I’m hoping to enjoy the day.
I got the mast up today. Finally! After a complete a$$ kicking last time, I took time to plan raising this mast. And I only dropped it once. And no one got hurt and nothing was broken.
So it’s not a one person job to step the mast yet. I don’t think it would be difficult to modify the system to allow me to raise it by myself, but for now, I am okay with it being a two person job raising the mast.
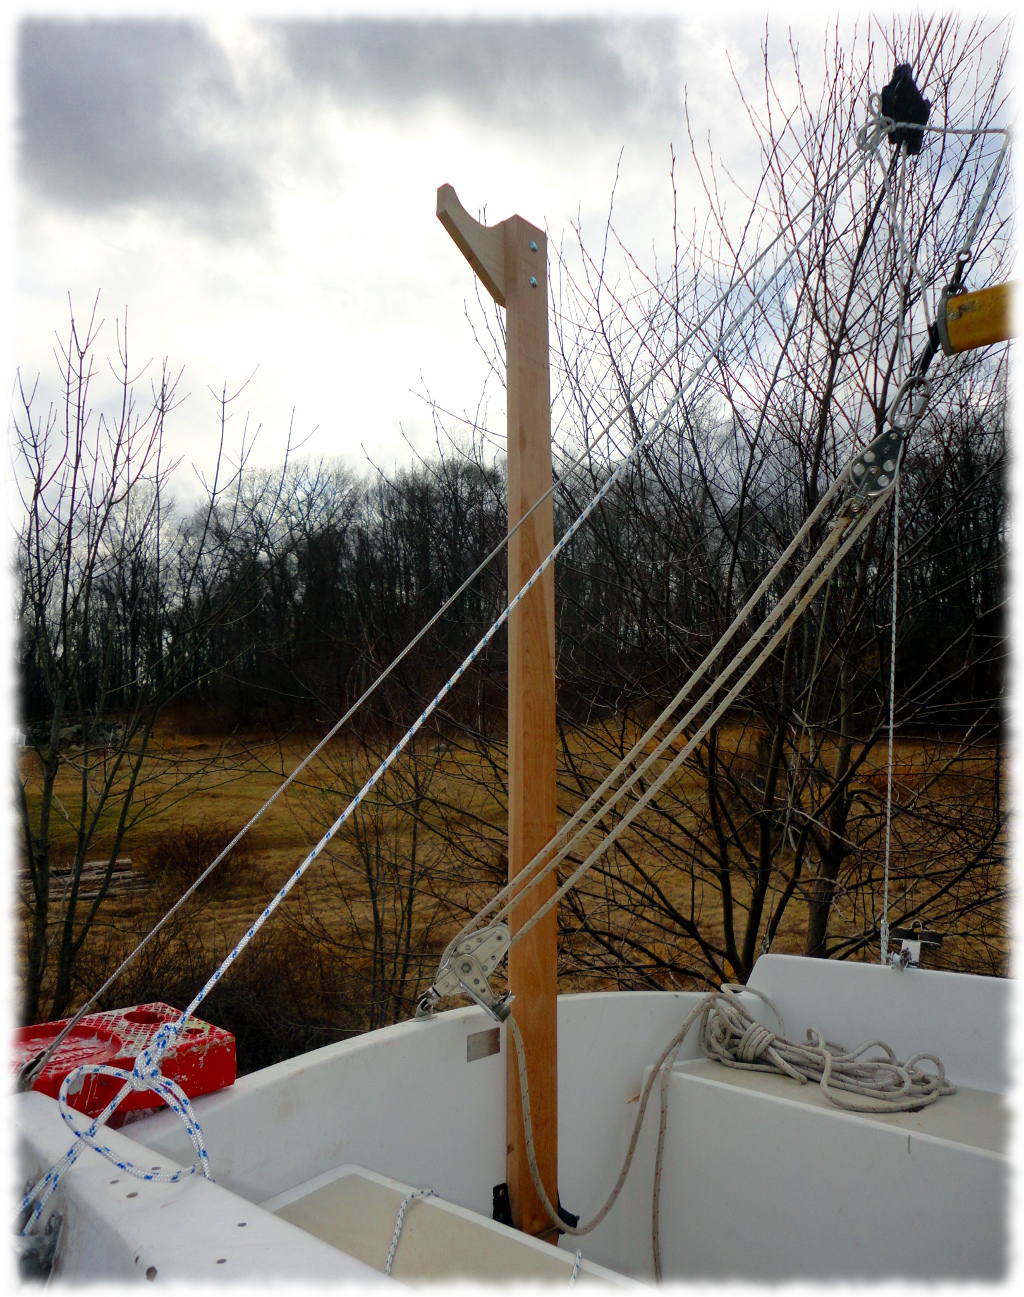
I built a mast support at the aft end of the cockpit. I used the two gudgeons that I had ordered to keep the mast support from falling down. I take the mainsail halyard and run it to the winch on the trailer. I had Will winch up the mast as I walked it up from the cockpit.
It is way too windy today to even attempt to put up any of the sails, and I have the jib halyard tangled up in the standing rigging (I’ll fix that when I take the mast down next time.
We confirmed that the masthead light worked tonight. The boys are getting pretty excited about sailing.
I still have to get the outboard motor out and make sure it is working. I also have to put the last toe rail on and clean up the inside of the boat. And the final step is to put the lights on the trailer. Of course it has been a bit cold and windy – not to promising to put the boat in the water in 10 days. But we will see.
The mast support installed. I will probably add another support lower on the post for storage of the mast.
A couple of lessons learned from today:
The boys are both surprisingly good helpers when it comes to attaching the deck hardware. It is easiest if I have them inside the boat with a wrench while I tighten the fasteners from topside.
Ben is a champ, he won’t stop working even after he draws blood when he scrapes his hand or after hitting his head on a sharp corner (not drawing blood, but hurting a lot I’m sure).
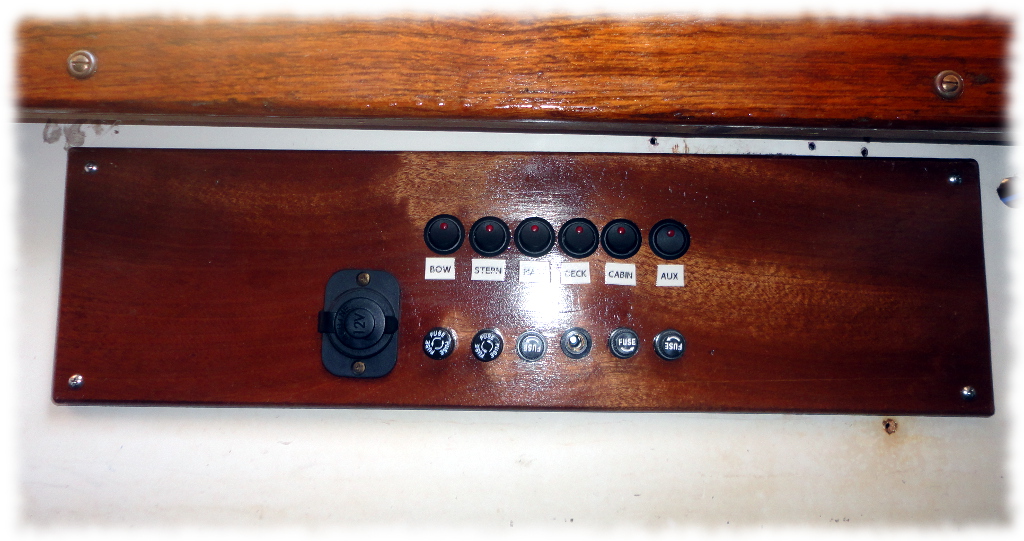
New switch panel installed in the boat (below the starboard settee)
Okay, so my labors in repairing the sailboat are nothing compared to that of creation. Nor is the labor close to that of slaying the Nemean Lion However, it is one of my longest unfinished projects, so finishing any of the tasks to get the boat into the water is a big accomplishment for me.
Then again, a 40 year old boat is probably never a finished project.
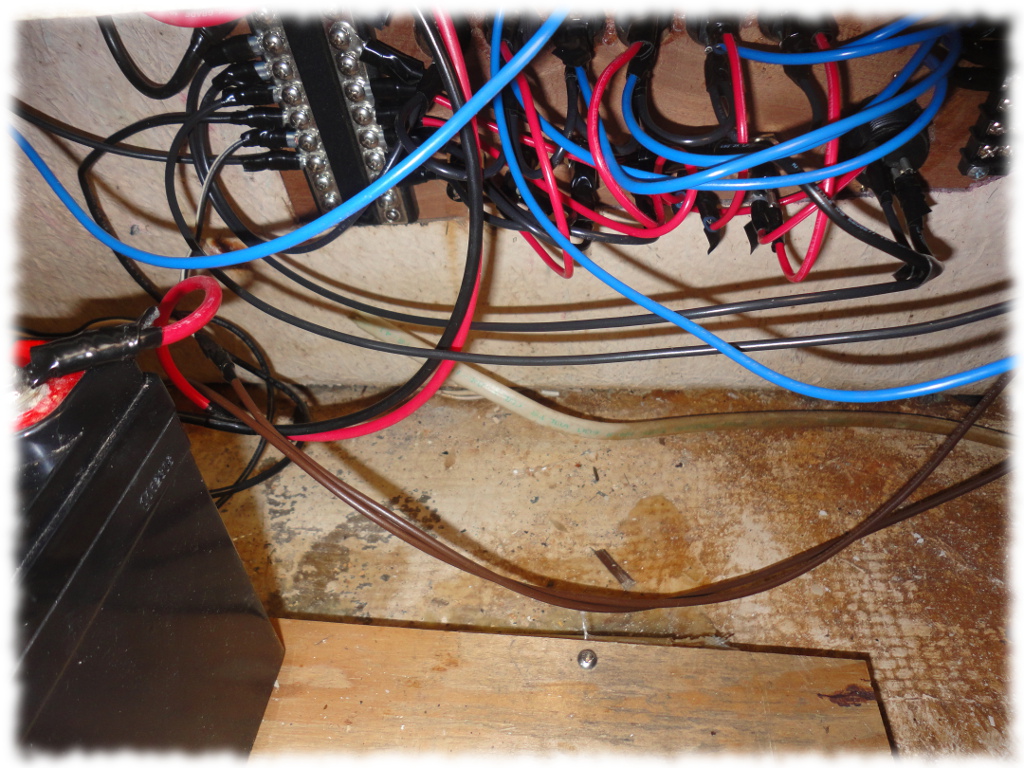
Today I created light. Well, at least I hooked up lights. I installed the new switch panel and battery. I had run new wires to the bow light and the interior cabin lights. I tied in the old wiring to the stern light and the masthead light. I turned on the switch, and there was light.
All the lights have either LED bulbs or are low draw bulbs (such as the masthead light). The battery I have is a 35Ah AGM battery. It isn’t nearly as big as most boat batteries, but I figure we won’t be using that much power. And there is room to put another battery the same size next to the current one.
The battery sits on a wood (plywood) platform on wooden supports that I fiberglassed onto the hull. I have a strap holding the battery down to the platform.
rear of switch panel (installed). The battery is on the left side of the picture
The switch panel was made from sapele and has 6 circuits, each with independent fuse holders under the switches.
I used round panel mount switches and panel mount fuse holders. A couple of lessons learned:
Use good components. I got cheap fuse holders, and I hate them. The good ones I picked up from Defender were well worth the couple of bucks I spent on them.
I couldn’t find a good source of high quality switches, so I ordered them off of eBay. Get spares. The quality isn’t always the best – I found one of my switches arrived broken, and don’t have a spare.
I’ll probably add a dedicated USB charger one of these days (before any long days out).
The wood panel is much thicker than the panel mount hardware is able to handle. I needed to drill out a recess behind the fuse holders so I could thread the nut to hold them in. I should have drilled recesses behind every hole prior to drilling the holes. The switches would have snapped in better if I had a recess behind their holes. As it is, I had to use a drop of epoxy to keep the switches from rotating and popping out.
I used all 16ga wire. I probably could have gotten by with using 18ga wire for all the lights, but it wouldn’t have saved much money anyway.
I think I would try to put the negative bus bar and the terminal block strip on the same side of the panel. Right now the positive connection for each circuit is at the forward end of the panel, and the negative bus on the aft end. That makes the cabling a little messier.
The switch panel is relatively simple. The to cables from the battery go to a double bus bar. All the negatives return directly to the negative bus. All the switched circuits go from the positive bus to the fuse holder, and then to the switch. From each switch I ran a wire to a terminal block strip. That allows me to build the entire switch panel in the workshop, and just connect each load to the appropriate terminal block (and negative bus on the other side of the panel).
Since the switches are lighted, I also needed a negative from each switch to the negative of the battery. The negative terminals for each switch are connected in a daisy chain back to the negative bus.
Currently the only electrical connections in the boat are the navigation lights, a pair of interior dome lights and a single 12V outlet.
In addition to making light, I was able to make progress on some other boat projects. Susanna helped me install two more toe rails (I have one left to complete). The boys and I made a run to the Defender warehouse to pick up some more hardware (a couple of shackles and padeyes) as well as pick up Ben a short sleeve wetsuit. Both boys saved their allowances and purchased sit-on-top kayaks (I won’t complain, it is better than spending it on electronics, and we were able to find them for a steal online). The kayaks should show up in two weeks, so I figured getting some warmer water clothes may be good for this spring.
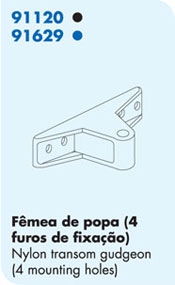
I am also making a plan on how to step the mast without killing myself. I ordered two parts from Nautos to help make the supports I need, a pair of nylon gudgeons:
Nylon gudgeons to be used in making a mast support/raising system.
More on that project when I finish it…. Hopefully tomorrow.
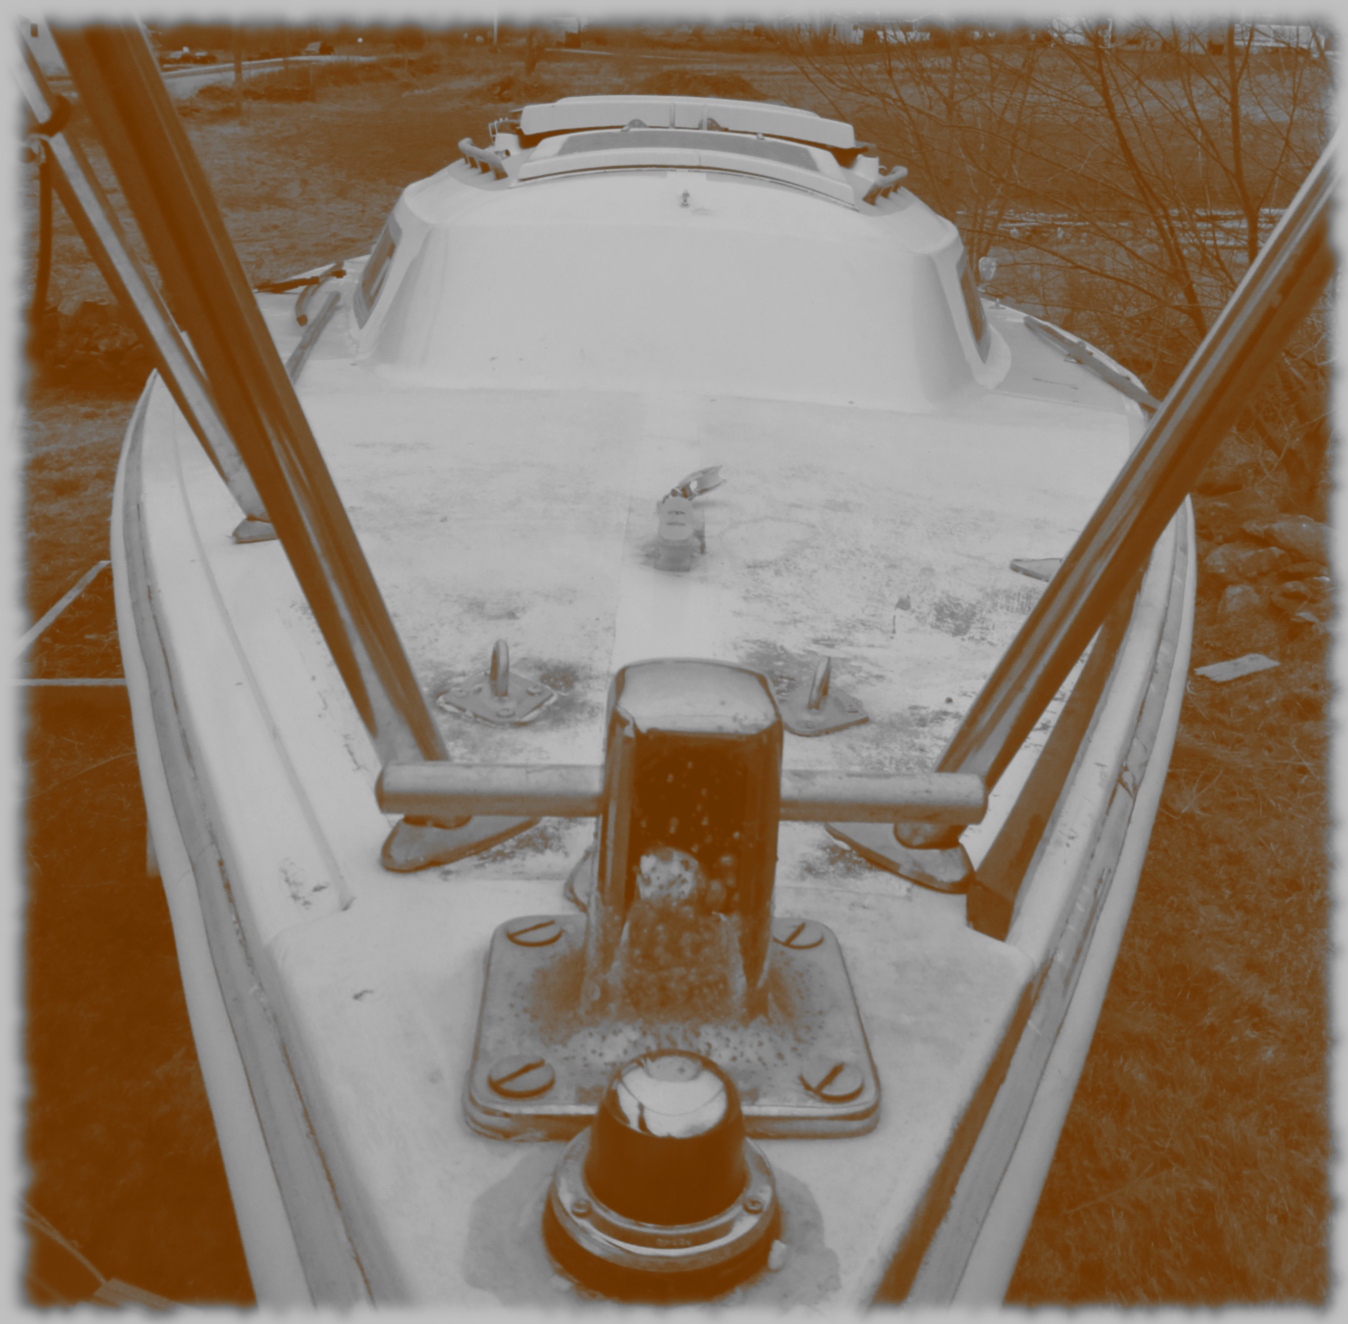
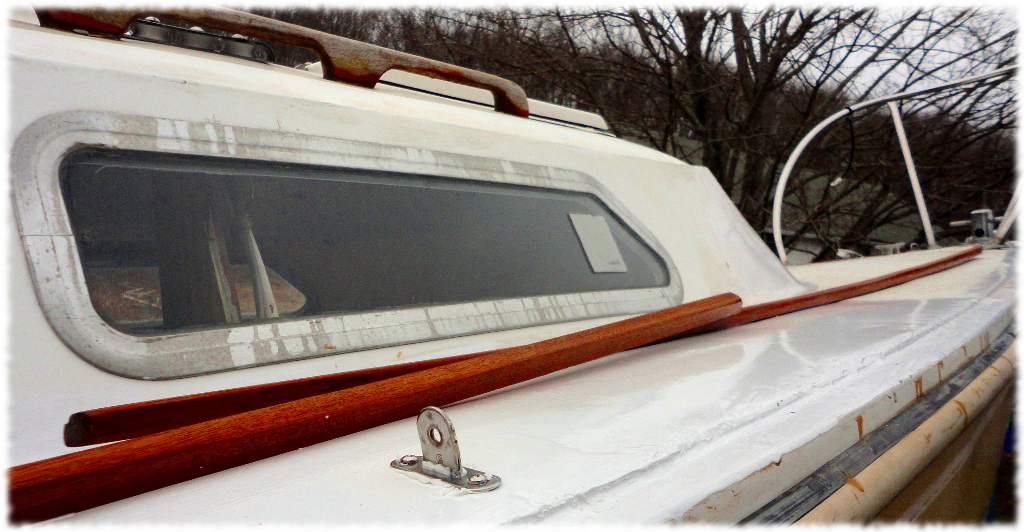
View of the boat from the bow. Needs the mildew cleaned off, but most of the topside hardware is installed
So, I couldn’t get it up this evening. No not that… This is a (mostly) family friendly blog. I tried to step the mast tonight after work, but couldn’t get it all the way up. The standing rigging isn’t adjusted properly, and it was too cold (and dinner time) to spend much time playing around adjusting the rigging.
Plus it is a bitch to step the mast (okay, so not so family friendly tonight). I need a better system for raising the mast. I’ll have to build some sort of support to put on the stern of the boat to help raise the mast. Maybe use one of the halyards to help pull the mast up once it is part way up.
I’m getting close to getting the boat ready for the water. The goal is still April 17th. But not if it is still this cold.
We had a tease of warm weather this Saturday. But only a tease. This week has been back to cold and windy. However, I can tell that spring is coming. The evenings are cold, but not bitter cold.
I was able to get a lot finished on Saturday. Mark came over to work in the woodshop and brought his 12-year old nephew to hang out. His nephew, Greg, was a huge help on the boat. One of the biggest pain in the a$$ is to get the bolts tightened on the topside hardware. It requires two people, one below and one topside. Will and Ben are a little too young to be helpful (and not very patient) and Susanna is super busy with school.
In a couple of hours we got most of the hardware reinstalled.
Sunday I installed the chainplate that had been removed for the fiberglass repair on the deck. I also removed the mast post and built a new one from sapele. The old one was pine and had rotted on the bottom. The sapele is much nicer looking. And heavier.
New chainplate installed on the starboard side.
I’ve been working on rewiring the electrical system in the evenings this week. I hope to have the electrical finished this weekend. I have to still install the toe rails, but that needs adult help to get installed – hopefully I can talk Susanna into taking time this weekend to help some more (she already put in an hour or so this week helping with the toe rails).
I also need to figure out how to step the mast without killing myself. Or breaking the boat. I’ll post more pictures of each project as I make progress.
We finally had a Saturday where the weather was beautiful. At least it was beautiful until right before dinner time. The skies opened up in the evening. At least the boat seems to be keeping the rain out of the cabin – it is a small step – but having the top of the boat keep water out is not as important as the bottom keeping the water out. I’ll have to wait until next year to confirm that.
The boys had soccer in the morning. Will’s team played better than they have all season, and they tied 2-2. Ben’s team is improving as well, even though they lost – something like 4-0. Ben is showing promise as a goalie – he enjoys the position and is pretty aggressive.
After the game, the boys headed over to a village of inflatable bounce houses that had been set up adjacent to Ben’s soccer game as a fundraiser. It was $5 each play in the village, and they borrowed money to play. To pay off their debts, both boys spent over an hour in the afternoon helping Susanna paint trim on the porch. Hopefully the trim dried enough before the rain.
I did get a little work done on the boat – epoxy repairs prior to installing the deck hardware. I epoxied the holes and will drill them out – the epoxy will keep the balsa core from getting wet if the bedding compound leaks.
The holes filled with epoxy..The holes taped from below to keep the epoxy from draining out of the holes..
Measuringfor the placement of the structural support for the new battery
The original wiring on the boat was a mess. I have ripped out most of the old wiring, and am in the process of replacing it all. I also decided to replace the battery (I think it had one or two large batteries originally) with a small 35 Amp-Hour deep cycle AGM battery. All the running lights and interior lights will be low-draw LEDs, so a large battery shouldn’t be needed.
The battery compartment and all the electrical switches are under the starboard settee. I couldn’t figure out how the old batteries were originally restrained in the battery compartment. There didn’t appear to be any place to connect a strap or any other restraining device. So I am adding some support for the battery (with room for a second battery of the same size). Yesterday I used epoxy and fiberglass tabs to connect three pieces of wood on the inboard side of where the batteries will sit.
Once all the epoxy has cured, I will run a 1×1 piece of wood across the inboard supports and one across the outboard supports. The battery will sit between the supports, and I will use a strap to ensure the battery doesn’t move.
I am using fast-set hardener for the epoxy, so it should be ready for the next step this evening.
I am also working on constructing a new switch panel. The old one had corroded to the point of not working. I have a hole cut for the panel and the piece of teak (I believe it is teak, but it doesn’t really matter) cut out. This afternoon I will mark the cutout size on the back of the wood so I know exactly where all the hardware needs to fit. I have the switches, fuse holders, and wire – so I should be able to finish the switch panel over the next couple of days.
I also worked on fiberglass repair on the starboard deck, alongside the cabin. The wood decking core was wet when I bought the boat (years ago), and years ago I repaired the weak portion of the deck. I had just never smoothed and painted the surface. I’ll post pictures later today on that project.
Now for a quick dip in the (hopefully) not too cold pool.
Cutout under starboard settee for the electrical switch panel
Susanna's sister, Sofia, and Tucker inspecting the boat before the carpet is installed
Susanna and I have been making progress on the sailboat this weekend. Yesterday, Susanna cut out the pattern for the new carpet, and cut the carpet to shape. I was able to drill all the holes needed in the new steel square tubing for the trailer (and prep the steel for painting).
Today, after a nice relaxing morning enjoying coffee on the patio with Susanna, I spent time on the trailer. The second wheel was removed and I cleaned and painted the fist coat of POR-15 on it. I also removed the remainder of the old/rusted square tubing. I spent some time painting the new steel, and cleaning the rusty old steel.
Susanna finished preparing the floor for the carpet, and just before lunch we were able to install the new carpet. What a big difference. Now to get new cushions (or at least one new cushion – we have one that sort of fits).
Tonight, if it cools down enough that I feel like working in the workshop, I will start milling more trim for the boat. I have to make pieces to cover the joint between the hull and the deck. I also need to make trim to cover the edge of the carpet, and some more trim for around the hatches…