The next project

The start of a project - making the plan.
The start of a project – making the plan.

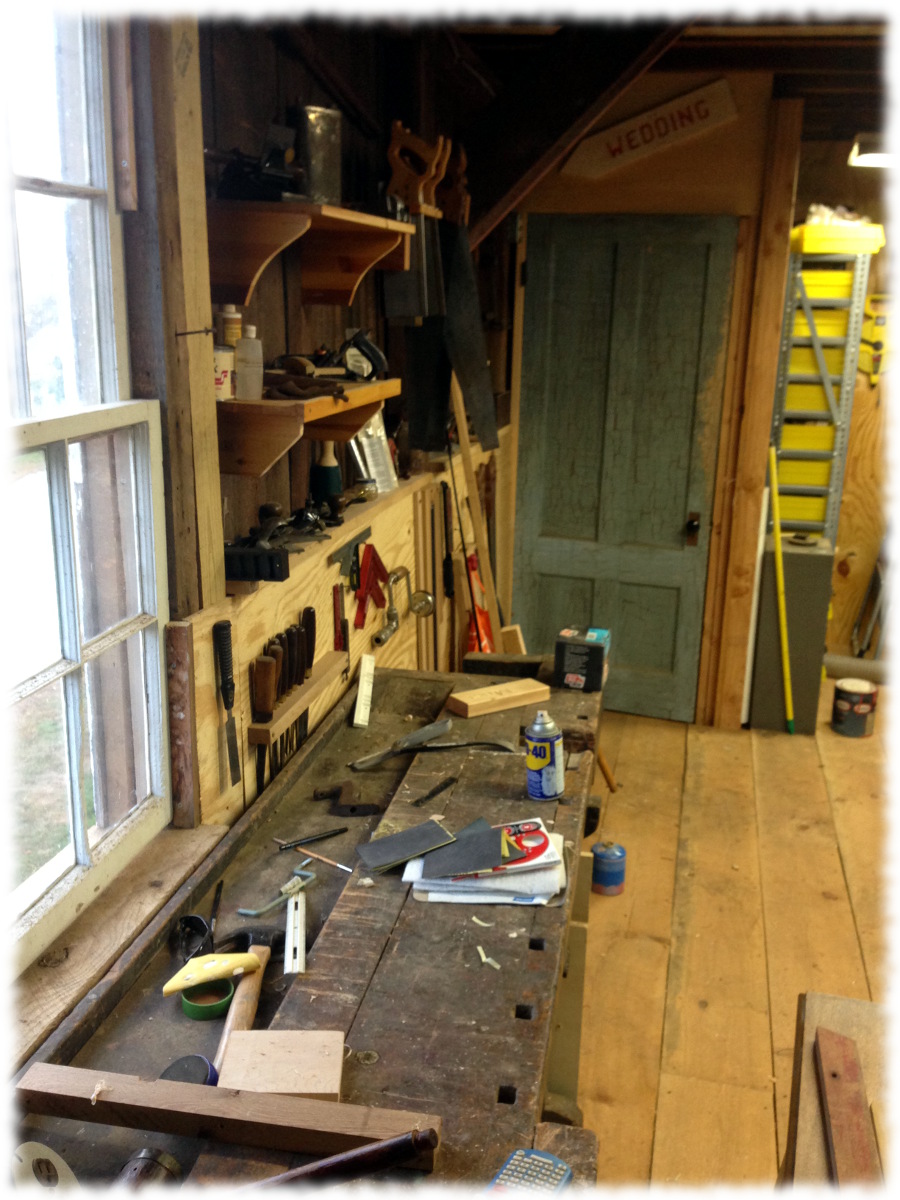
Although the workshop reorganization isn’t totally complete – the workshop is looking pretty good. And since, I don’t want to only spend time cleaning and organizing the shop, I started the next woodworking project today. And yes, part of it is because it is more fun to start projects than finish them. But I plan on trying to keep putting away and sorting out the workshop as I build this project.

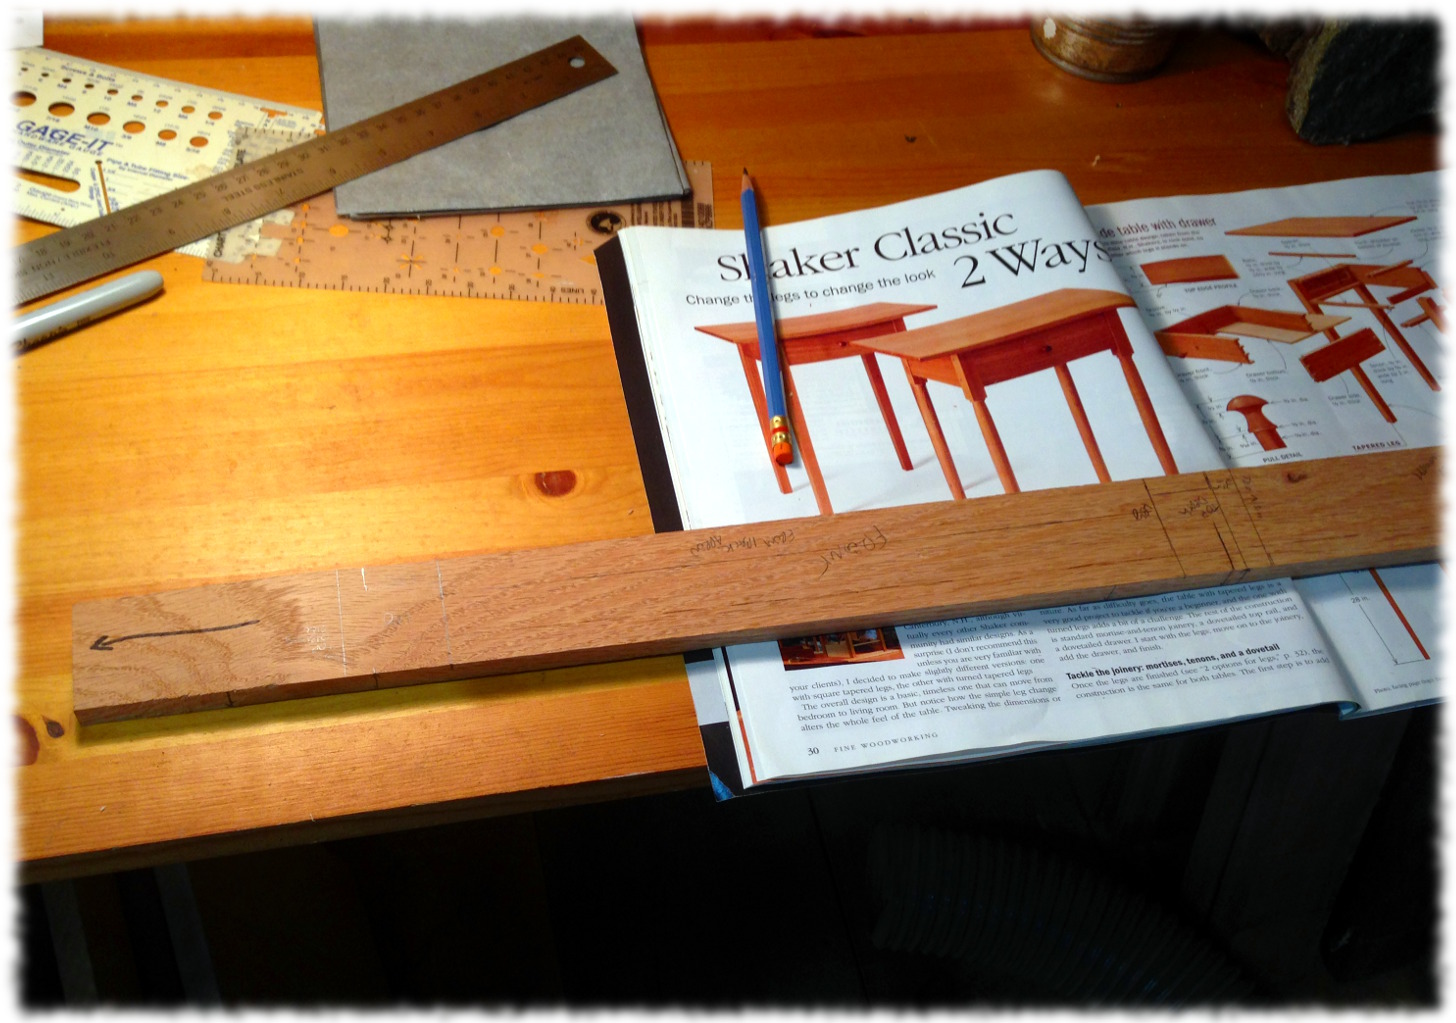
I am starting to build two nightstands for the boys (one each to start with). I started with a classic shaker side table plan from Fine Woodworking, and modified the design. The tables will be a little narrower than was in the magazine.

The fist step was to take the plan and make a story stick with the appropriate measurements. That way I don’t have to use a tape measure and risk cutting things to the wrong size. I just have to take the story stick and mark out each part. The story stick was a scrap piece of oak I had in the workshop.

Marking out the boards - making sure to remove an inch or two at the ends of each rough board. This is some 2" square boards for the legs
Marking out the boards – making sure to remove an inch or two at the ends of each rough board. This is some 2″ square boards for the legs

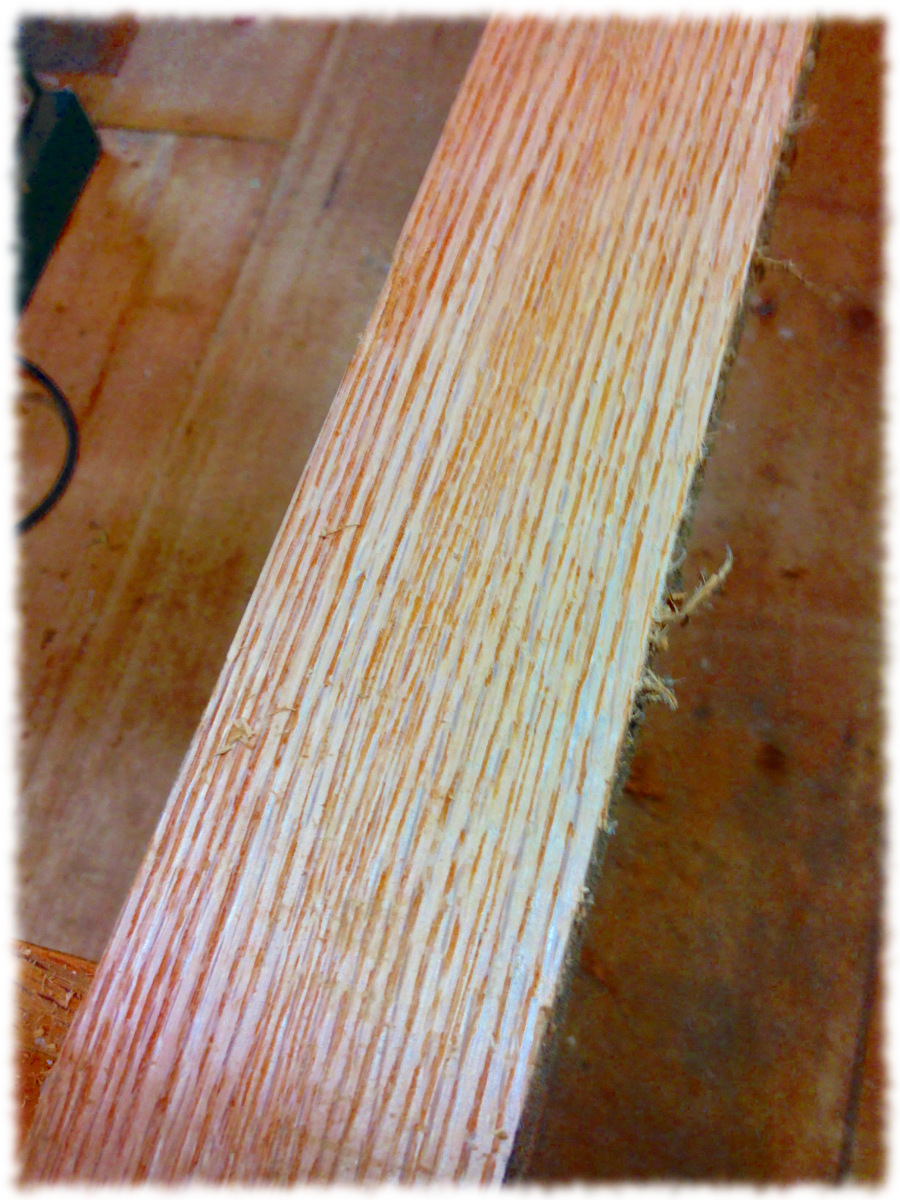
The two tables will be made from red oak. If they turn out nice, I will make another pair out of cherry for our bedroom.  After marking out the dimensions, I made an estimate of how much wood I would need and headed out to the barn to pick out wood. I am using a tree that I had cut into boards a couple of years ago. The lumber is beautiful. It is clear and the boards are thick (probably 1 1/4″ thick each for the thin boards) – so it should be no problem getting nice wood for the project. There is enough lumber from that tree to make several more matching pieces of furniture for the boys.

Of course the lumber was on the bottom of the stack in the garage. I had to unstack the pile, pull the lumber I needed out, and then re-stack the pile. I think Tucker was the only one that enjoyed that part of the project – I uncovered a mouse nest which is endless fun for a beagle to dig through.

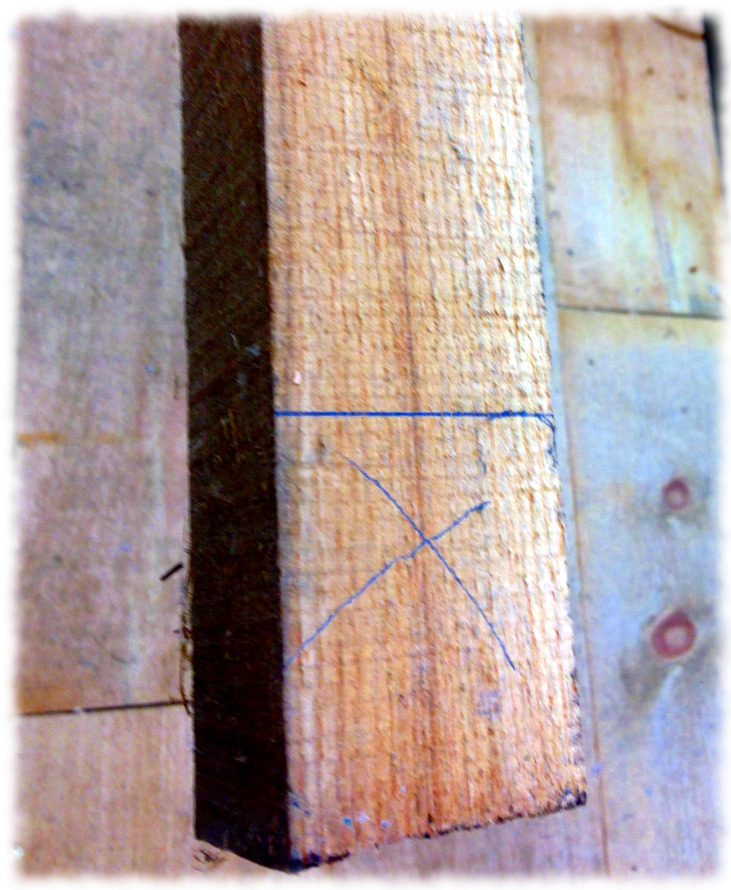
After getting the lumber out I started marking out the boards. The next step is to cut the boards to rough size. This will allow me to easily mill the boards (it sucks to try to mill a 10-foot long board), and I can plan out the nicest looking pieces for the most visible parts.

A couple of things that will be a challenge for this project:

  • Each table will have a drawer. I haven’t built drawers before, and will plan on hand dovetailing the drawers.
  • I will attempt to resaw the sides of the drawers (they only need to be 1/2-inch thick). If I can’t do the cut on the bandsaw, I will try to resaw by hand. It is a waste to use the planer to take a 5/4 board down to 1/2-inch thick.
  • The legs will be tapered. I haven’t figured out how I will taper them yet. The magazine shows a jig for the tablesaw. I’m thinking I will either taper them on the jointer or use the bandsaw (followed by a hand plane).
A couple passes of a hand plane expose the nice straight grain in these boards.

Workshop Progress

A "getting closer to clean" workbench
A “getting closer to clean” workbench

Today wa a chore day. The boys had friends over and, for the most part, spent the day playing rather than fighting. I spent time organizing the garage as well as the wood pile under the workshop. The chilly morning encouraged me to install all but two of the storm windows.

After morning chores, I spent time picking up and organizing the workshop. I have most of the bigger power tools where I want them (or at least where I think I want them). I have as much of the floor put down as I have lumber for right now. Now it is time to clean up and find a home for everything. It helps me keep somewhat organized if everything has a place. Not that I always put things back in their places. Actually, it is a challenge to keep any space organized. But having a home for everything helps.

I added a small “desk” in the corner. I’m not sure I’ll use it too often, but I like the look. It is just a deep shelf at desk height, nothing complicated. But it will give me a place to plan projects. At least in theory. I’m sure I’ll mostly plan projects sitting on the couch in the living room. I’ll also now have a place to put the chair when it isn’t in use.

I am nice and tired tonight. So are the boys. And the dogs. Back to work tomorrow. At least it is a short work week.

New desk height shelf in the corner of the workshop. Under the 10,000 woodworking books/magazines I have.

Round two (or three) with the workshop.

Back of the workshop with the  new floor and walls.
Back of the workshop with the new floor and walls.

I am rearranging the workshop. Again (or rather, still – if you read my post from last week). I am making slow progress on the project, but am getting to the point where the workshop is getting back to almost usable.

I have enough of the floor installed to have most of the heavy tools back where they belong. The next project is to go through the pile of way too much stuff that I moved from the back of the workshop to the front. Hopefully I can find homes for everything, and maybe even find a way to get rid of some of the stuff.

I am only insulating the bottom half of the walls. In public, I would say that I am only insulating the bottom to preserve the look of the old walls. But, just between you and me, I am pretty lazy.  It would be a lot more work to do the upper half of the walls (all the electrical wiring is run on the upper half of the walls). Maybe next year if I am inspired to insulate the rest of the space.  I’ll see how bad it is to heat this winter.

Cutting down the door to the workshop loft - the door needed an inch taken off the bottom to accommodate the new floor)
Cutting down the door to the workshop loft – the door needed an inch taken off the bottom to accommodate the new floor). Photo by Ben Curtis

The new layout certainly opens up space in the back of the workshop.  I used to have the workbench out from the wall, which made it a little cramped between the workbench and the outfeed table of the table saw. I also had all the hand tools on the side wall, which meant always walking away from the bench to get tools I needed.  The tools are all hanging (or will be hanging) on the back wall, over the workbench.

Maybe I’ll build a new outfeed table, and some nice shelves for all the woodworking books I have (that are sitting in a pile in the front of the workshop). I’ll see what I feel like attacking once the shop is cleaned up. Maybe I’ll just reorganize the shop again. It would be so easy to just turn into one of those people whose only connection to woodworking is reading magazines, rearranging the workshop, and periodically building shop furniture.

Ignore the pictures. The workshop is still a disaster. But an improving disaster. To keep the rest of the family busy, I arranged playdates for everyone. Will had Shane over. Ben had Slater over. Susanna got to babysit Michael. Targa and Tucker, well, life is just one big playdate for a dog. My playdate was with a bunch of air-dried pine 1×10’s and a hand saw (not to forget the cordless drill).

The gang hanging out for the day. I took a break from the joy of hand-sawing lumber long enough to snap the picture. Susanna tried to get Tucker to take the picture, but he kept cutting everyone's heads off.
The gang hanging out for the day. I took a break from the joy of hand-sawing lumber long enough to snap the picture. I tried to get Tucker to take the picture, but he kept cutting everyone’s heads off, and getting the camera wet.

Mid-September update (or rather, random thoughts for the night)

Taking a snack break with the boys while out bicycling earlier this month

I haven’t found much to blog about this month. It isn’t that I have been bored. I have been very busy. But I think I’m still working on getting used to the fall routine. I have to keep reminding myself that writing is a good way to focus on things at home. It gives me motivation to finish projects. It is certainly fun in an ADHD way to start projects. But it is no fun to only blog about starting projects. It is much more fun to write about finishing projects.

I decided to do a little more than just clean the workshop. I am doing a reorganization of the entire shop, and adding a new floor (just rough pine 1×10 boards on top of the existing floor).  I moved my workbench to the back wall, under the window. I will move the table saw back a foot or two to allow for more room when cutting long boards. So far about 1/3 of the floor is installed. I’m also adding insulation around the bottom half of the walls.  Pictures will follow when the workshop no longer looks like an example of typical ADHD organization (or a 10-year old’s room). Really, I will get it organized. It will just take some time.

I haven’t finished too many of the house projects that are still hanging out there. So, they are still sitting out there. But at least they aren’t in the way. I have been focusing on getting the workshop finished. I think the workshop had been enough of a mess after building the chicken coop, that I figured I might as well just do the walls and floor now. Nothing is as much fun as starting a new project. The trick is to finish them. Or at least mostly finish them. A workshop is never really finished.

Maybe this week I’ll find enough focus to finish the workshop and maybe even one of the smaller projects hanging out around the house. I’d be happy with just getting the workshop back to a usable space.

Chickens (kycklingar)

Completed chicken coop made with red oak and maple.

It has been a busy two weeks. I don’t write as much when life is crazy. Susanna got her green card and a full time job last week. They wanted her to start training this week, and she hasn’t even finished her last job. The boys start school and soccer this week.

I had been working on building a chicken coop and run. I told myself that I should finish one project before starting another project. Of course I don’t always listen to myself. For a month or so, Susanna and I had been planning on refinishing the living room floor this weekend. Of course things change. A new job. The boys’ schedule. Maybe in hindsight we should have pushed off the floor for a bit. But we didn’t. So I took a break from the chicken coop and over the weekend we finished the floor. The final coat went on last night. But I will save that for a later post when I can get good pictures of the floor. And I’m pretty sure it was worth doing the floor.

The chicken coop was finished yesterday and we picked up chickens from Mark and Jessica Matkovich this afternoon. The coop is 3′ x 8′ and is made from maple and red oak. The wood I had picked up for building the floor in the garage for the wedding, so was free. The shingles are left over from when the previous owner sided the workshop. I had some wire fencing left. The only materials I purchased for the coop was the chicken wire.

The wood was pretty wet when I milled it, so I plan on letting the coop dry for a couple of months and then painting it to match the house.  I have to build a new compost bin (so I can take down the compost bin to the left of the coop) and build a bigger run for the chickens. I hope to finish that next weekend. But for now, the space should be enough for the 4 chickens.

I will have to add some more trim to the coop, and maybe another hinge to support the top. Susanna and I plan on trying to keep track of expenses to see how long it takes to pay off the investment for the coop.

So far our investment in the chickens:

  • $30 for chicken wire
  • $36 for a feeder, feed and bedding (I didn’t want to use the wood chips from milling the coop for the birds – the lumber wasn’t clean enough).
  • $3 for golf balls to encourage the chickens to use the nesting box. Plus they will offer entertainment for me when I mow over them in the yard after the boys leave them around when playing with them.
  • The wood, screws, and roofing was free (existing materials).

The boys are very excited about the chickens. Susanna not so much. But we will get eggs (hopefully soon) and they should help compost table scraps.

My plans are to add a 4′ x 12′ covered run for the birds. This will give 24 square feet of coop space and 72 square feet of run. The compost bin will be at the far end of the run. I will move the feed and water into a protected part of the run – or at least the move the water out where it is easier to check and fill. I may replace the watering system with one that is easier to keep clean – hopefully thanks to the Sawyer farm.

Garden Trellis Completed

Garden Trellis Completed - just waiting for netting to tie up plants
Garden Trellis Completed – just waiting for netting to tie up plants

Yesterday was my day to take off and enjoy sailing. Today was a day to get work done around the house. Susanna spent the day rearranging the library, and I took time to finish building a trellis for the vegetable garden.

I had glued up most of the legs over the past week. Today I milled the remaining lumber and assembled the trellis.

The structure is made from 1″ thick maple. Not because maple is good for exterior projects – it is terrible. But I have a ton of maple under the workshop that I had purchased to make a floor for the wedding reception. It was pennies per board-foot and isn’t worth saving for furniture building. But it is perfect for outdoor projects (and burning in the fire-pit).

The legs are glued up from three pieces of 4-inch wide boards. I only milled the boards as thin as needed to clean them up. I didn’t bother jointing anything – it is a construction project to sit out in the garden. Anyway, trying to joint a 8-foot long board sucks, and wasn’t worth the effort. This wasn’t fine furniture.

Trellis detail.
Trellis detail.

The top stretcher is connected to the legs by a bridle joint. I simply cut the center of the three pieces for the leg shorter than the two outside pieces – leaving room for the long stretchers to slide into when the legs were glued up. The connectors between the sides are attached with pocket-hole screws. The three top pieces were assembled with a slot cut in them so they just slide onto the long stretchers and can be moved.

Overall this is a quick weekend project if the lumber doesn’t need to be milled. Actually, with dimensional lumber, this is a morning project. The only trick would be cutting the bridle joints at the tops of the legs.

I have ordered netting to hang from the three cross beams. Hopefully the netting will arrive tomorrow so I can finish tying up the plants in the garden before the summer squash take over the tomatoes.

There wasn’t a lot of design thought that went into this project. The dimensions were based on what I had for lumber. I think the top stretchers could be longer, but I couldn’t rip a board that is longer than 8-feet long on the table saw without moving the saw. The wood is still a little green, so I’ll let it dry out in the sun for a week or two before I put a finish on it. The question is, should it be painted to match the house, or just put a clear coat on the wood?

It is nice to finish projects. Of course, it is still easier to start them than finish them. But I am thankful to have a partner that encourages me to finish things. It is amazing how much Susanna and I have been able to get done with the house over the past two years.

And of course, I had Tucker to keep me company outside all day:

A mostly useless Tucker

Boneheaded move of the week

Over the weekend, the boys and I decided to move the futon from the downstairs library to the upstairs guest room. Well, I decided, and the boys helped. Well, I decided.

When I disassembled the futon frame, I noticed that the sides were a bit loose. The tenons had broken free of the glue joints in the mortises. A quick and easy repair in the workshop. Over the weekend, I disassembled one of the ends and re-glued all the mortises.

Monday, I took the one that had been re-glued, and set it down by the workshop door. Across from the remaining piece that needed to be repaired. I then noticed that the workshop door had been blown shut by the breeze. I walked over and propped open the workshop door and back to the pieces. I wasn’t paying attention, and grabbed the piece that I had just glued up (not the one still needing repair). I took it over to the workbench and had knocked it mostly apart before I noticed that it wasn’t the right piece. I now have two pieces to reassemble. Plus fix the cosmetic damage from breaking apart a properly glued joint.

Sometimes ADHD will bite you. I don’t have any pictures of the project, nor will I share the language I used when I realized what I had done. But it is a good story, and maybe in a couple of days I’ll even find it funny.

Kitchen Island (Finished)

The new kitchen island in place in our kitchen

I have been working on a kitchen island for quite a while now. I finished it the week before the wedding. It replaces a table in the kitchen – and it is nice to have a proper-height work surface in the kitchen. It is also narrower than the old table, which fits the size of the kitchen better.

The base is made from white oak, with pegged mortise and tenon joints. The top is made from hickory.

I’m pretty pleased with the project. The top is maybe 2-inches narrower than I think would look the best. Another project may be to make a new top, or add a strip of cherry or sapele in the middle to widen the top.

The joinery isn’t perfect, but it is better than some of the work I’ve done in the past.  I think a shelf on the bottom would look nice (and be useful), but I forgot to build in a shelf when I constructed the base.

It is nice to finish another project.

Trivets

Completed 7-inch square trivets (two from walnut and one from possible maple)

I decided to do a quick project in the workshop with the boys today (and Will’s friend who was over for the afternoon). I had worked with Will yesterday to mill some (what I think is) maple to make trivets. And today, after I figured how easy they were to make, I pulled a scrap piece of walnut out of the wood pile for an additional three trivets.

I get the idea from one of the many woodworking books I have. The plans called for stopped groves made on a router table. I had a 1/2″ straight bit for the router and I tried to make one following the plans yesterday. The router bit is terrible, and it left the wood in terrible shape (so that one will go to the fire pit).

That of course made me head inside and look for a better router bit online. For $70 I could get a nice solid carbide spiral bit. But then I would have to wait to finish the project. And I would have to spend $70 on a bit to make a handful of simple trivets. Which would change the cost per trivet from nearly free (scrap lumber) to something more than nearly free. Though a nice spiral bit would be good to have in the shop… but I sat on my hands and didn’t get the bit.

I thought about it for a while, and realized, that if I changed the design, that I could easily cut 1/2-inch dadoes using the table saw (they would be through dadoes vice stopped). It took longer to switch blades than to cut all the trivets. The boys and I then sanded them. A 3/8″ piece of wood with adhesive sandpaper clamped in the face vice made quick work of cleaning up the inside of the dadoes. After sanding, the trivets were finished with butcher block finish (wax/oil mixture), and are all set for use.  We made a total of six trivets in all. I think the entire project took less than 2 hours (including the first screw-up with the router bit).  Susanna even used one with dinner tonight.

Overall, I am pretty happy with the project. Next time, I will have to be careful measuring the spacing between the dadoes – on a couple it is obvious that the spacing isn’t even. But for very little effort, and a chance to get the boys in the workshop – it was perfect. Maybe we will make some more sometime – anyone want to buy trivets?

Not a bad quick project for a Saturday afternoon. Of course I had to spend some more time in the shop making wood guns for the boys. Luckily, a couple of months ago I milled up a dozen boards that are the perfect thickness/width for making play swords/guns.

Drill bit upgrade

Carbide Drill Bits from Lee Valley & veritas

I had to drill a bunch of 1/4″ holes for the counterbore pins for the base of the kitchen island. The base is constructed from white oak. I drilled the first few from the 1/4-inch forstner bit I had on hand. The bit quickly heated up and dulled.

I ordered a 1/4″ carbide tipped brad-point drill bit from Lee Valley. The drill bit arrived on Friday, and yesterday I completed drilling the holes out for the counterbore pins. The 1/4″ bit was $19.70+shipping, and was worth every penny. The bit didn’t overheat, and cut amazingly clean holes.

I’ll be adding to my collection of carbide-tipped drill bits as I need them for projects. I don’t want to put out the money for a full set of the bits right now, so I’ll get them one at a time. Also, these are only designed for drilling in wood, and won’t be used for general household use.