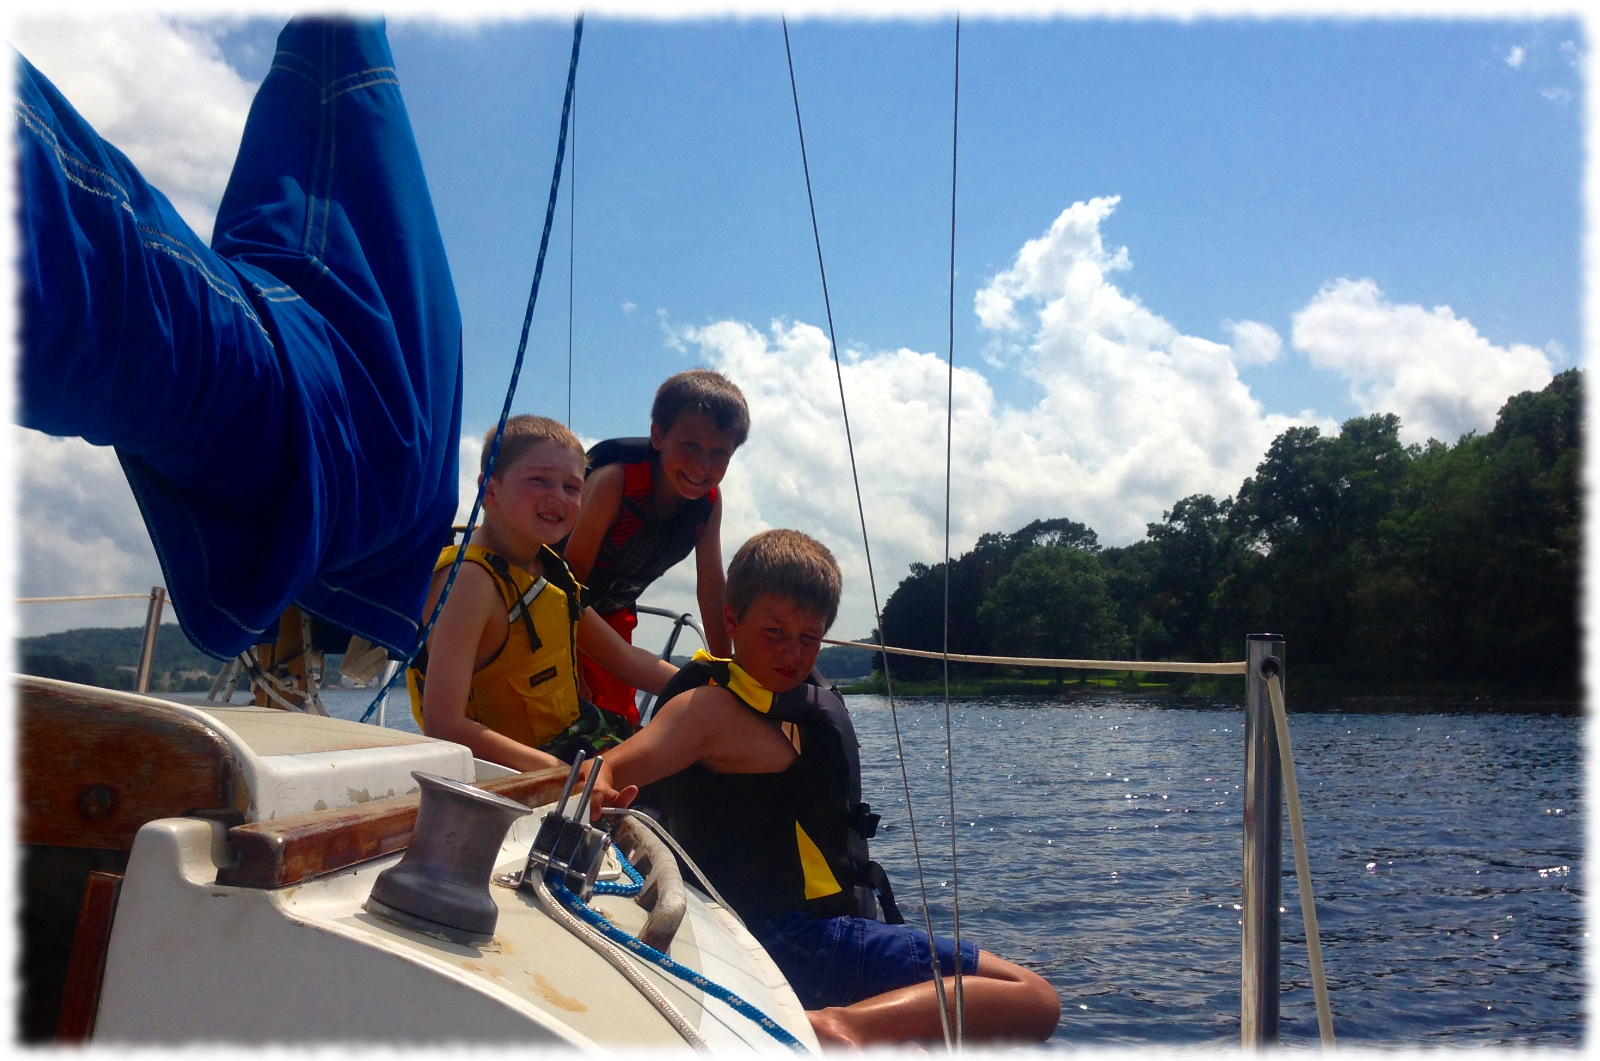
This afternoon I took the boys out sailing for the last time this summer. We only paid for two months at the submarine base marina. With the summer coming to an end in addition to being on furlough, we decided to not extend the time at the base. Susanna and I should get a sail or two in before we have to take the boat out of the water, but I don’t think there will be time for the boys to go sailing until next spring.
Today we motored south of the base and put up the main north of the bridges. A gentle breeze pushed us downriver. Before we passed under the bridges, the boys and I hanked on the jib. As we went south the breeze picked up. In New London harbor, the gusts would push us over at least 20-degrees, but the wind wasn’t constant. It would pick up and die down. It couldn’t pick a direction either. The gusts and waves made Ben a bit nervous, so we eventually dropped the jib.
We ran to pine island and turned around just short of the harbor entrance. Once we turned back into the river we beat into the wind upriver for a bit, finally grew bored, and started the outboard. I think our timing was pretty good. A storm passed south of us as we drove up towards the base – we only caught a little of the rain. The bridges disappeared in the haze of the storm almost entirely as we motored past the base. We reached our slip in sunlight as the storm headed east.
I spent some time last night looking back at my old blog posts. Reviewing posts from 2 and 3 years ago. What a fright. I hate reading my own words. In addition to the obvious fact that I frequently don’t proofread my posts, it is clear that I wasn’t too comfortable writing. Hopefully over time my writing will have improved. Or at least not gotten much worse.
I read a decent amount of blogs. Okay, I don’t actually read them all always. I guess I would say that I have a bunch of blogs in my blog reader, and at times I read some of them. After reviewing my old posts, I started wondering how better writers go about writing in their blogs. What are the mechanics of writing a blog entry? I see writers that were professional journalists write several well written articles a day. And, yes, I understand that it was/is their job to write. But what are the mechanics. Do they just sit down and write? Do they make an outline and then write? Do they write and then rewrite?
This has been a busy week. This whole summer has been busy. Not crazy and stressful like last summer. But busy. I kind of feel that the summer is a bit like a water slide. I jump on at the beginning of the summer and it is a rush to the end of the slide. I have loved each week this summer, but I am also looking forward to the fall.
Susanna and I decided that, for the most part, we would not put the boys in summer camp the weeks they are here. Their last week of the summer here is the exception with Ben going to basketball camp and Will going to Project Oceanology. That has meant three weeks of family fun; although the first week was wedding week and not just family fun (but it was lots of fun).
This past week has been no exception. The boys arrived Monday morning. It takes the boys a couple of hours to land after a transition. But in the afternoon I took the boys and Will’s friend sailing. Susanna worked that night. Tuesday was no less busy. I worked and Susanna hung out with the boys. We met for lunch and she took them to the aquarium for the afternoon.
Wednesday was my furlough day. We had planned on going to Six Flags, but Ben was feeling sick. I took Will and his friend, Tyler, to the north lake and spent the afternoon watching the boys play in the water. Thursday I again worked while Susanna hung out with the boys. We met for lunch and she took the boys to a movie in the afternoon. Furlough Friday we went to Six Flags to make up for Wednesday.
Yesterday the boys had friends over (Will had Tyler and Shane; Ben had Max). I tried to get some projects done in the workshop, but mostly wound up making swords and daggers out of wood for the boys. With five boys over it is a continuous line into the workshop. Each boy constantly wanting a better sword, or bow, or dagger made from wood. But I wouldn’t trade it for an empty project day. The weeks where the boys aren’t here are too quiet and I don’t get much more done around the house.
Today we are finishing up the week with a quiet morning. The boys both wrote about their weeks on their blogs and are unwinding this morning. Later we will clean the house and maybe go sailing this afternoon. Tomorrow I head back to work for a full work week.
Now I should go proofread my writing before posting to the blog.
I took my next two furlough days this Wednesday and Friday. We had initially planned to go to Six Flags on Wednesday. However, in the morning, Ben wasn’t feeling up for a big trip out (he was fighting a cold). Instead we took an easy morning. In the afternoon, Will and I picked up his friend, Tyler, and headed to the base to go swimming at North Lake for a couple of hours. Ben stayed home with Susanna and rested.
Yesterday we headed to Six Flags. It wasn’t as hot as it was earlier this summer, but it was warm enough to support going to the water park for a couple of hours. We had a good day at the park, and headed home in time to catch dinner on the drive home.
Now I’m almost half-way done with the furlough. I think after next week, I switch over to taking furlough days each Friday until completed. There are rumors of the number of days being shortened to 6 or 8 total days. But of course those are just rumors.
I finally finished Moon Wind at Large, Sailing Hither and Yon by Matthew Goldman aka Constant Waterman (Breakaway Books, Halcotssvile, New York, 2012). I have been spending too many evenings watching TV or playing on my iPhone and not enough time reading.
It is way to easy to put the book down and pick up something that will deliver entertainment to me. The iPhone or TV hands me the full experience. I don’t have to work for it. A good book (and even a not so good book) makes you work for the experience.
I have started reading “Fishing in Utopia:Sweden and the Future that Disappeared” by Andrew Brown (Granta Books, London, England). It was a wedding gift from Susanna’s friends, Anni and Fia. Digging though the bookshelves I have found a couple of other books that I haven’t finished, so I should be good for a couple of more weeks. Assuming I can stay away from the electronics.
Of course, I’m playing on my computer writing in this blog instead of reading right now. But in being human, a little hypocrisy is expected; but hopefully not too much tonight, so I’ll finish up this post and turn back into my reading.
I started blogs for Will and Ben 18-months ago. They are a scrapbook of sorts for the boys, but using their own words. I plan on having the blogs printed into a book every year that they write in them (I already printed them books for last year). Currently the blogs are private and can only be viewed by registered guests. Of course it is more fun to play than to write in their blogs, but I have worked it out with them that they write a couple of days a week when they are at my house. Even Will has grudgingly admitted that it isn’t too bad to write, and it is cool to go back and look at what he has written. So an update on the blogs:
Will has 166 posts over 18 months, he wrote all but a handful of them. He has written 5,656 words with an average of 35 words per post.
Ben has 129 posts over the 18 months, and he also wrote all but a handful of them. He has written 4,752 words with an average of 38 words per post.
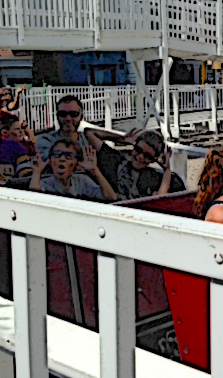
Will, Ben and Tyler enjoying the ride up the Thames
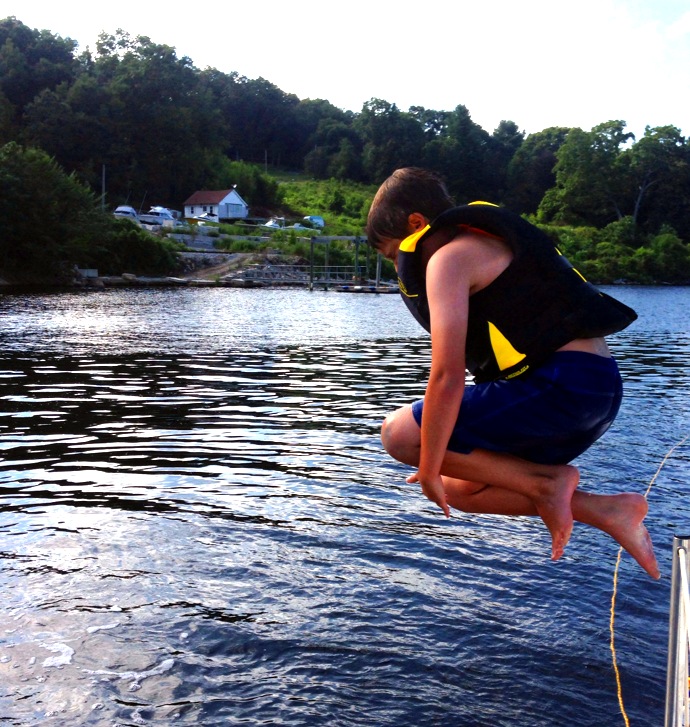
This afternoon I took Will, Ben and Will’s friend, Tyler, out on the boat. They wanted to go swimming up river. The wind was from the south, so we hanked one of the headsails and rode the breeze upriver to almost the highway 2A bridge over the Thames. We then dropped the sail and motored back down to our previous swimming spot. We dropped anchor in about 12 feet of water and spent the afternoon playing in the water. We headed home around 5pm and got home by 6.
I tried to get some pictures of the boys jumping into the water:
Transition days are difficult. Difficult for Susanna and me; we have to get re-adjusted to either having the boys or having an empty house. But of course, most difficult for the boys; they have to adjust from living at one house to another. It is tough to watch them need time to adjust. It is difficult for the dogs. Okay, maybe not for the dogs; just extra exciting when the full pack is here, and normal exciting when not. I’m pretty sure nothing in life is too difficult for the dogs.
Today is no different. The boys take time to adjust. This morning they took time to write about their week at their grandmother’s house and are now taking time to relax on their electronics. But not for too long. It isn’t raining yet, so will be good to get outside and get some energy out.
I’m sure everyone works transitions differently. It is one of the stresses of a divorce. But one has to hope that two houses where the boys can find peace is better than only one house where there is no peace.
This week should be fun. So far the summer has been going very well. We will try to get some sailing in. Maybe visit Six Flags. The boys can have friends over. Susanna and I are only working two days each this week, so we should have lots of time to do family things. Maybe I can even convince the boys to help me weed the flower bed. But probably not.
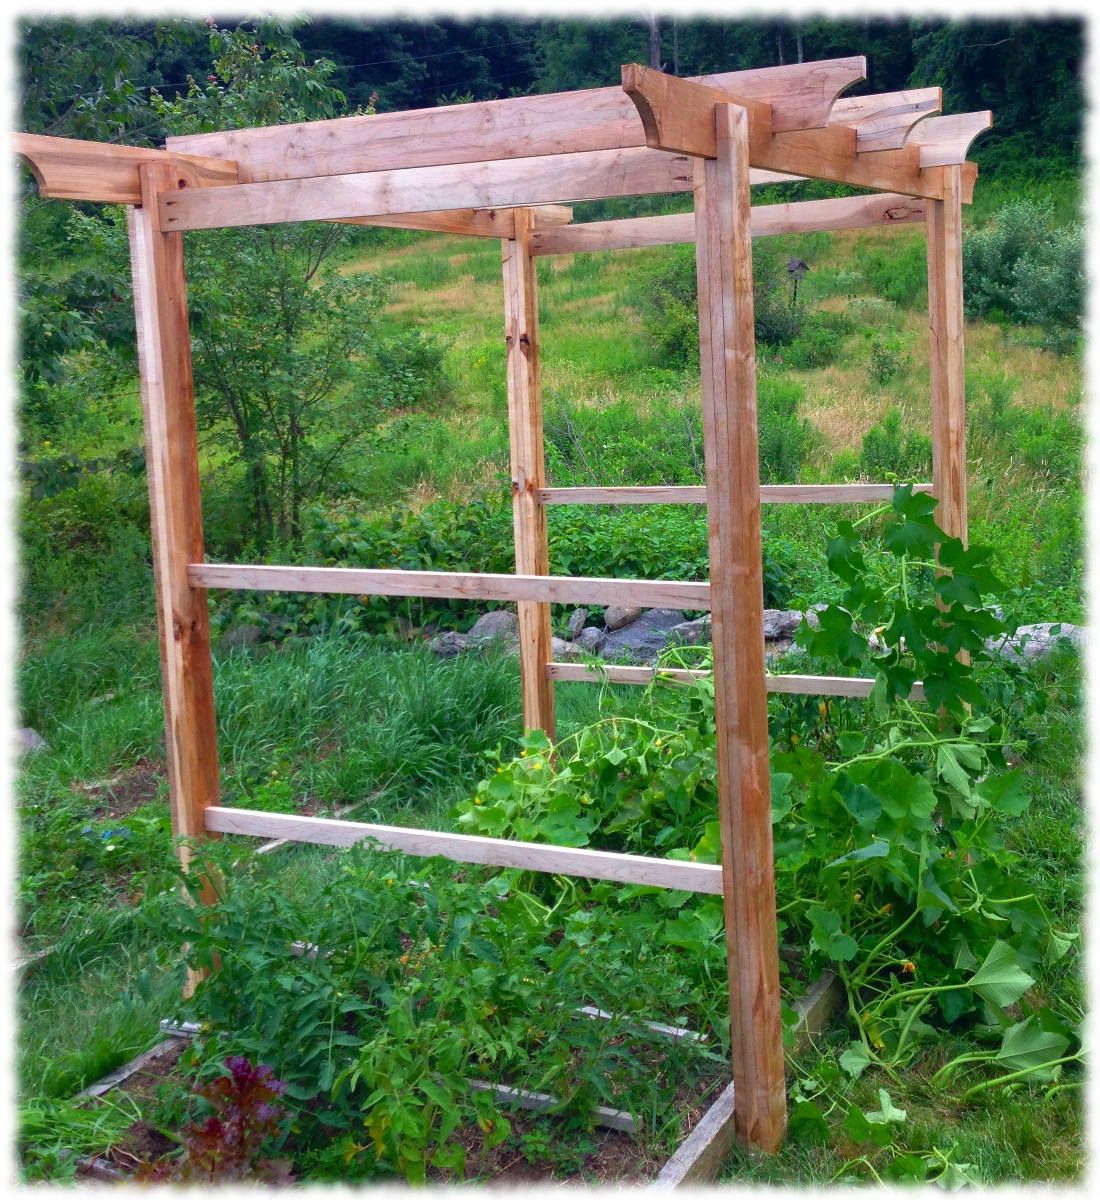
Garden Trellis Completed – just waiting for netting to tie up plants
Yesterday was my day to take off and enjoy sailing. Today was a day to get work done around the house. Susanna spent the day rearranging the library, and I took time to finish building a trellis for the vegetable garden.
I had glued up most of the legs over the past week. Today I milled the remaining lumber and assembled the trellis.
The structure is made from 1″ thick maple. Not because maple is good for exterior projects – it is terrible. But I have a ton of maple under the workshop that I had purchased to make a floor for the wedding reception. It was pennies per board-foot and isn’t worth saving for furniture building. But it is perfect for outdoor projects (and burning in the fire-pit).
The legs are glued up from three pieces of 4-inch wide boards. I only milled the boards as thin as needed to clean them up. I didn’t bother jointing anything – it is a construction project to sit out in the garden. Anyway, trying to joint a 8-foot long board sucks, and wasn’t worth the effort. This wasn’t fine furniture.
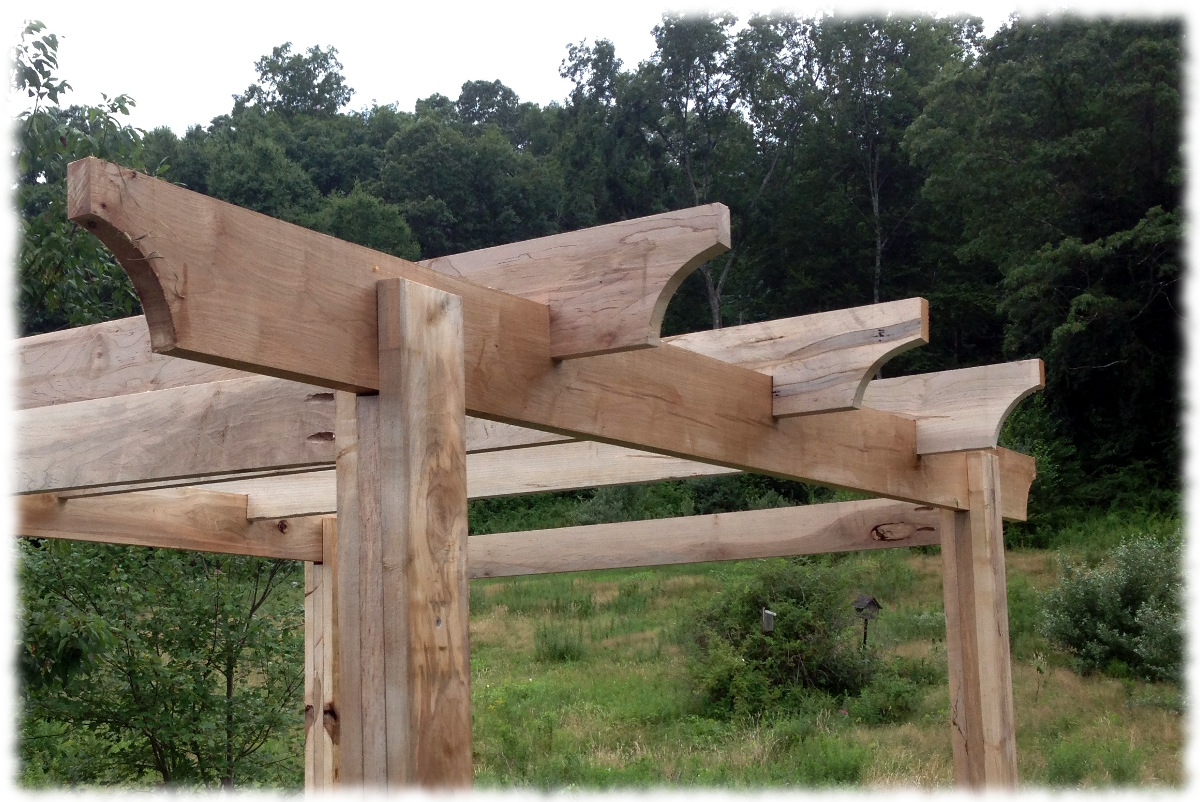
Trellis detail.
The top stretcher is connected to the legs by a bridle joint. I simply cut the center of the three pieces for the leg shorter than the two outside pieces – leaving room for the long stretchers to slide into when the legs were glued up. The connectors between the sides are attached with pocket-hole screws. The three top pieces were assembled with a slot cut in them so they just slide onto the long stretchers and can be moved.
Overall this is a quick weekend project if the lumber doesn’t need to be milled. Actually, with dimensional lumber, this is a morning project. The only trick would be cutting the bridle joints at the tops of the legs.
I have ordered netting to hang from the three cross beams. Hopefully the netting will arrive tomorrow so I can finish tying up the plants in the garden before the summer squash take over the tomatoes.
There wasn’t a lot of design thought that went into this project. The dimensions were based on what I had for lumber. I think the top stretchers could be longer, but I couldn’t rip a board that is longer than 8-feet long on the table saw without moving the saw. The wood is still a little green, so I’ll let it dry out in the sun for a week or two before I put a finish on it. The question is, should it be painted to match the house, or just put a clear coat on the wood?
It is nice to finish projects. Of course, it is still easier to start them than finish them. But I am thankful to have a partner that encourages me to finish things. It is amazing how much Susanna and I have been able to get done with the house over the past two years.
And of course, I had Tucker to keep me company outside all day:
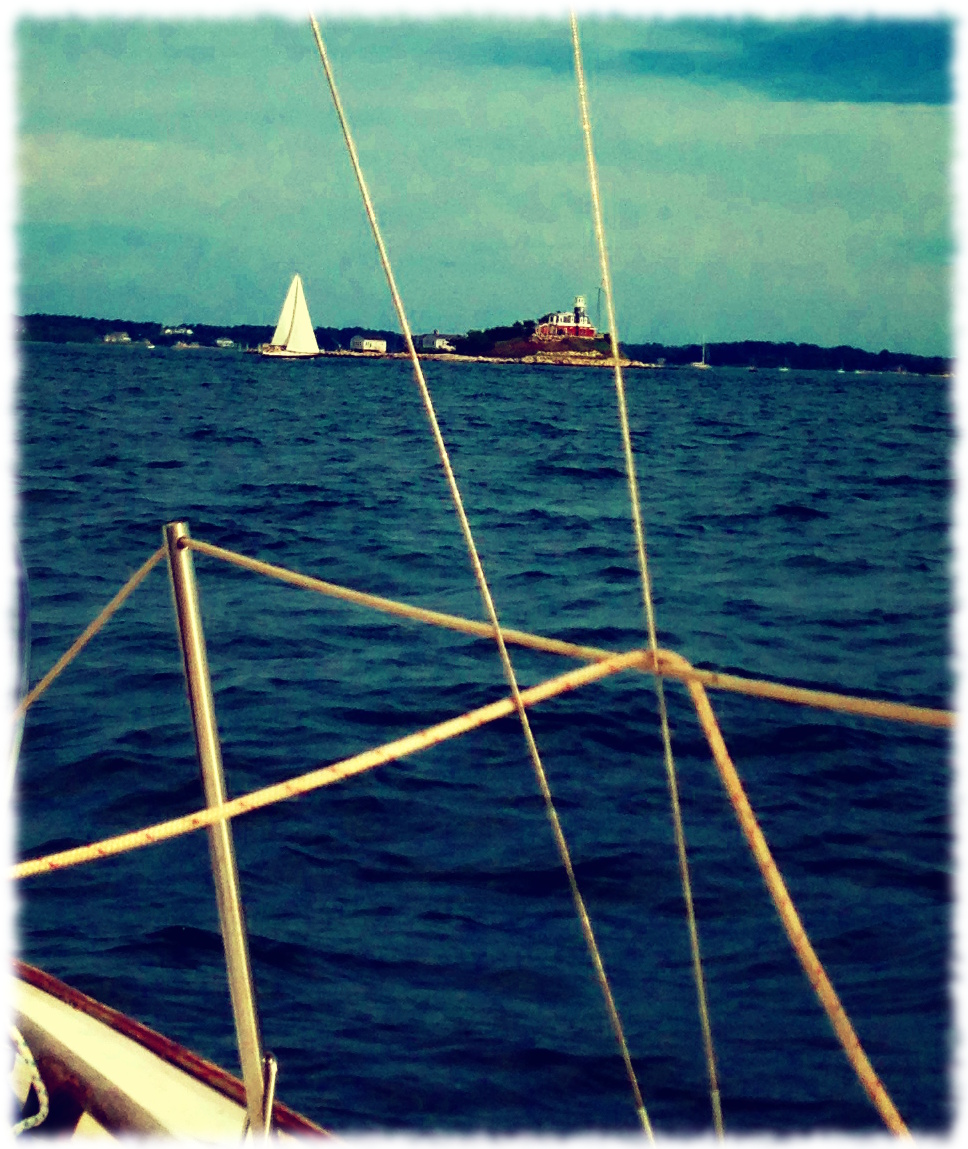
Today was a perfect day to sail. Calm seas with 10-15 knot winds from the south. Not too hot. Not too cold. However, Susanna had to work, so it wasn’t totally perfect – I had to sail alone.
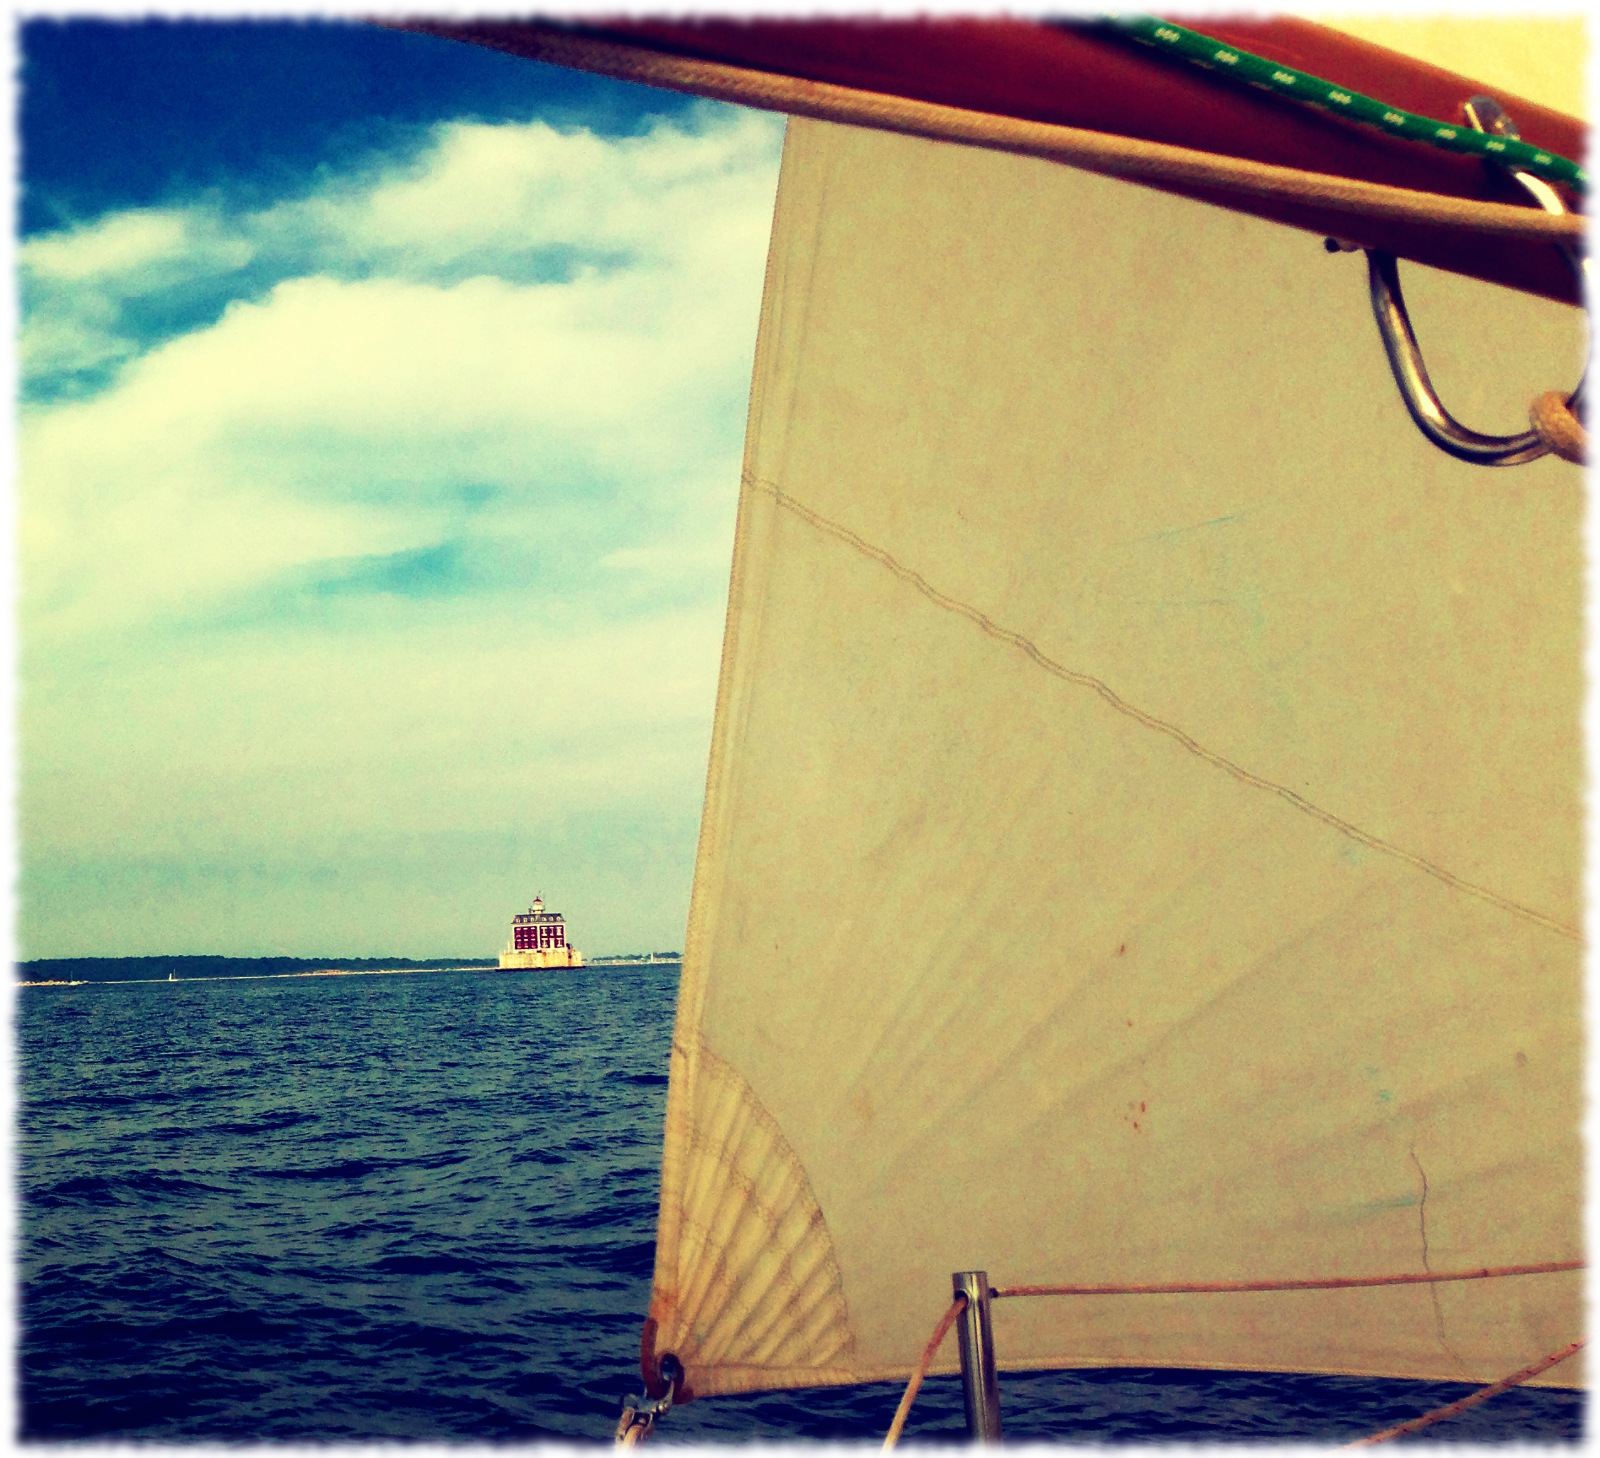
I motored out of the marina and down river against the wind. At least I could ride the ebb out of the river and into Fishers Island Sound. Just south of the bridges I put up the mainsail. I tacked my way through New London Harbor. The wind was reasonable and steady, but not strong enough to push us along under main alone. Around Eastern Point I climbed forward and hanked the jib on, trying to not get tangled up in the sail or knocked overboard. I got the sail mostly on right. I beat my way out past New London Ledge light and caught a left into Fishers Island Sound.
The wind remained steady from the south and picked up a little bit. I picked up speed on a close reach towards Fishers Island. We were making over 5 knots (over the ground), but I think we had a little push from the ebb tide to help. I pointed towards North Dumpling Island and held the course until about a half of a mile short of the island. I turned around just short of the New York state line and cruised back on the Connecticut side of Seaflower Reef. I made the turn around Pine Island and Black Rock back into the Thames before the wind mostly died.
With sunset ninety minutes away, a weak wind, and fighting the end of the ebb tide, I decided it was easiest to just motor up the river and back to the marina.
Overall today I spent 6 hours out on the water and maybe 4 of them under sail. The trip to North Dumpling is 18 miles as the power boat goes. Needing to beat upwind added several miles to my trip. I only bumped into one buoy, and only added a small tear to the mainsail. I was able to get the jib on mostly right and stay onboard the boat the entire trip. Overall, it was a successful outing.
I also answered one of Will’s questions this trip. He had been asking if there were jellyfish in Long Island Sound. I sailed through miles of jellyfish in the sound.
It is difficult to be forced to take extra time off in the summer. But I am suffering through the days off this week by spending time with the family. Yes, life is good. In reality, while it may suck to lose the money, at least they didn’t furlough us in the winter.
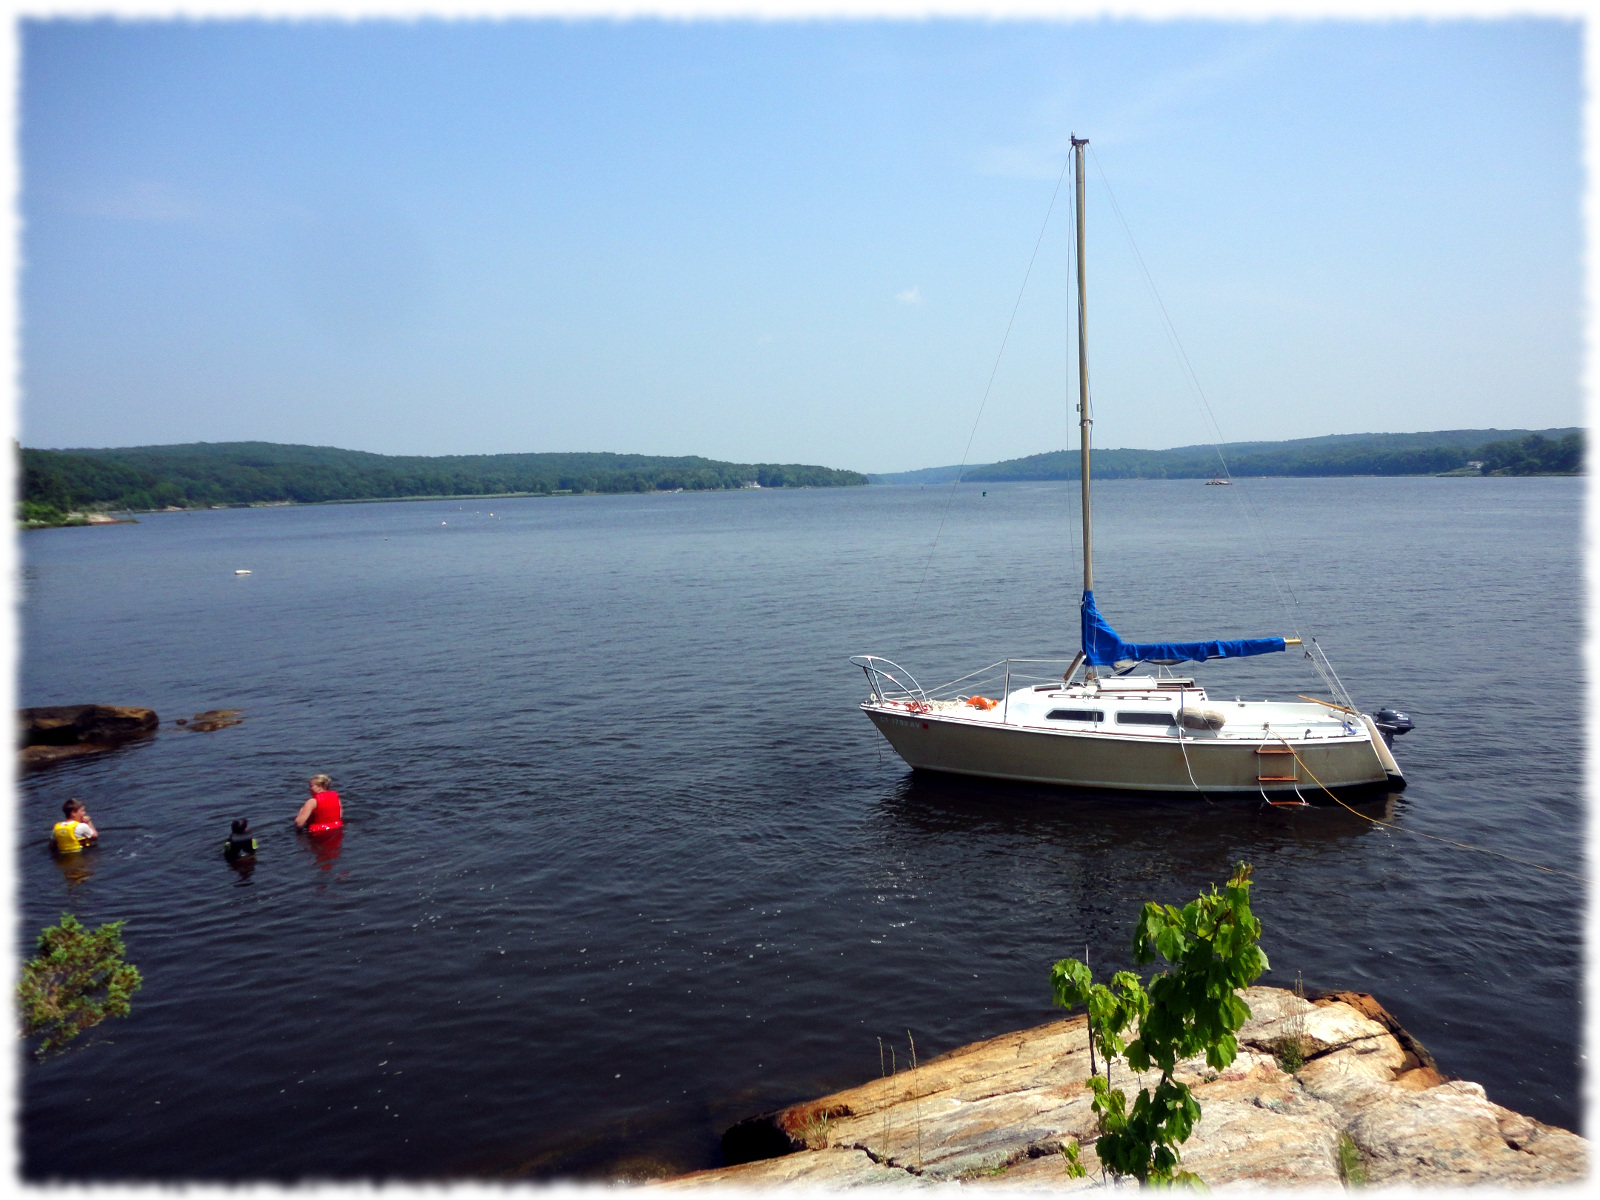
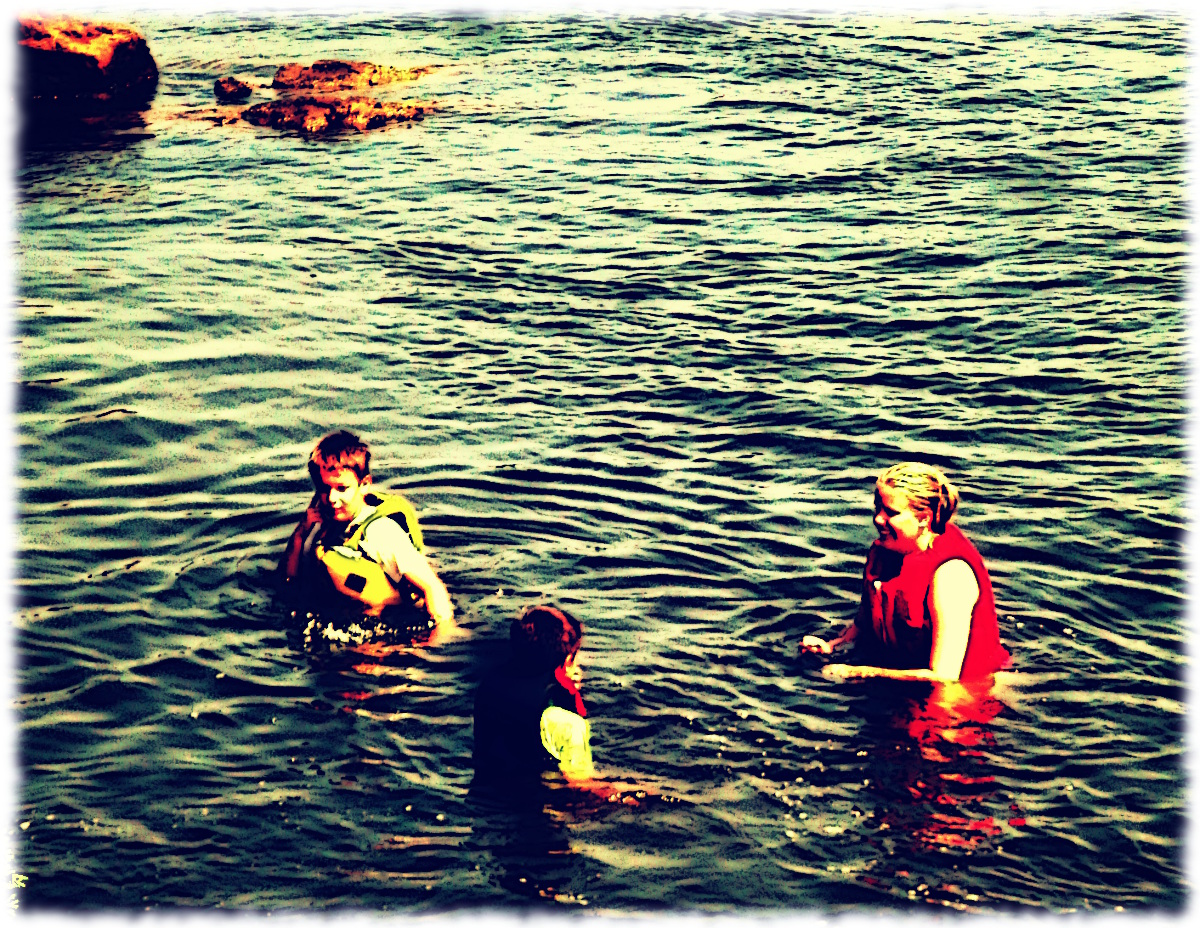
The view of the sailboat at anchor from our picnic spot (with Susanna and the boys swimming nearby)
Today we had originally planned a Six Flags day. However, the forecast heat helped us decide that a day on the water was better than a day waiting in line to get in the water. So, this morning, we headed down to the boat picking up lunch at Subway on the way.
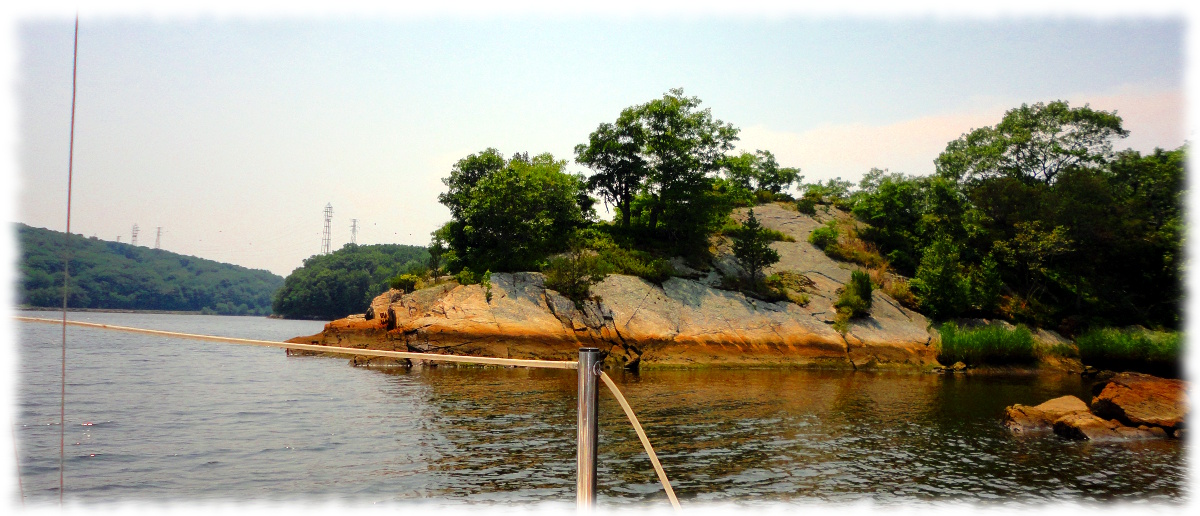
We again motored upstream. The wind is all downstream in the sound, but the boys prefer to swim in the river. And the trip downstream is much longer. We went up farther than we had on the past two occasions. Past Allyn Point in Gales Ferry on our right. On the way past Allyn Point we passed an outcrop of rock (across the river from the factory) that looked promising to stop for a swim and lunch. The chart showed a shipwreck not too far north of the outcrop, and we decided to check out he wreck first. The boys thought it was cool to find an airplane wreck in the woods behind our house last summer, and find a shipwreck this summer.
We did find the wreck. There isn’t much left of it, though we came a little closer to some of the underwater portions of the boat than I had hoped (but we didn’t hit it – so all is well). After the sightseeing we headed south to our anchorage. The river is warm and the current was pretty weak. The heat made it a perfect day for swimming. It is hot enough to be comfortable in and out of the water.
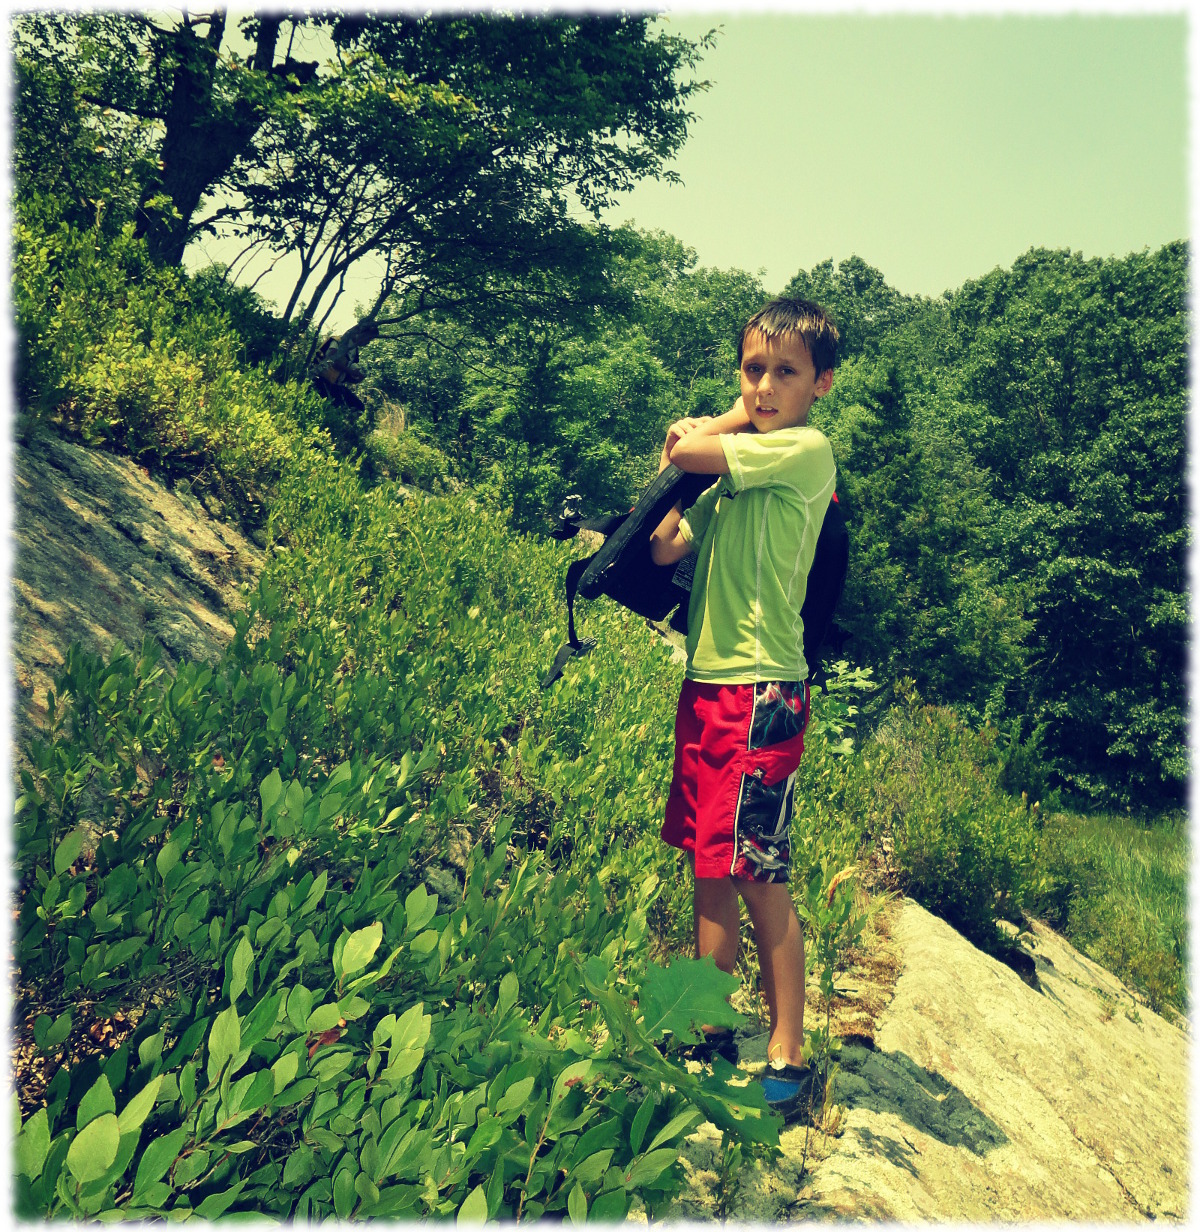
Ben exploring the rock outcrop
Susanna swam (or rather walked, the water was shallow) the cooler from the boat to the shore,and the boys explored the rock outcrop. We enjoyed lunch in the shade of some of the trees, and spent more time playing in the water after lunch.
We pulled up anchor and headed back mid-afternoon, and were home by 3pm. It was the best day out on the water to date.
Upon returning to the marina, we found that a family of swans was occupying our slip. The approach to the slip is slow, and they had plenty of time to swim out of the way, but they were not happy. It was a whole family of birds (parents and young swans), and the bigger birds didn’t like us disturbing their swim. Swans are mean birds.
I was able to improve the swim ladder by lowering it a bit, but it is still difficult for the boys to climb back in the boat (but at least now they both can climb in without assistance). I think this weekend I will head over to Defender and look for a better boarding ladder. If we are going to spend this much time swimming, it will be well worth getting a good ladder.