My goal is to replace both windows and the door in the workshop this summer. I have a door in the garage that is ready for me to install and have been looking for windows. I was able to find a used replacement window for the east-facing window, but couldn’t find a used one for the north-facing window. In addition, I had the window a/c unit in the north-facing window. It is a heavy unit, and I haven’t been taking it out in the winter, but that means lots of air leaks around the window.
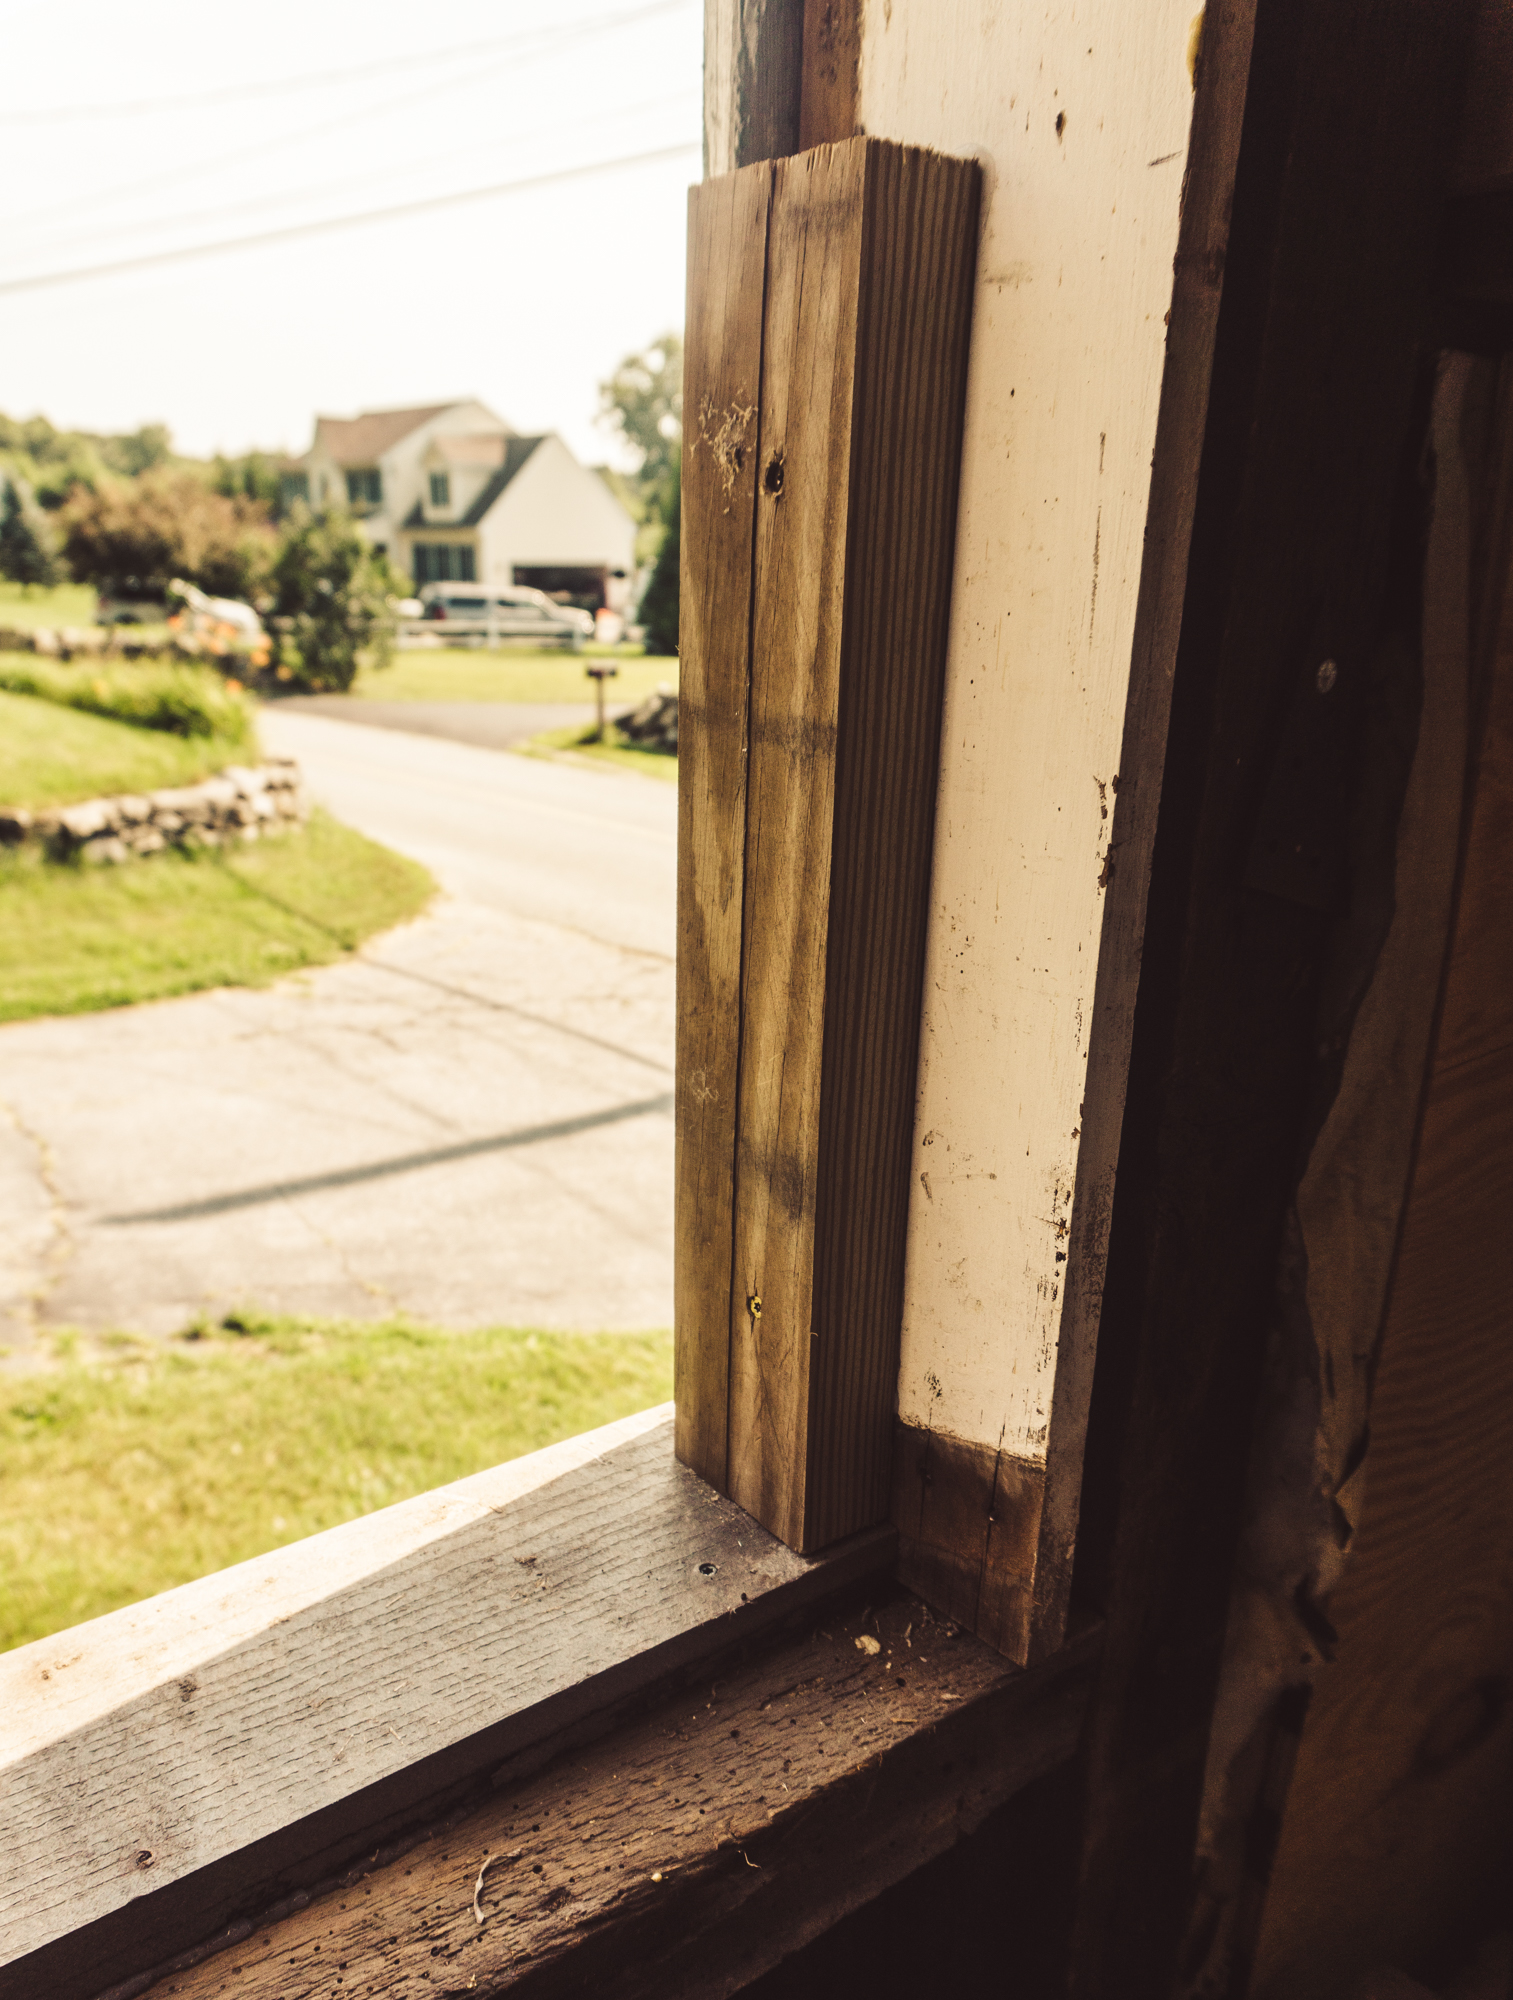
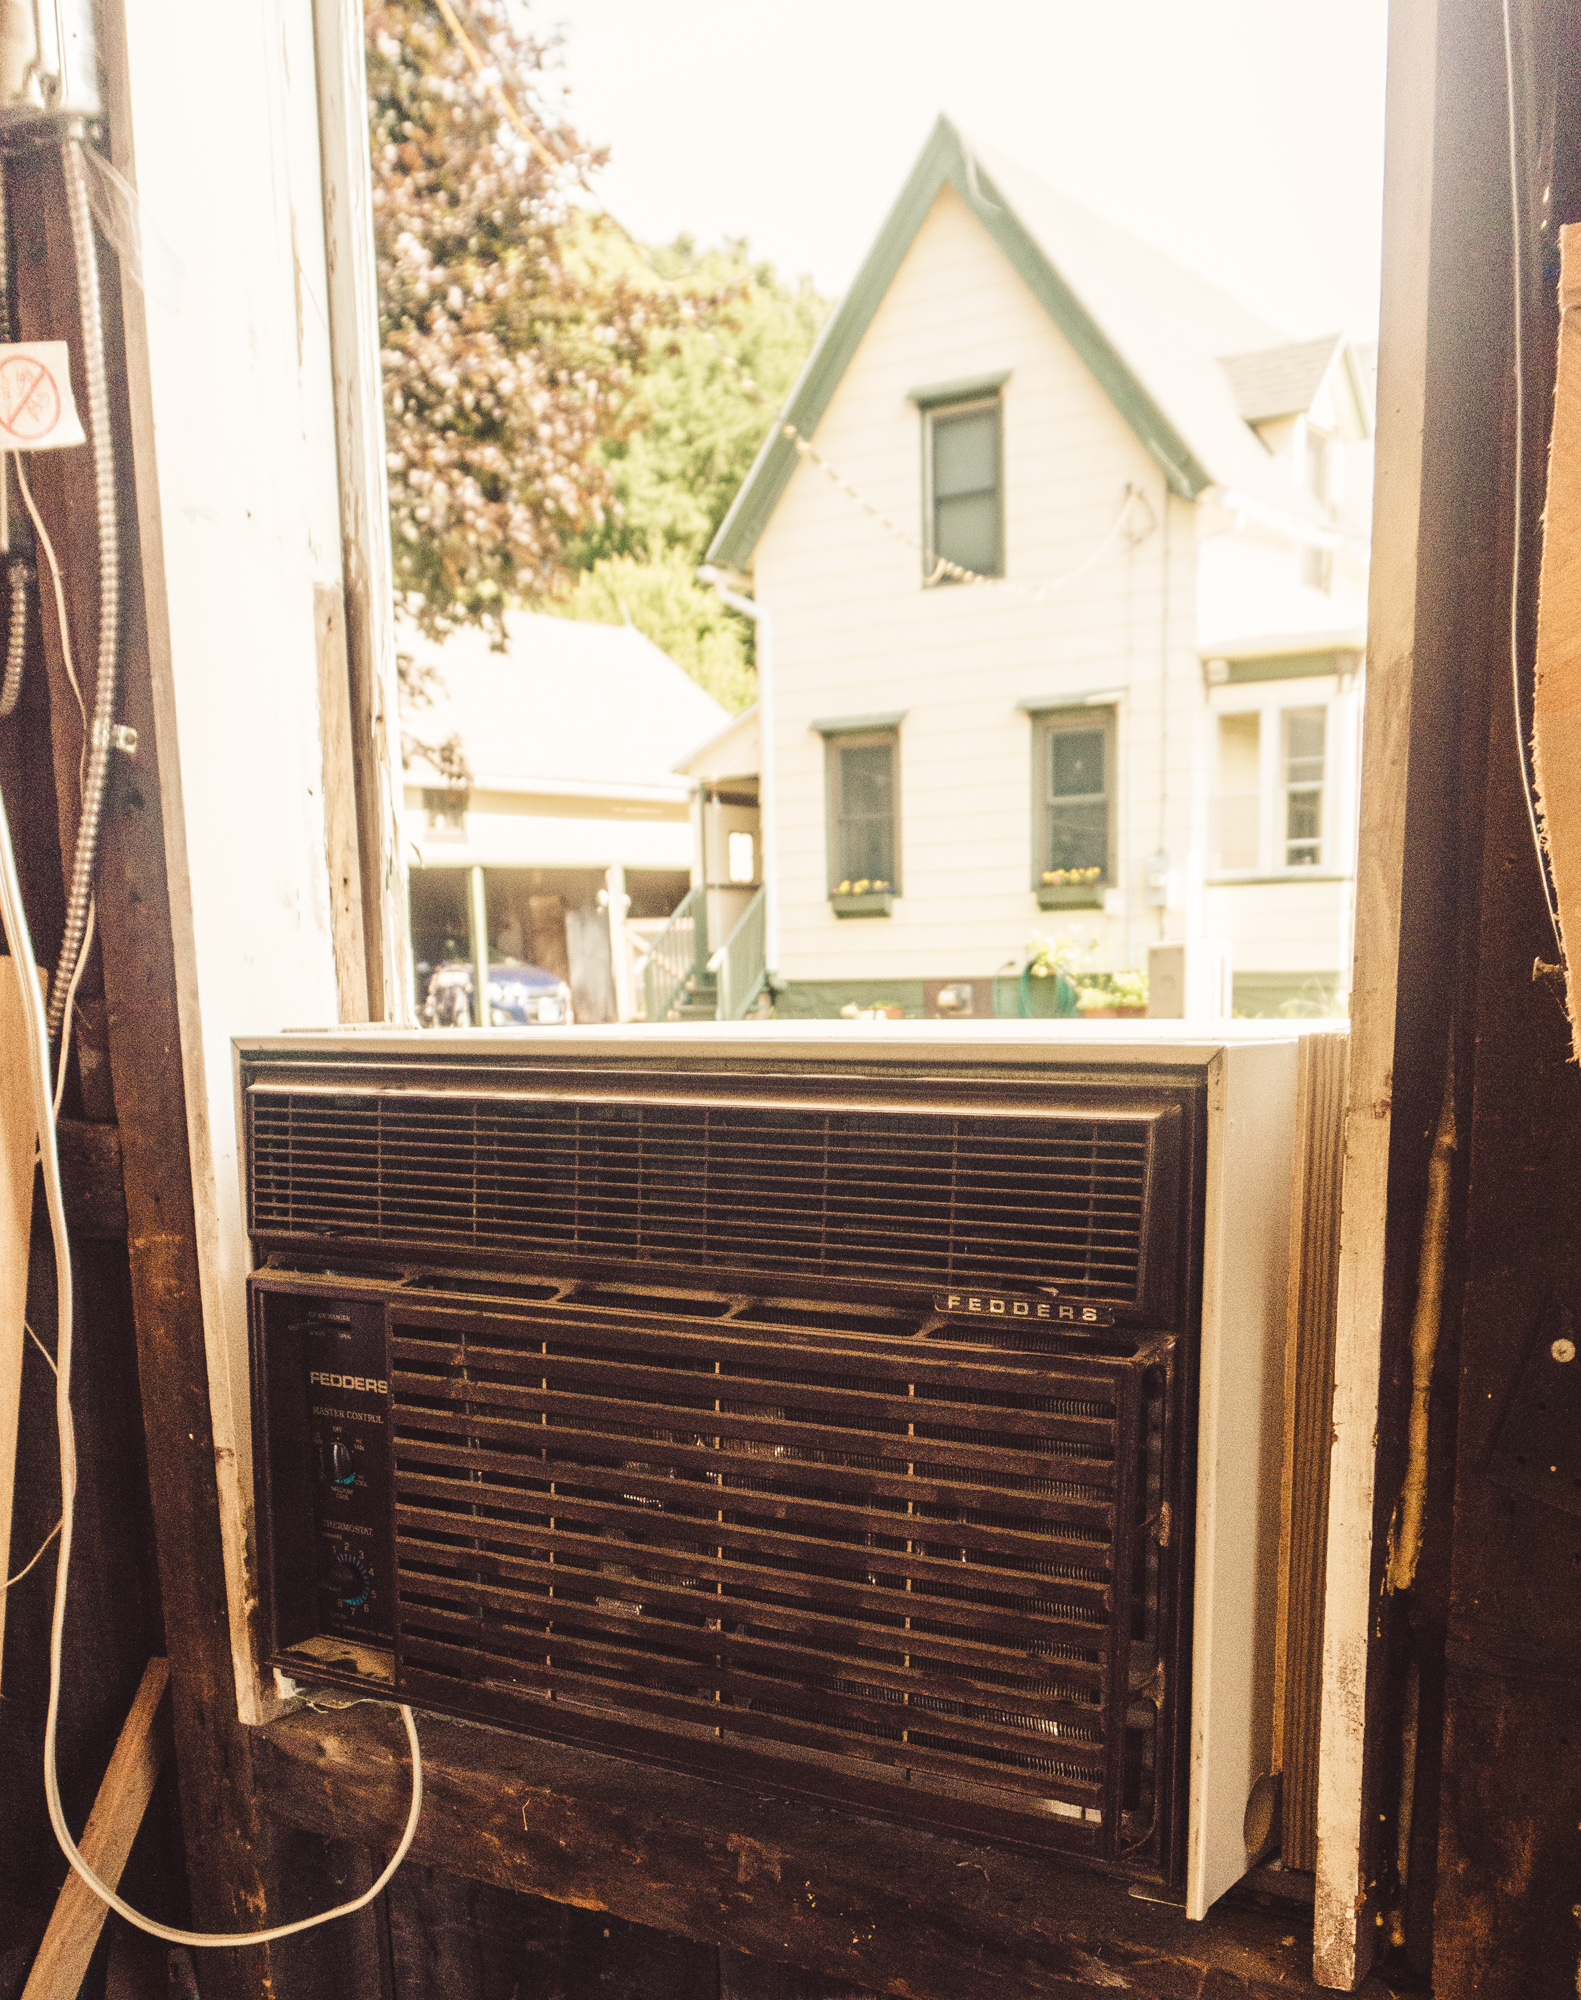
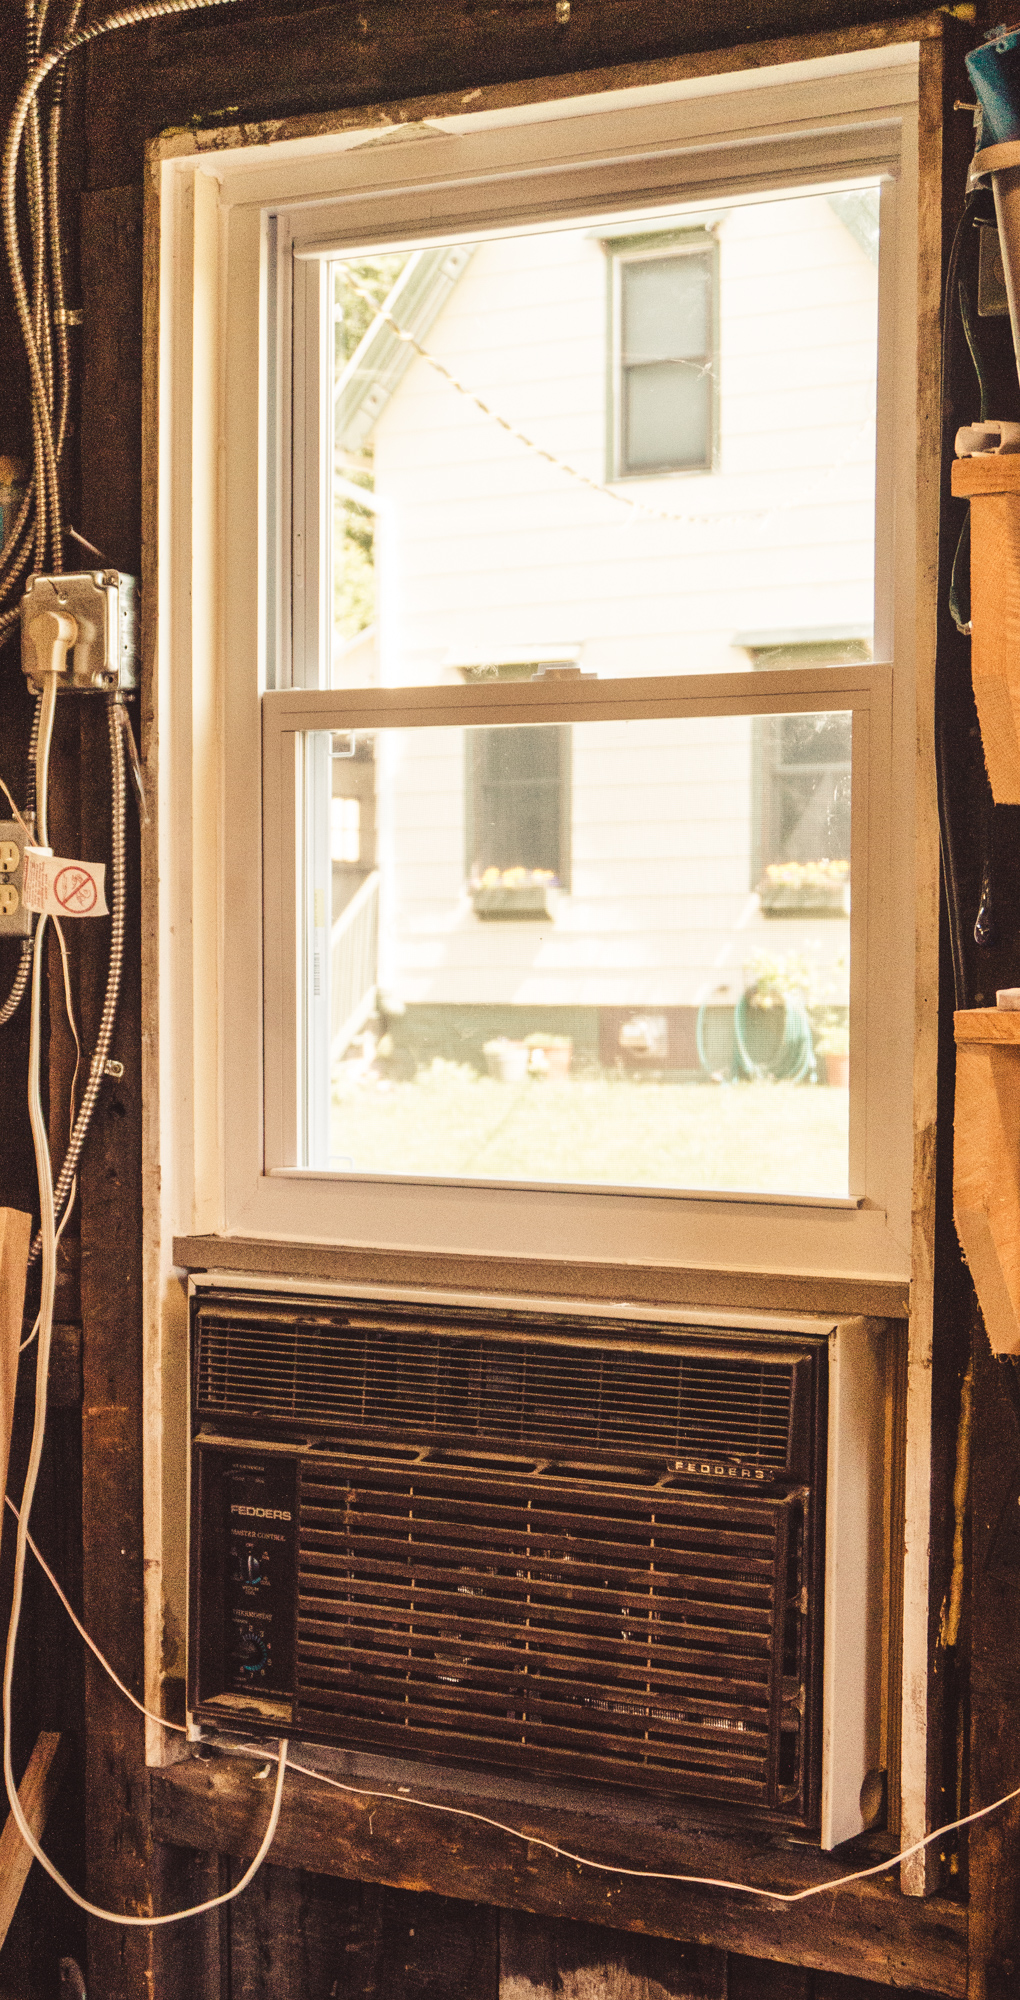
I decided to permanently install the a/c unit so I could insulate around it properly, and add a smaller window on top of the unit. I picked up a bottom-line replacement window (it is a workshop) and started working before it was too hot outside to work. The window sill was replaced with a piece of reclaimed decking material. All of the other wood used to frame the window was either reclaimed or pulled from the trash bin.
Window frame with new sill and spacers for the air conditioner. Reclaimed decking for the sill, and pressure treated lumber reclaimed from the same deck for the spacers.A/C unit installed. Preparing to install the replacement window. A piece of reclaimed decking was put on top of the unit to give the window a place to land.Project completed! Just in time for the heat. I still have to add insulation around the A/C unit – but good enough for now.
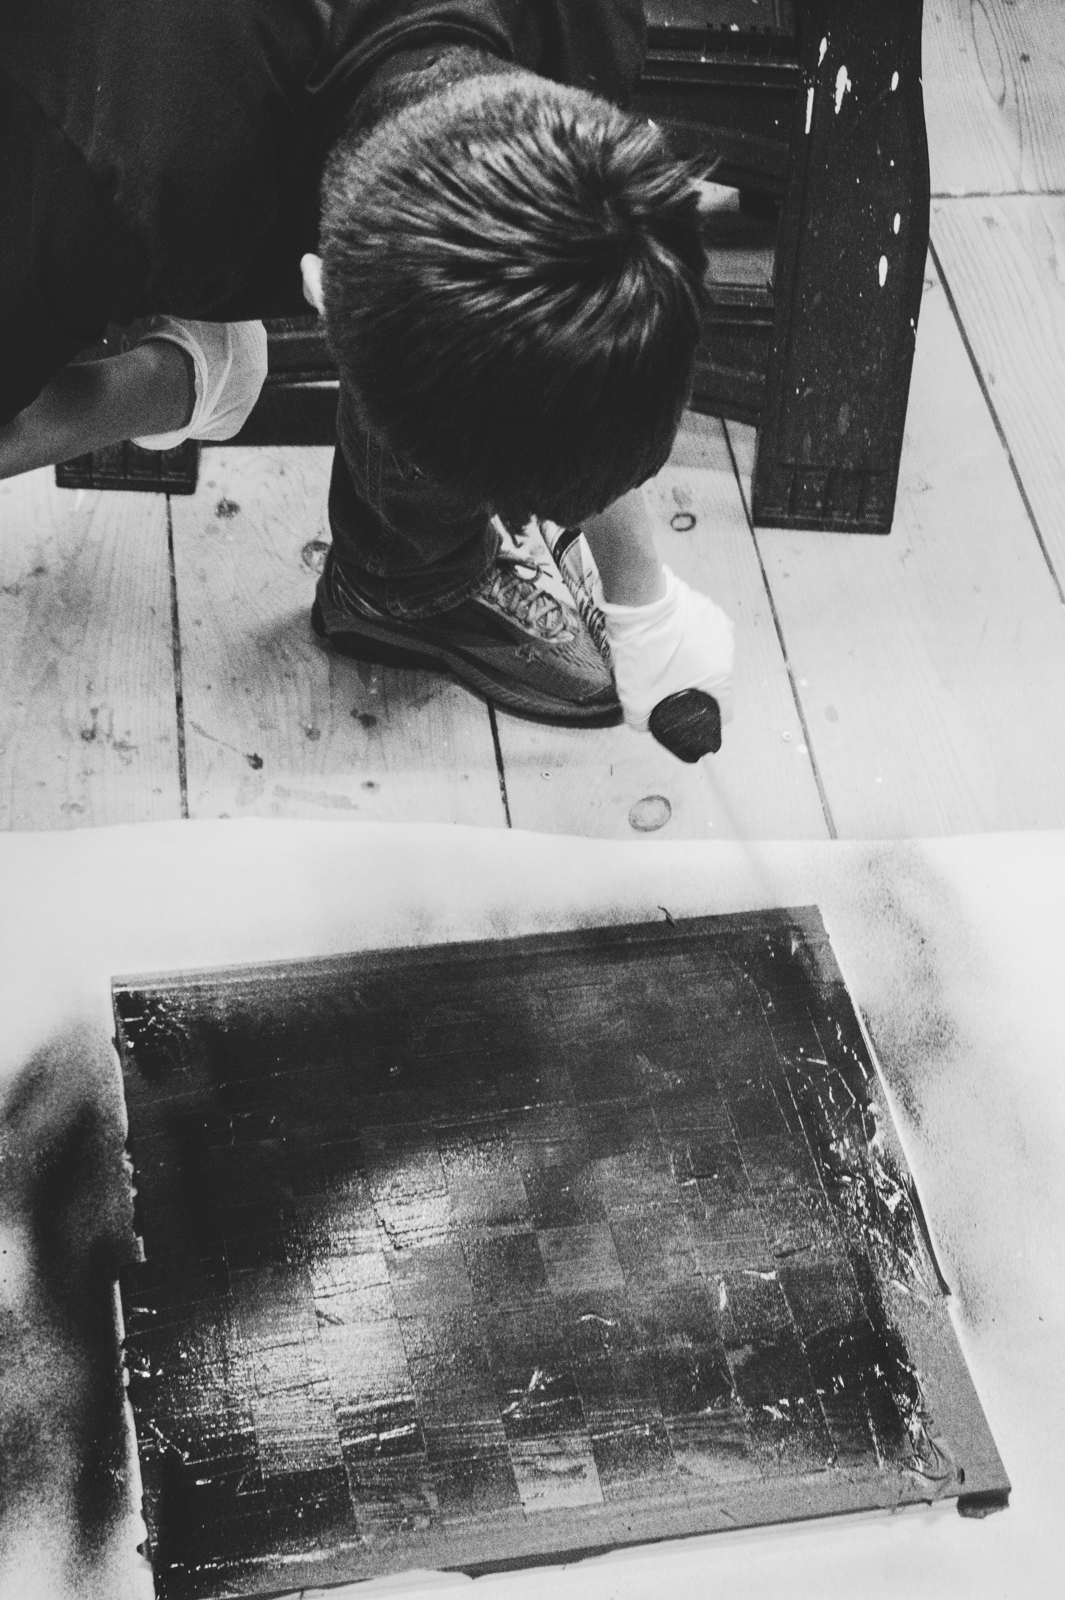
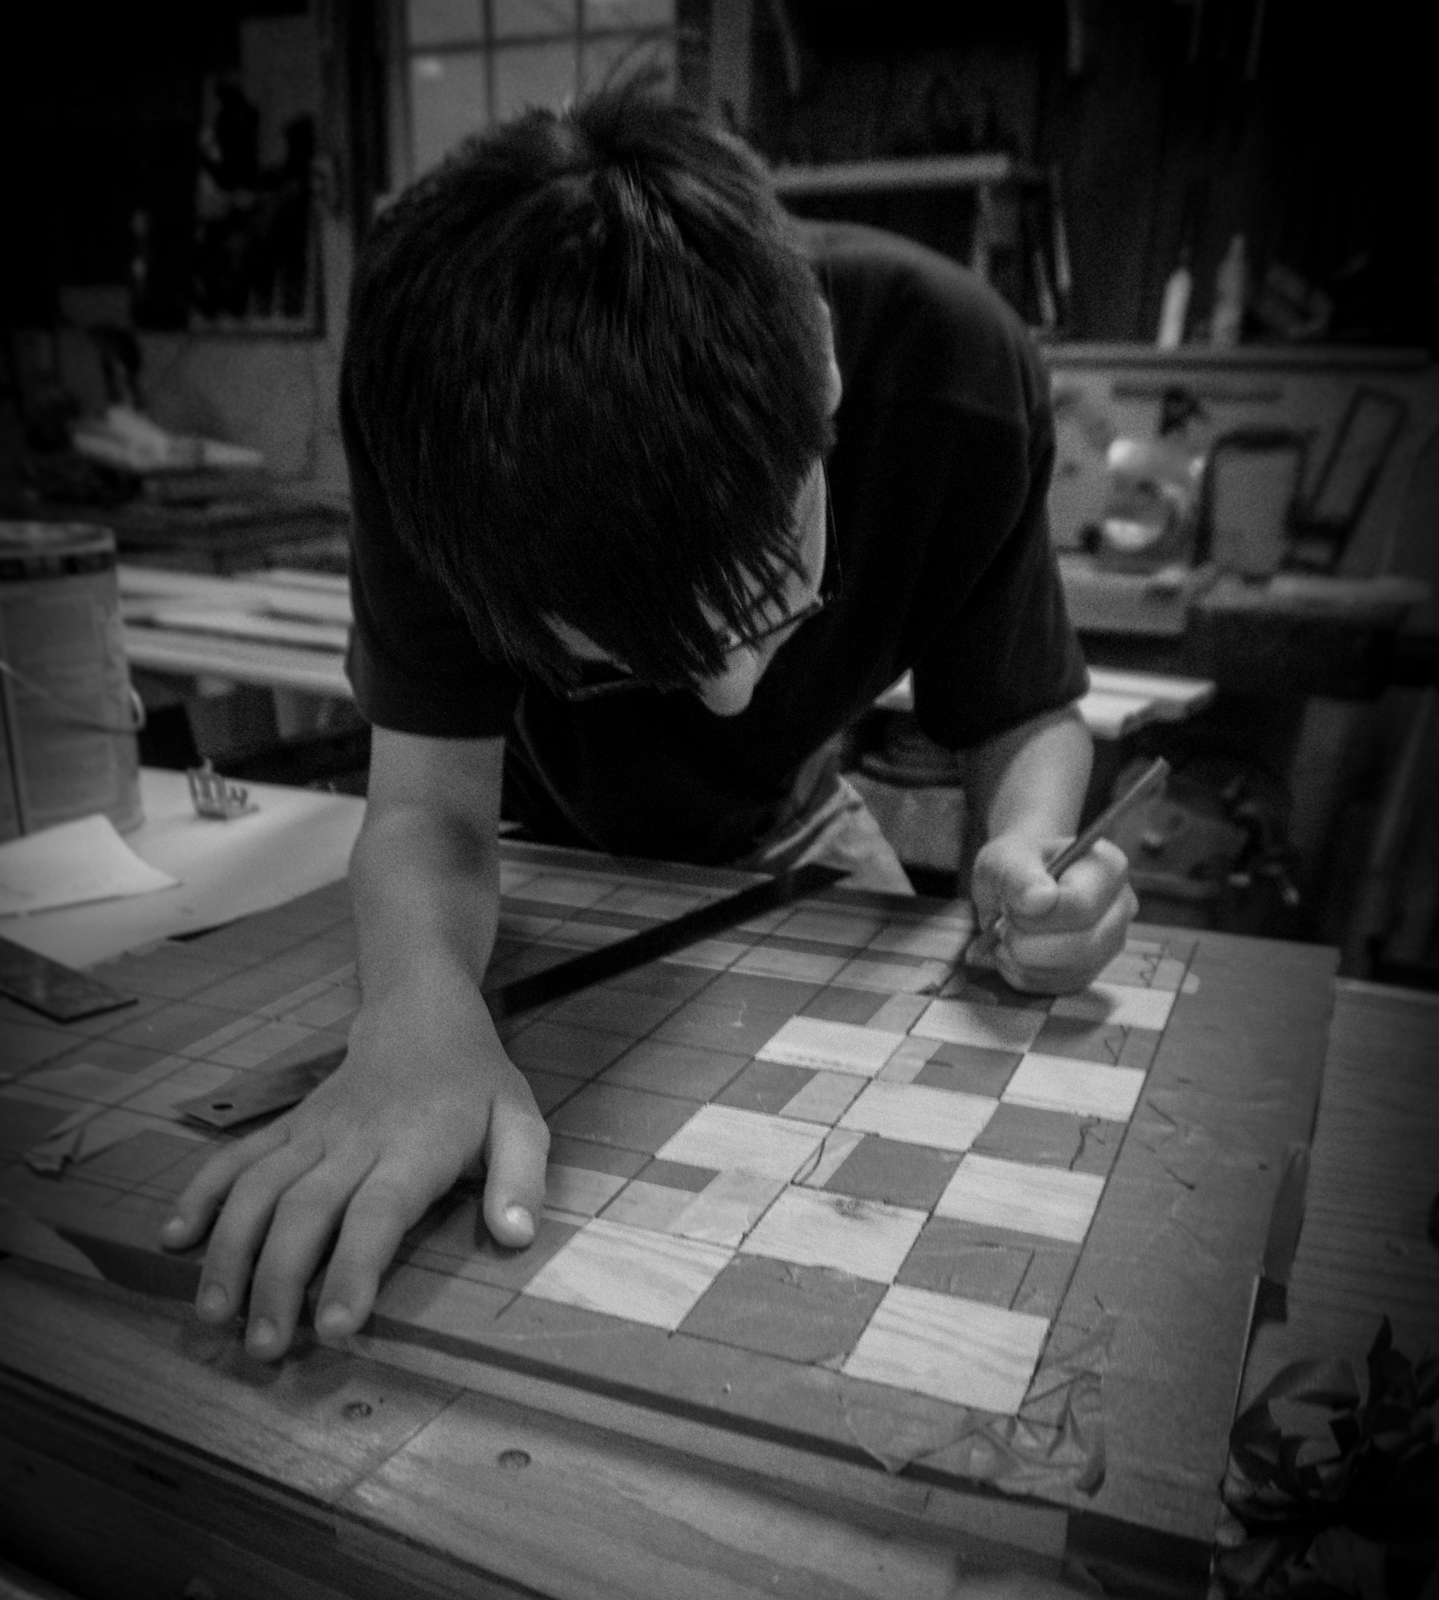
Tonight Ben decided to head out to the workshop to work on his chess set. We have milled lumber for half of the pieces (the white pieces) and glued up the wood for the board. He put tape down on the board tonight, and I helped him mark out 2″ x 2″ squares. He cut out the individual squares and then used black spray paint to paint the dark squares. The light squares will remain natural wood color.
In the meantime, I spent some time cleaning up window trim (so I can paint it tomorrow) and picking up the workshop.
Spray painting the chess board.Cutting out the chess squares on the board.
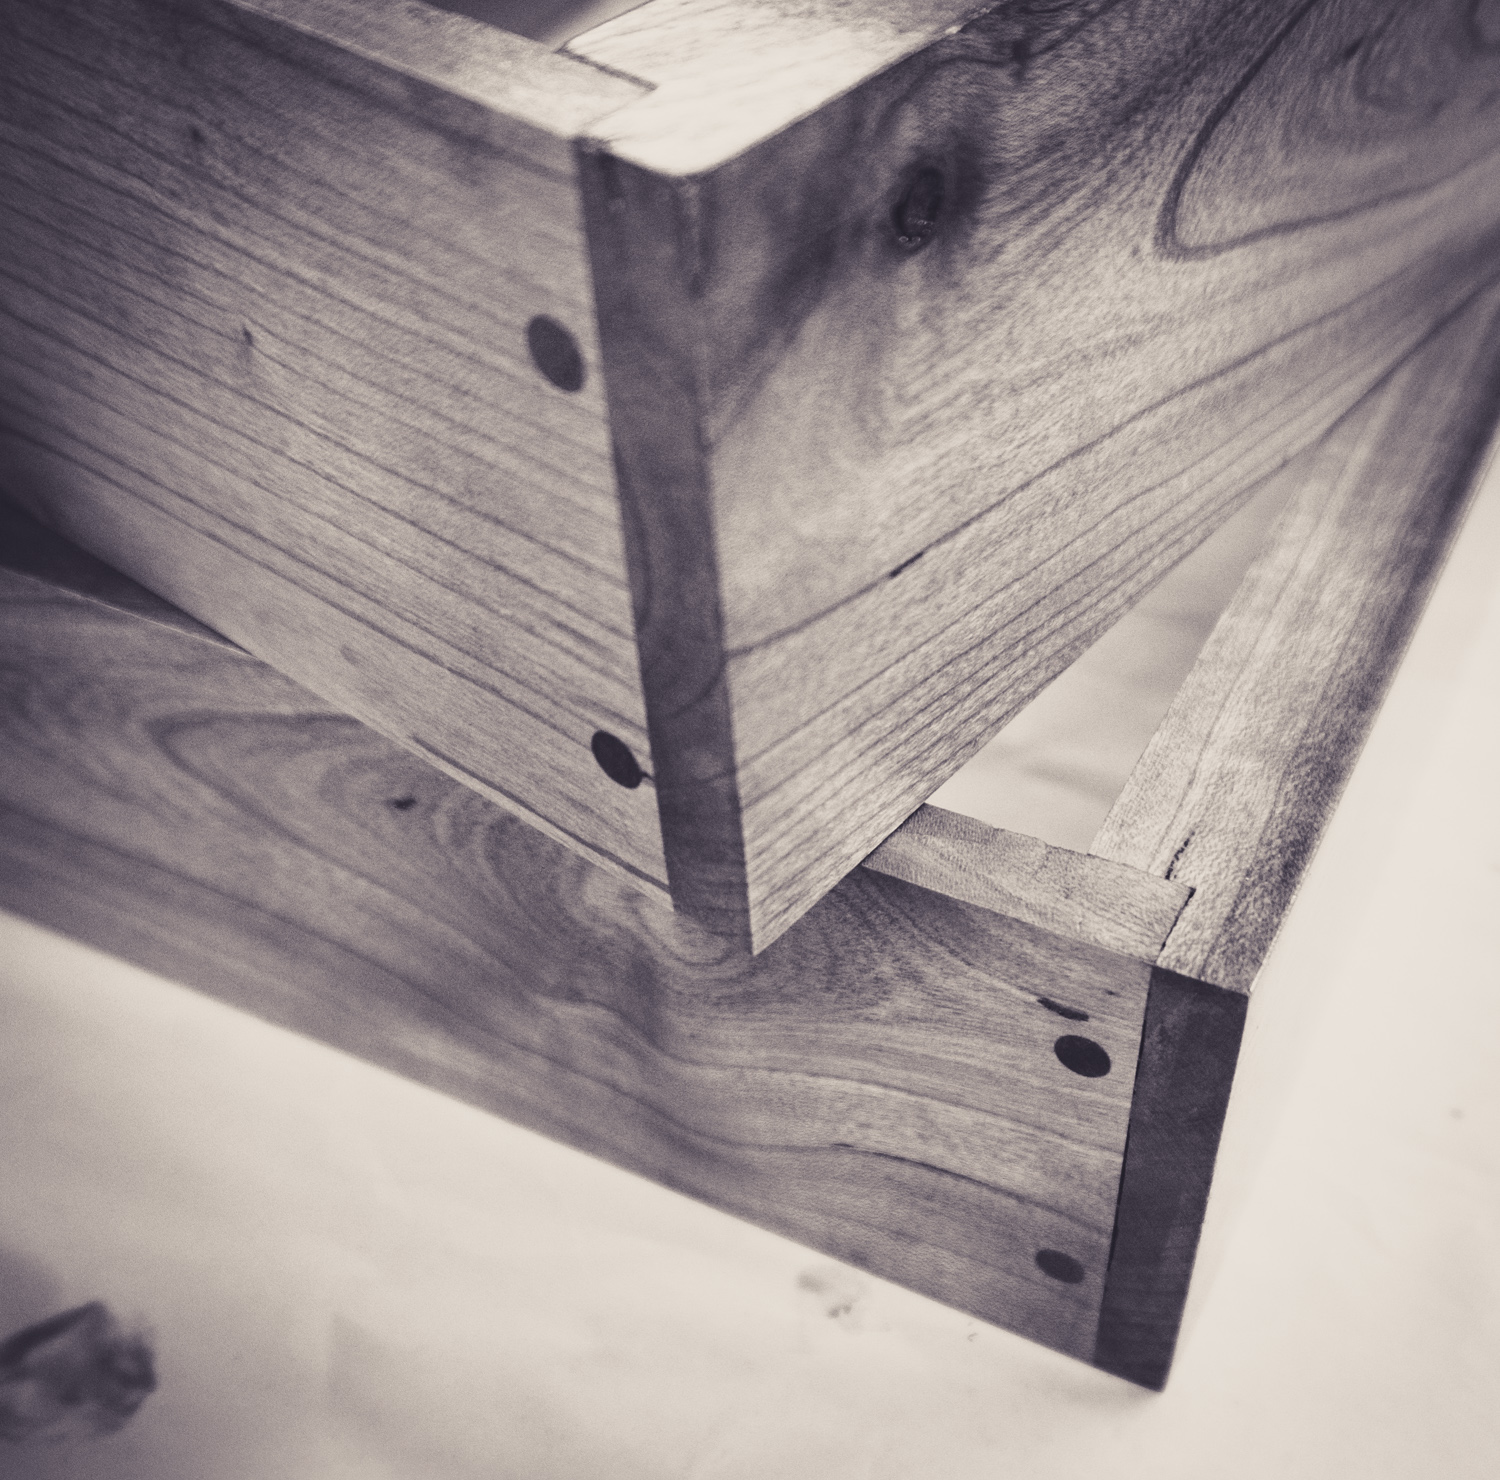
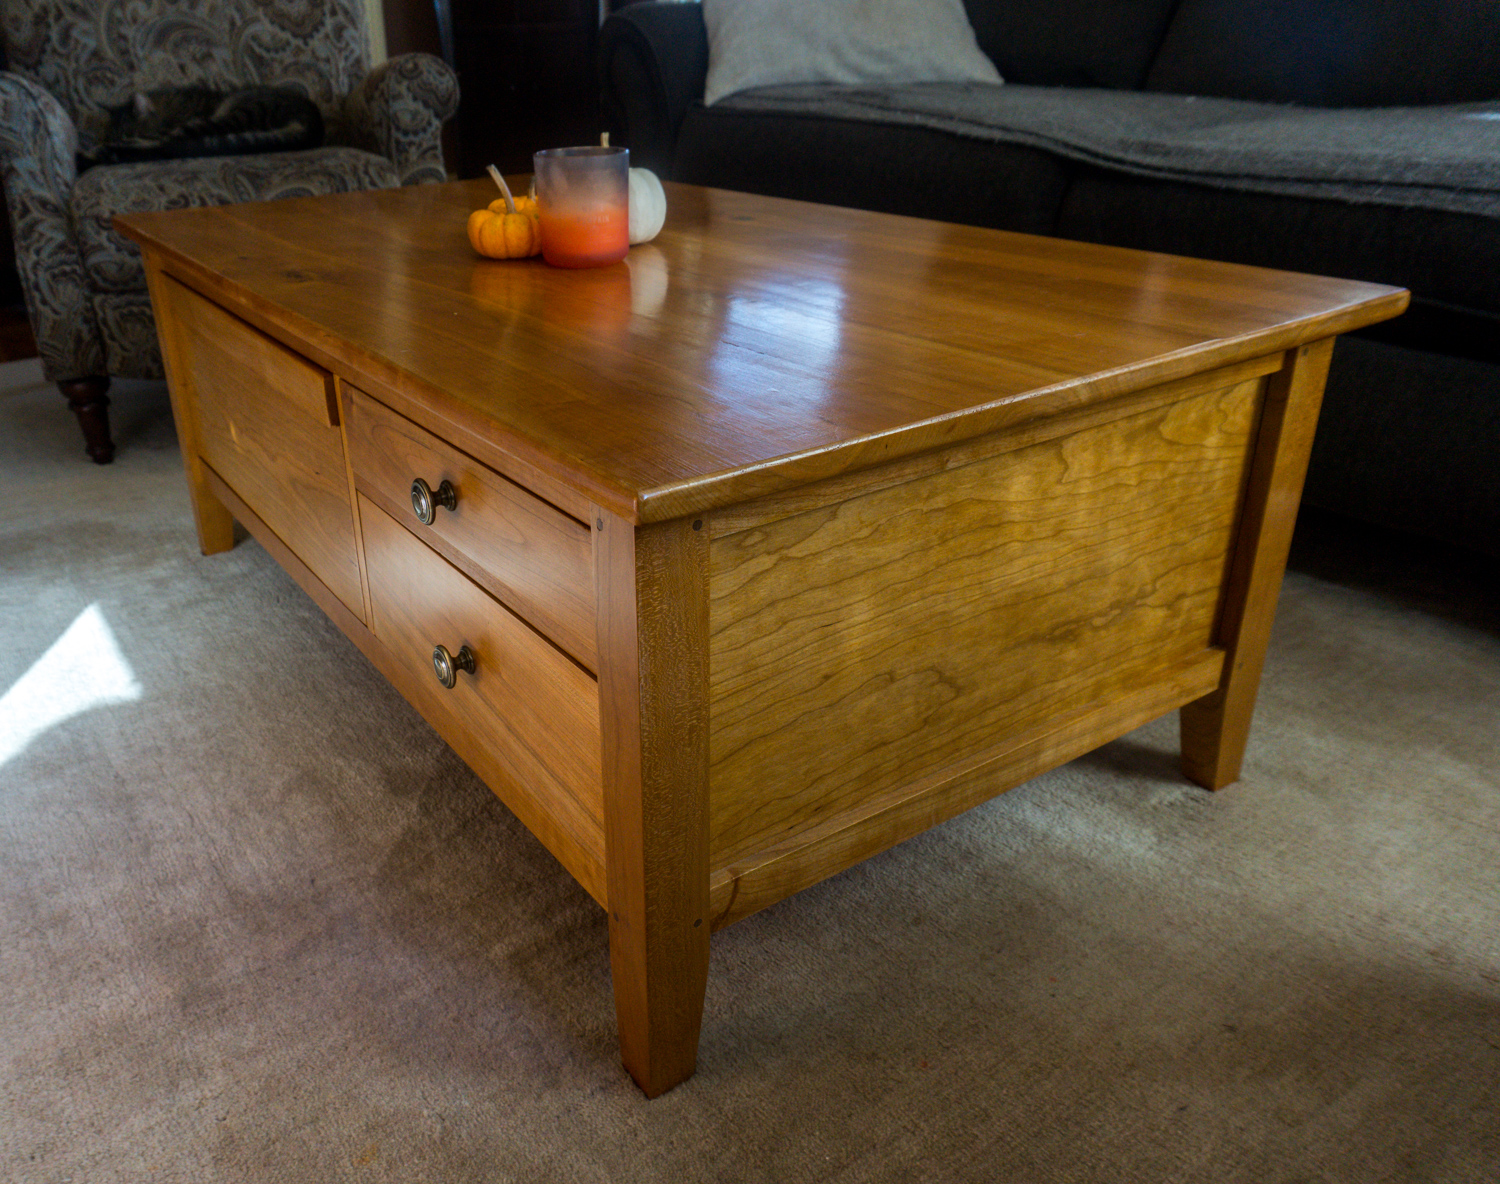
Sometimes it is easier to start projects than to finish them. Okay – it is almost always easier to start than finish. The new coffee table was no exception.
I had the table frame and top constructed in May. Then life came in the way. We had to complete some house projects and replace windows. Travel for work. Yard projects. Time with the kids. It is easy for the days to slip to weeks and to slip to months. But the project is finally finished and in the living room. It isn’t perfect, but it is the most complicated project I have made to date.
It is constructed of solid cherry – with the drawer bottoms made from 1/4″ plywood (I was running out of wide cherry, and the plywood bottoms can be glued into the drawers and won’t move with the seasons. I finished the project with a single coat of shellac and then Enduro-Var as a top coat. This is my first project using Enduro-Var, and it is great. The water-based finish dries quickly and looks great. I think I have my new go-to finish. Next time I’ll try spraying it.
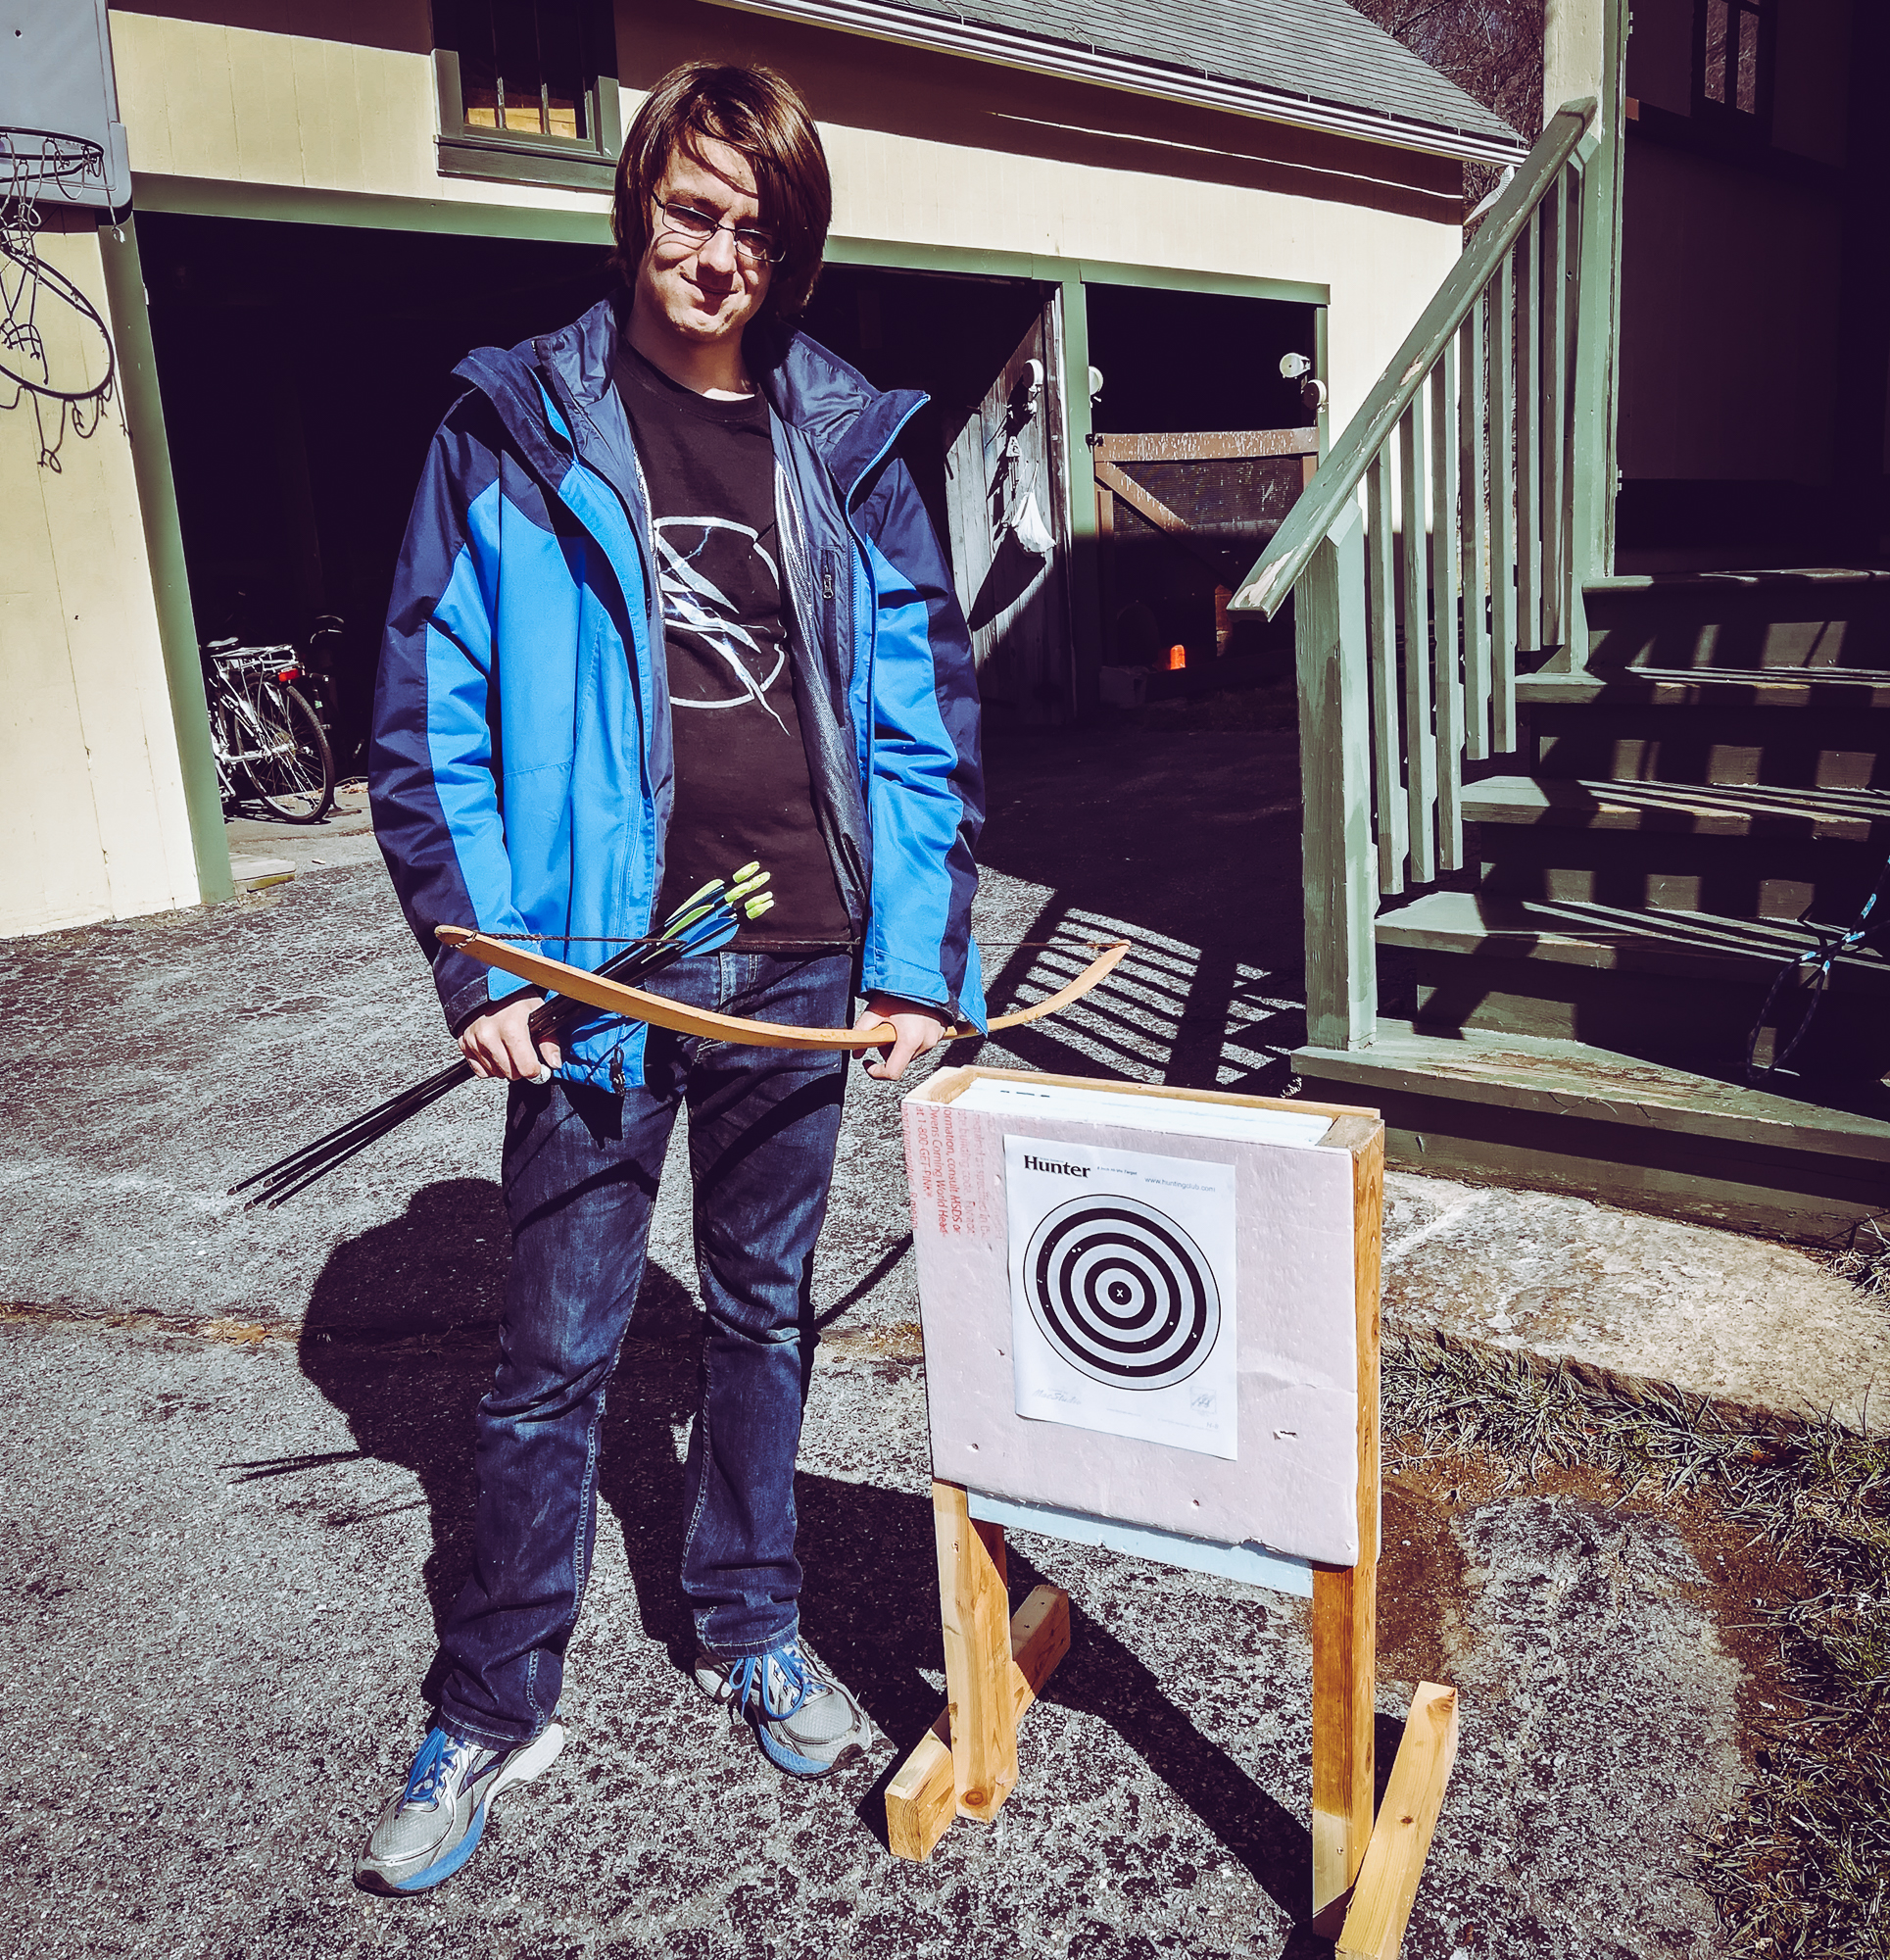
Will asked me to help him build an archery target. He was tired of shooting at a half-fallen-apart bale of hay. We went into the workshop, found some old foam insulation blocks, and pine reclaimed from some benches that had been in our sun porch. It was a short project to put together a target and stand, and nice to use some materials that had been sitting around the shop.
I’ve been pretty good at getting back into the workshop. I have the AC installed – and even though it doesn’t completely keep up on a hot and humid day like today, it helps. I’m currently building a case for my new workshop computer. The case will allow me to add filters to keep the dust out of the machine.
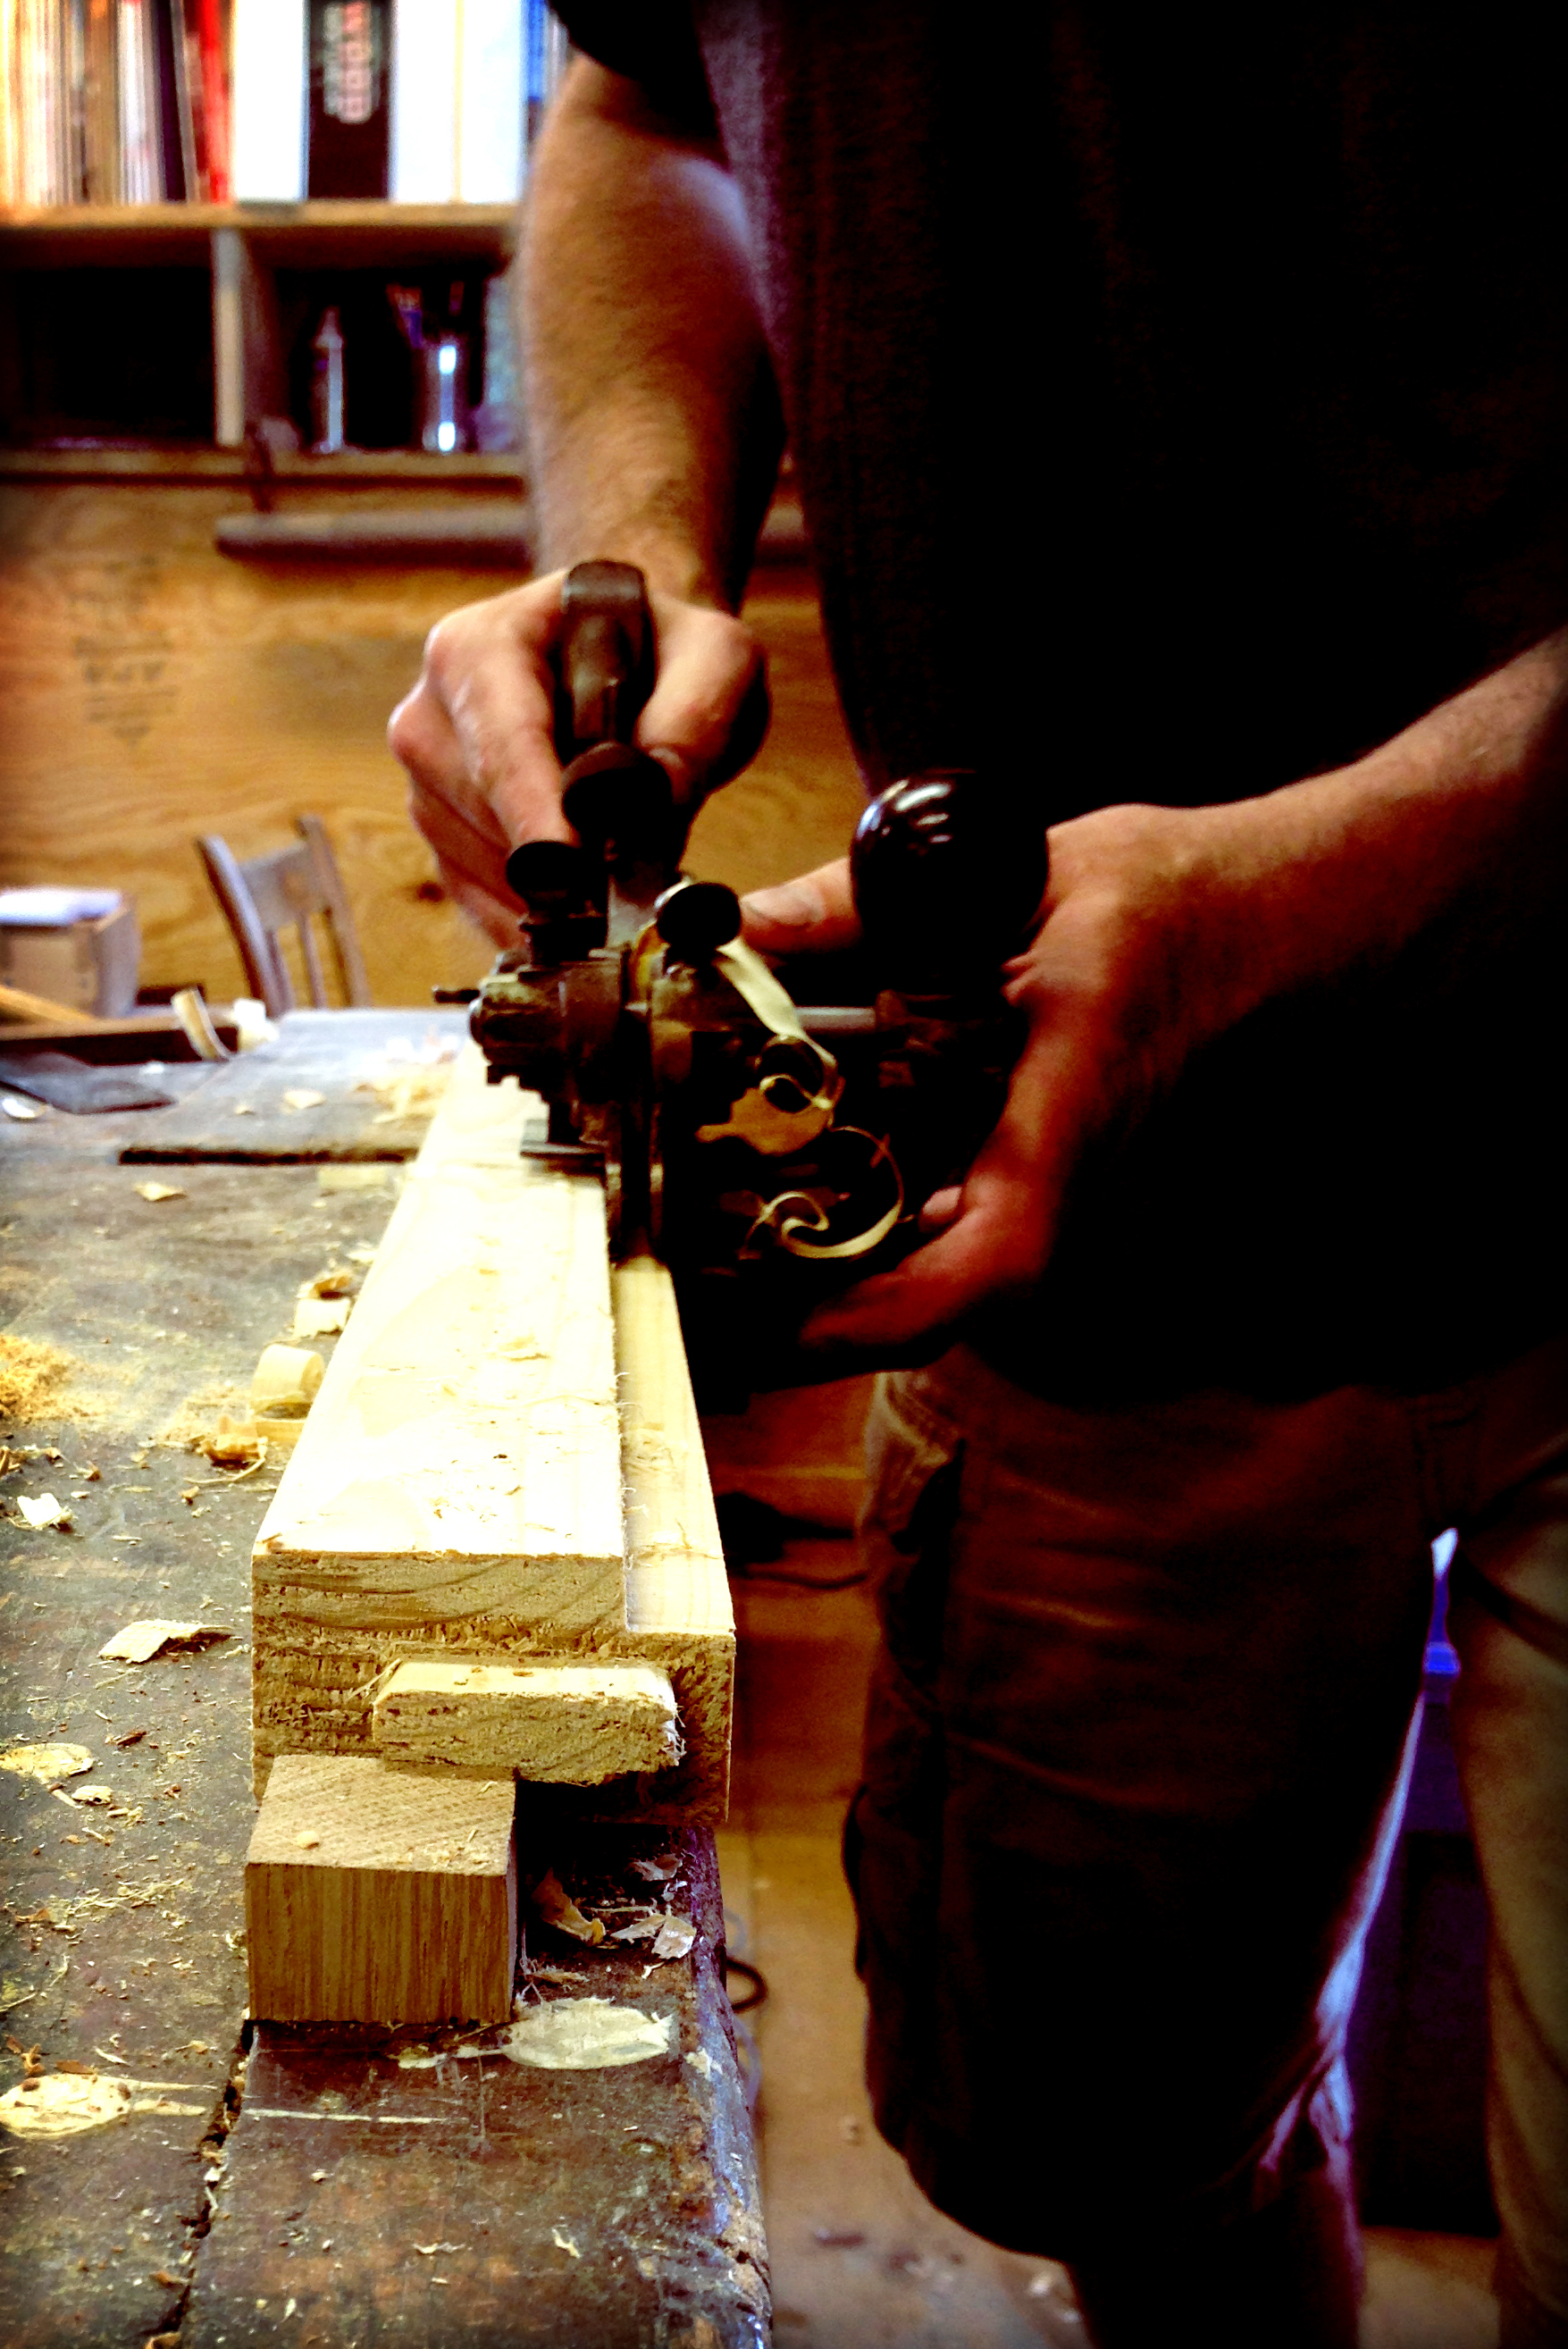
Using the Stanley 45 as a plow – cutting a rabbet along the grain on a piece of antique pine.
Today I’m cutting rabbets on the rails of the case to allow me to install the bottom and sides of the case. Normally I would set up the router table and use the router, but I need to go get longer bolts to attach the fence to the new table and I’m lazy. Plus, Izzy has been hanging out in the shop at times (in her pack and play), so I need to find ways to do things without power tools.
Which brings me to the Stanley No. 45 Plane. The plane came in a collection of antiques I got from my dad. It is in pretty good shape, though the cutters need sharpening. Last night I started sharpening the cutters. The cutters are almost at a 30-degree bevel, but not quite and it took me a while to grind the proper bevel. So, after sweating at it for a while, I decided to only grind the 1/2 dado cutter. I’ll work on the rest as I need them (and in hindsight, I should have done one of the wider ones).
How did it work? At first use, it works well. I had to make two passes to get the width of the rabbet I wanted (hence, the wish I had sharpened a wider cutter) which made the finished cut a little rougher than I had hoped. Of course I didn’t do a good job cleaning up the rabbet either, but no worries – the rabbet will be hidden.
Now back to work – time to clean up the rails and glue up the frame. And maybe later to eBay to browse different cutters for the plane.
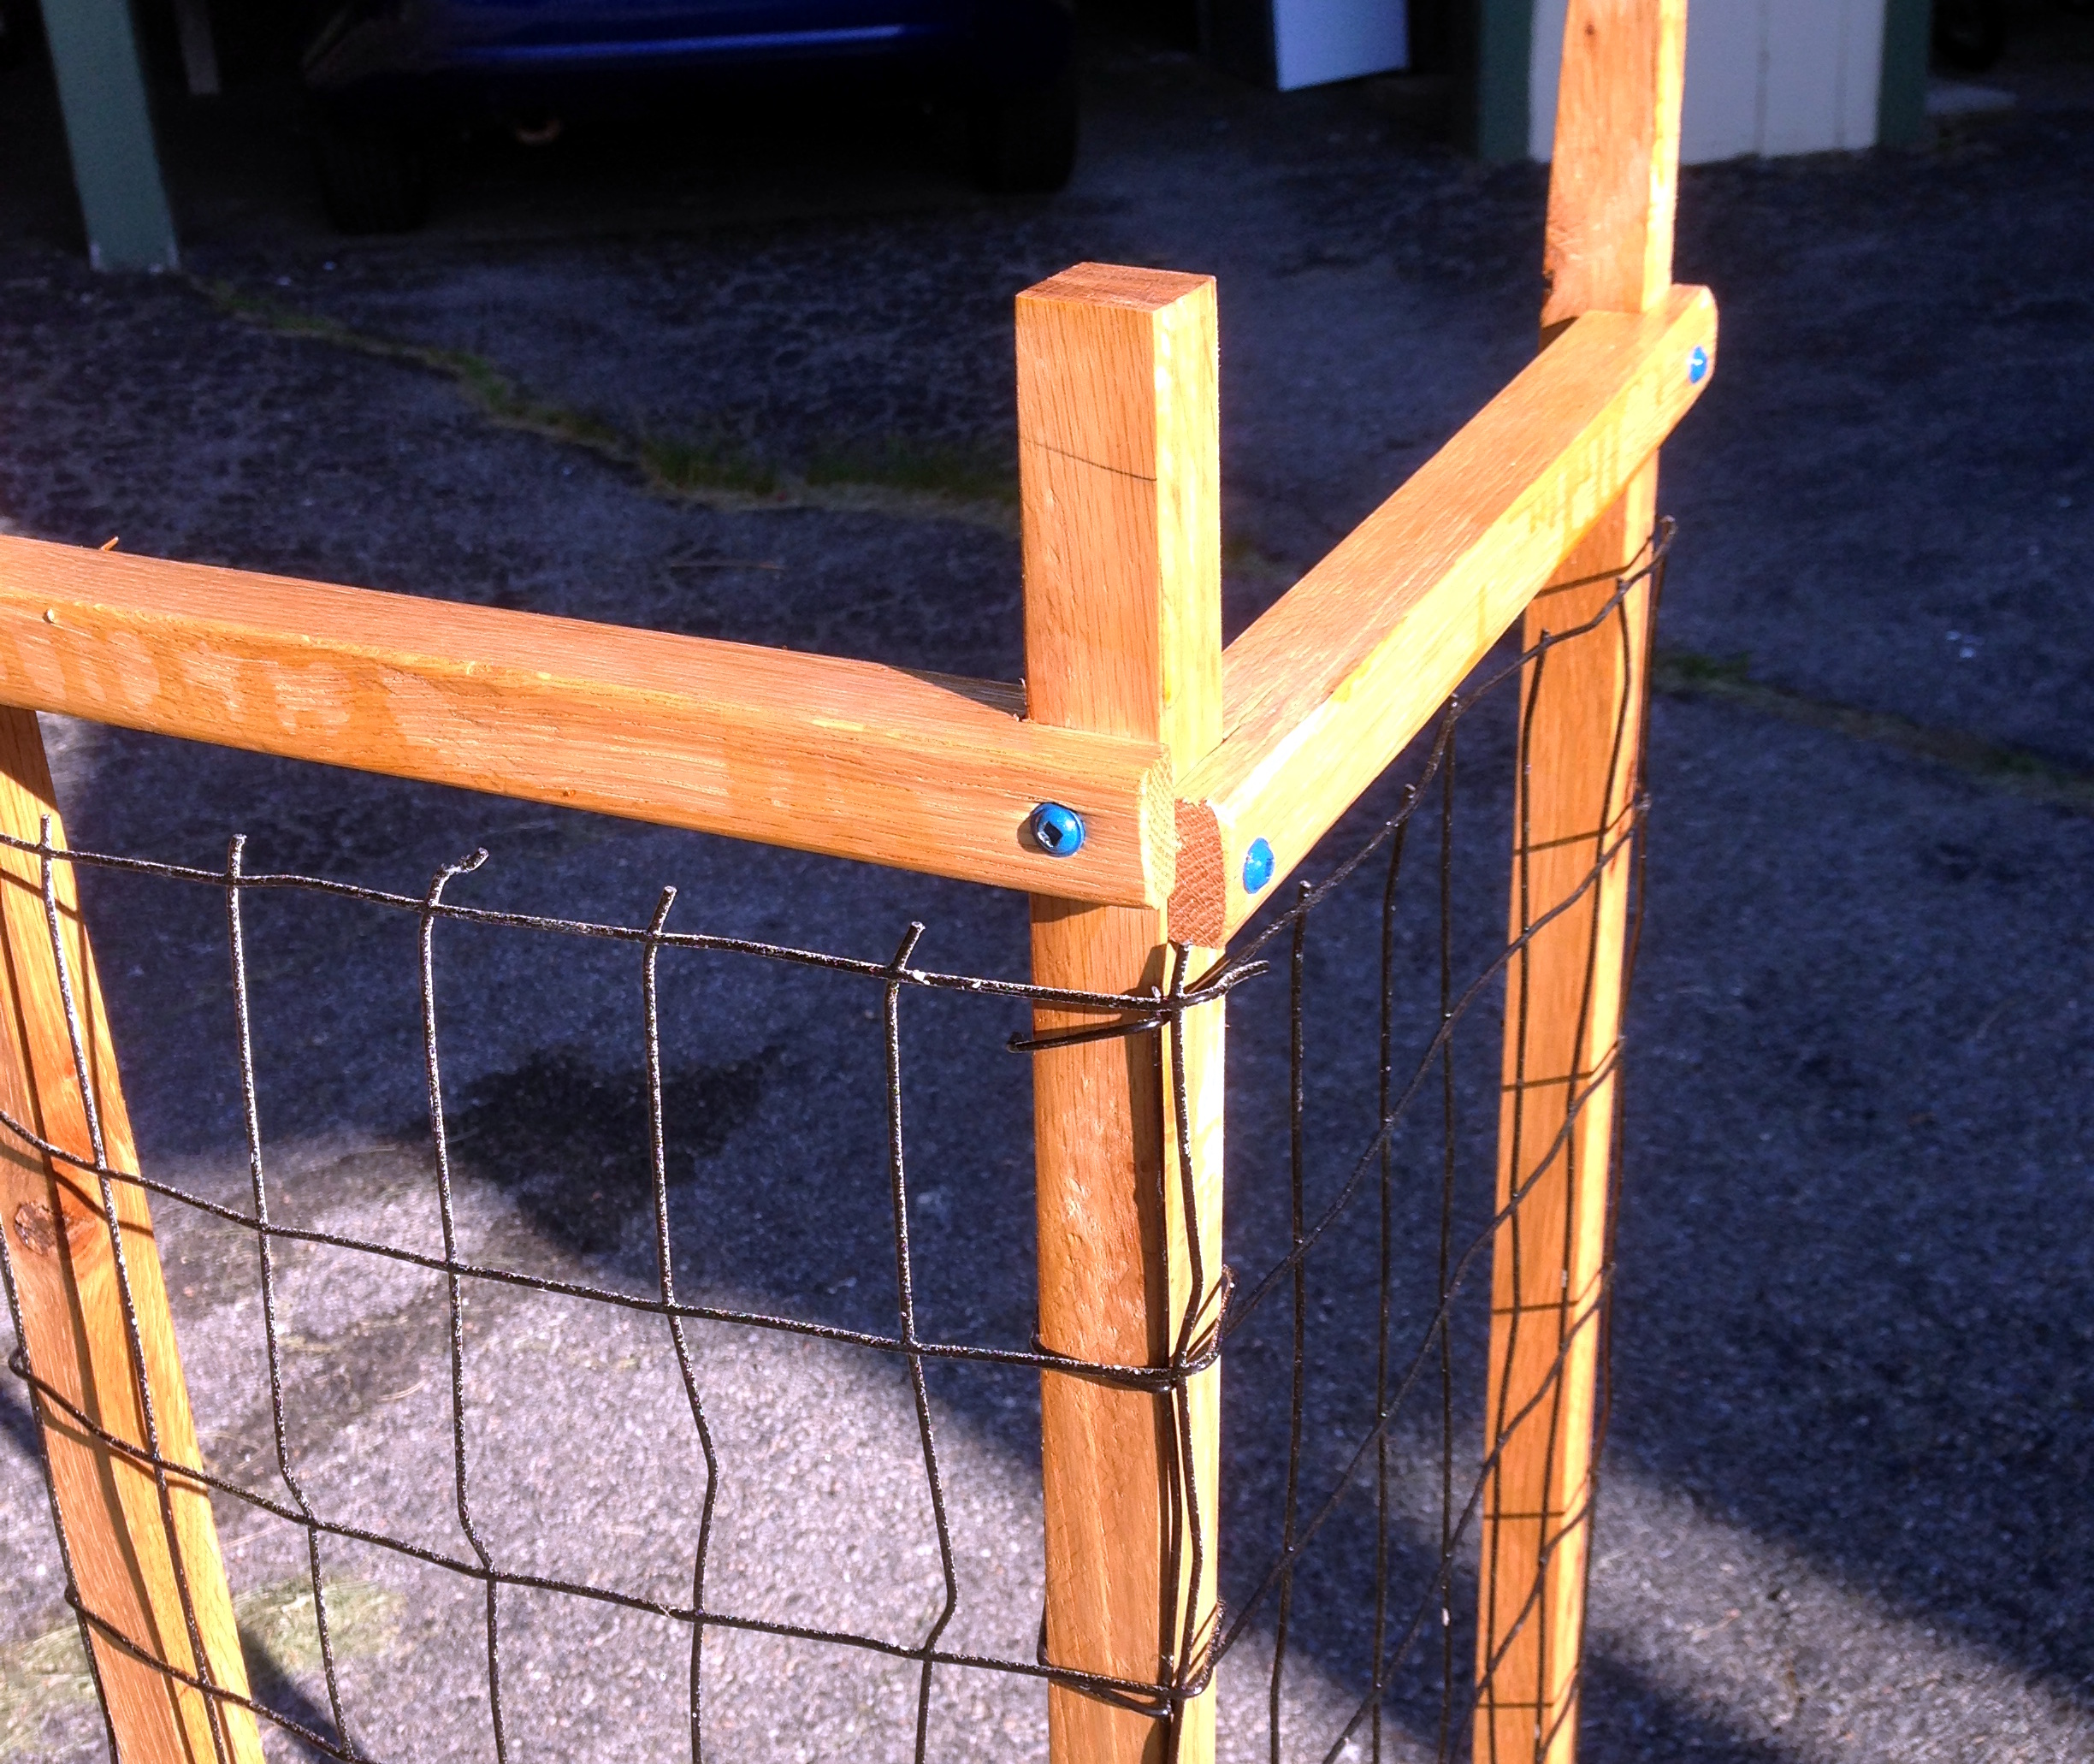
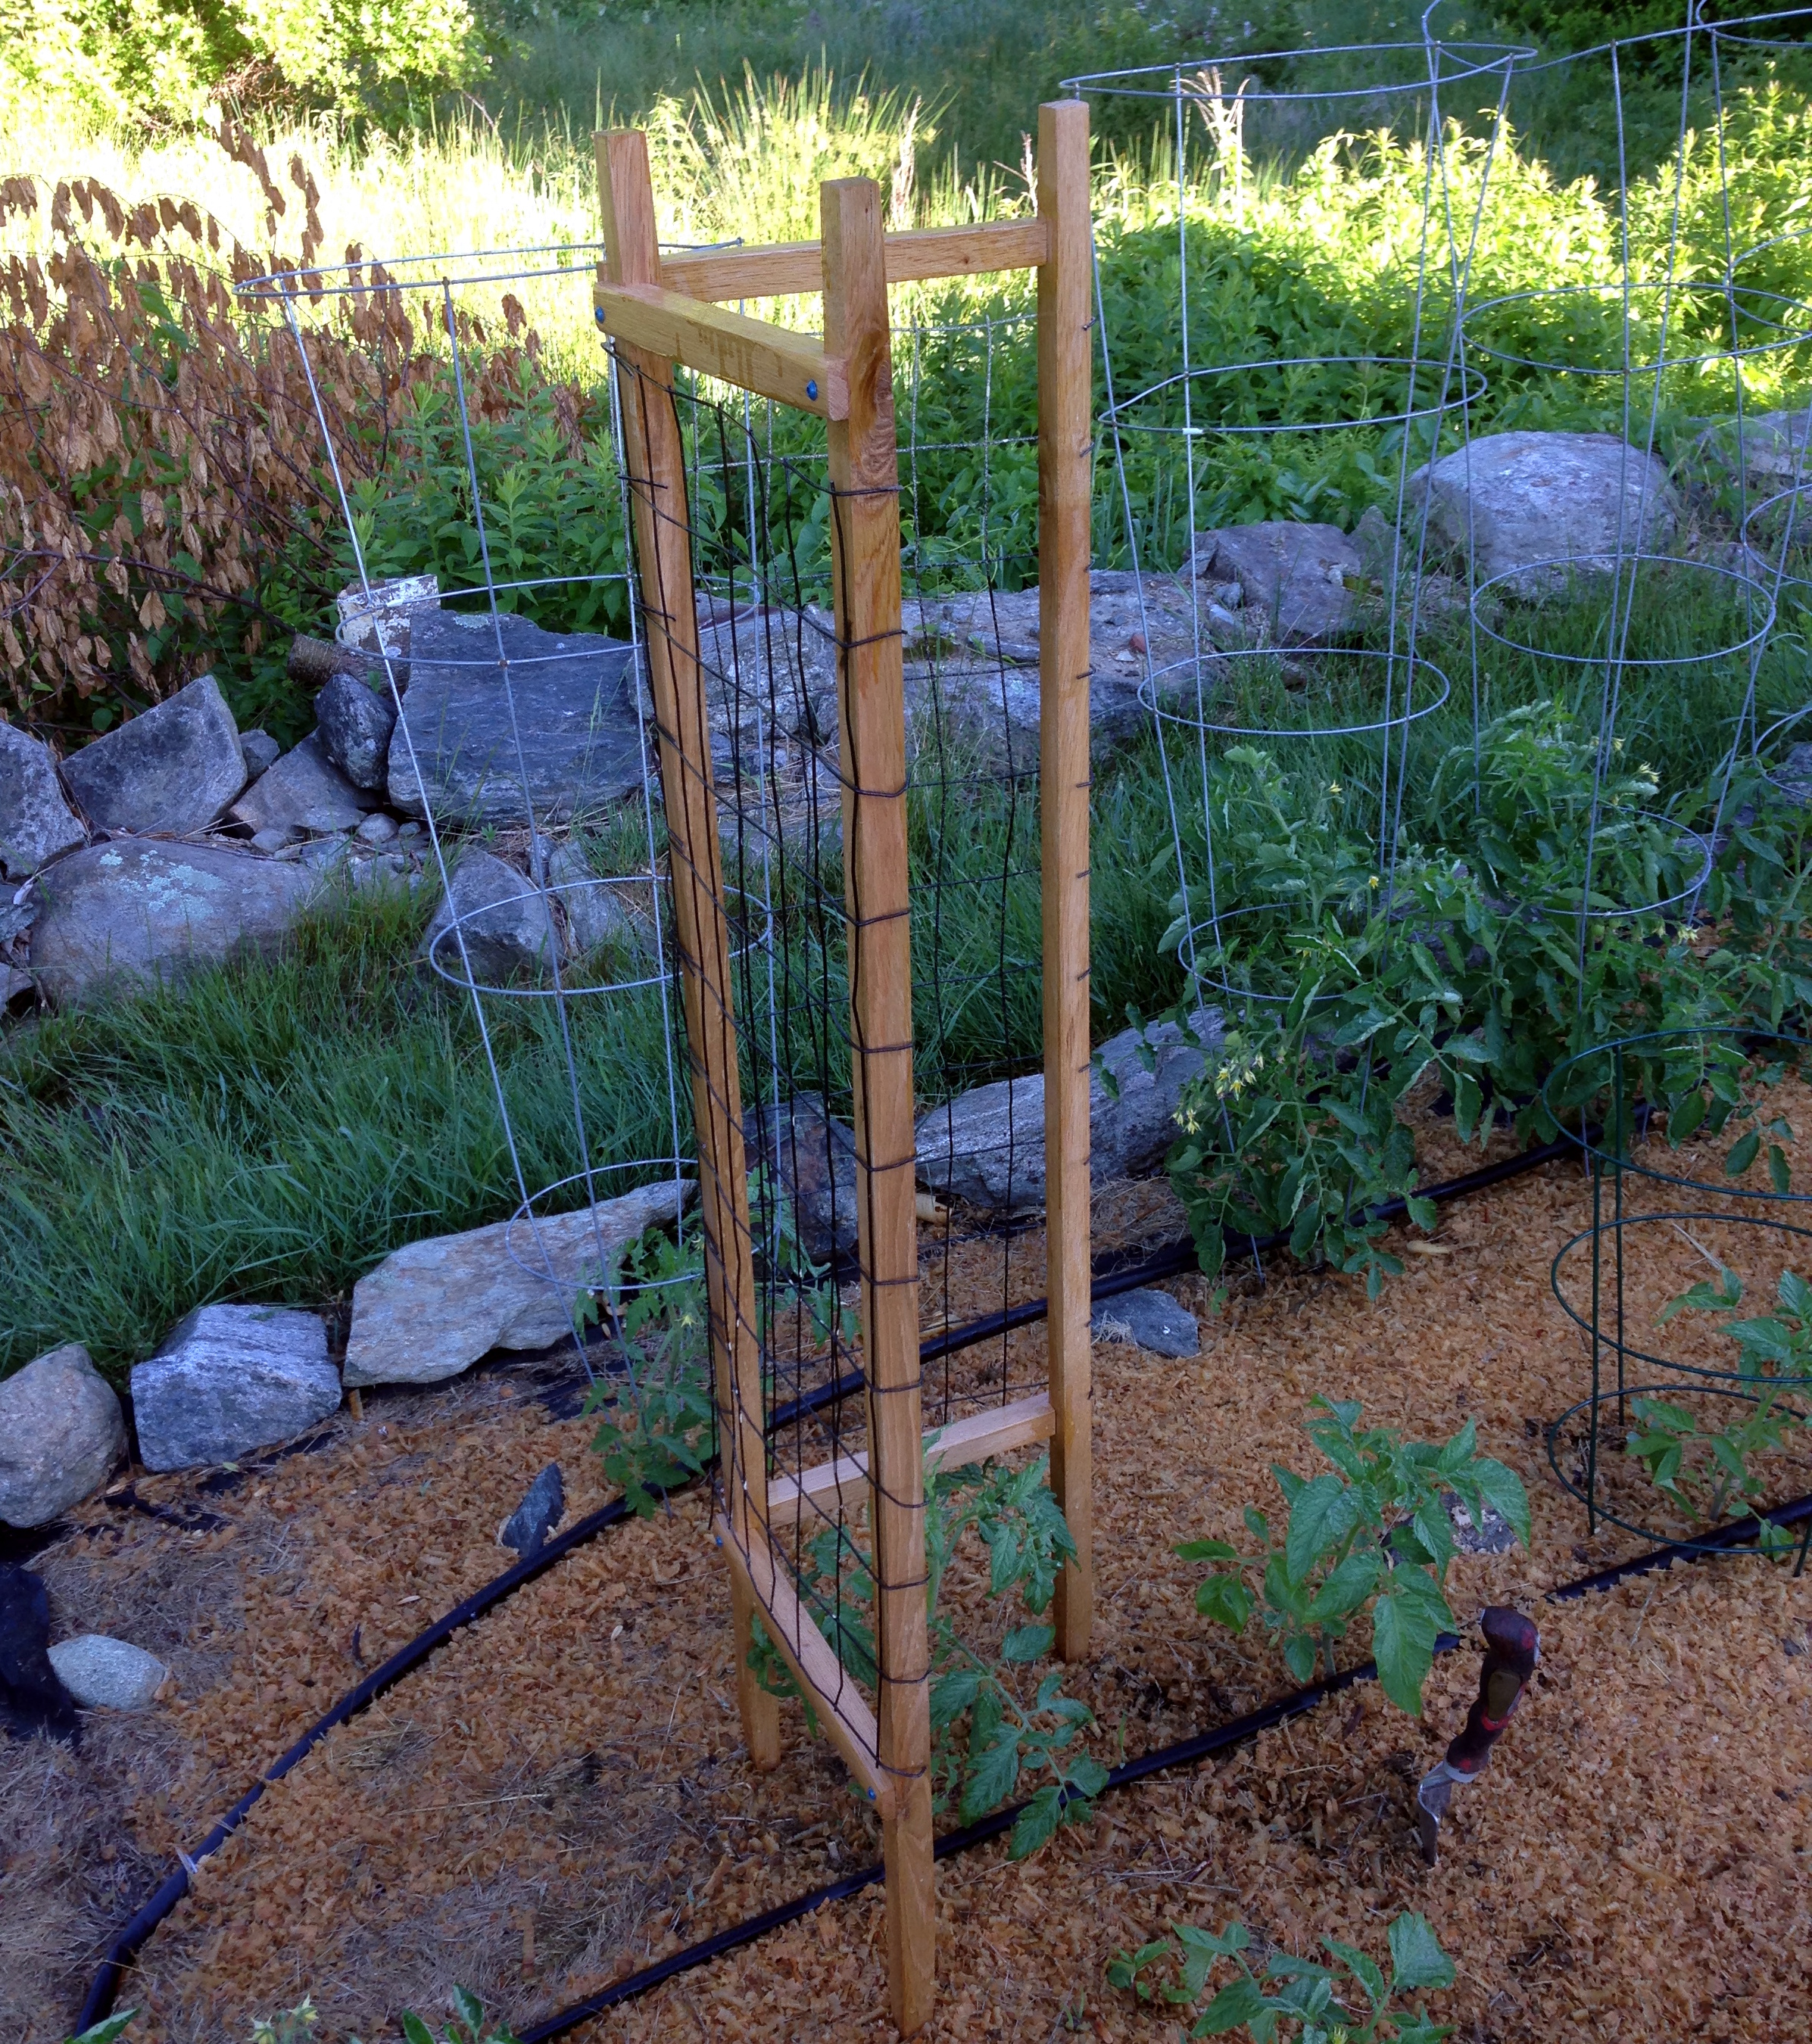
I’ve been trying to get back into the workshop. However, it has been difficult with a 4-month old baby and two middle-school boys here half-time. So I started with simple. I have lots of lumber around and found some extra wire fencing to make some tomato cages. The cages are pretty simple, made from 1″x1″ strips I cut out of a white oak board. They are connected using exterior screws (yes they are designed for pocket-holes, but they work fine here). They are finished with one coat of spar varnish (again, something I had laying around).
I made two cages from the board I cut up, and may have enough lumber left over for a third cage. I don’t think they turned out too bad for a couple of short evenings worth of work. Hopefully the white oak will hold up for a few years. I’ll have to see how the L-shape works for a tomato cage.
Detail on the joinery for the tomato cage. You can see the discoloration from only having one coat of varnish applied – but they will be outside. I’ll have to remember to recoat the cages in the fall.In place in the garden (although the legs still need to be pushed through the weed-block fabric).
As Susanna’s due date approaches we are pushing to get the last few projects ready for the nursery. One of the projects that Susanna wanted was a way to display books – an idea taken from a Pinterest idea that re-purposed a wooden spice rack to display books.
I reclaimed some pine that had been used for shelves in Will’s old room and built two shelves. The shelves are 18″ long with the back around 6″ tall. I milled the pine to 1/2″ in thickness and cut the parts. The shelves were assembled using glue, screws (for attaching the sides to the back where they wouldn’t be seen) and cut nails (where visible).
I finished the first in time for Christmas. Susanna helped me assemble the second one today. They will both be finished with clear shellac. Both took no more than a few hours to complete.
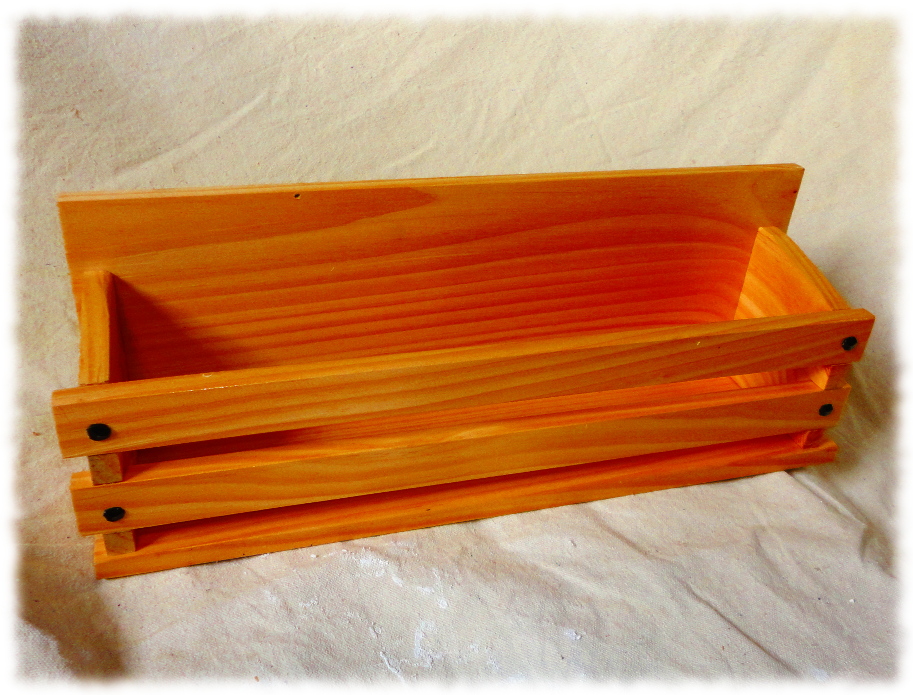
Book display made from pine and finished with clear shellac.
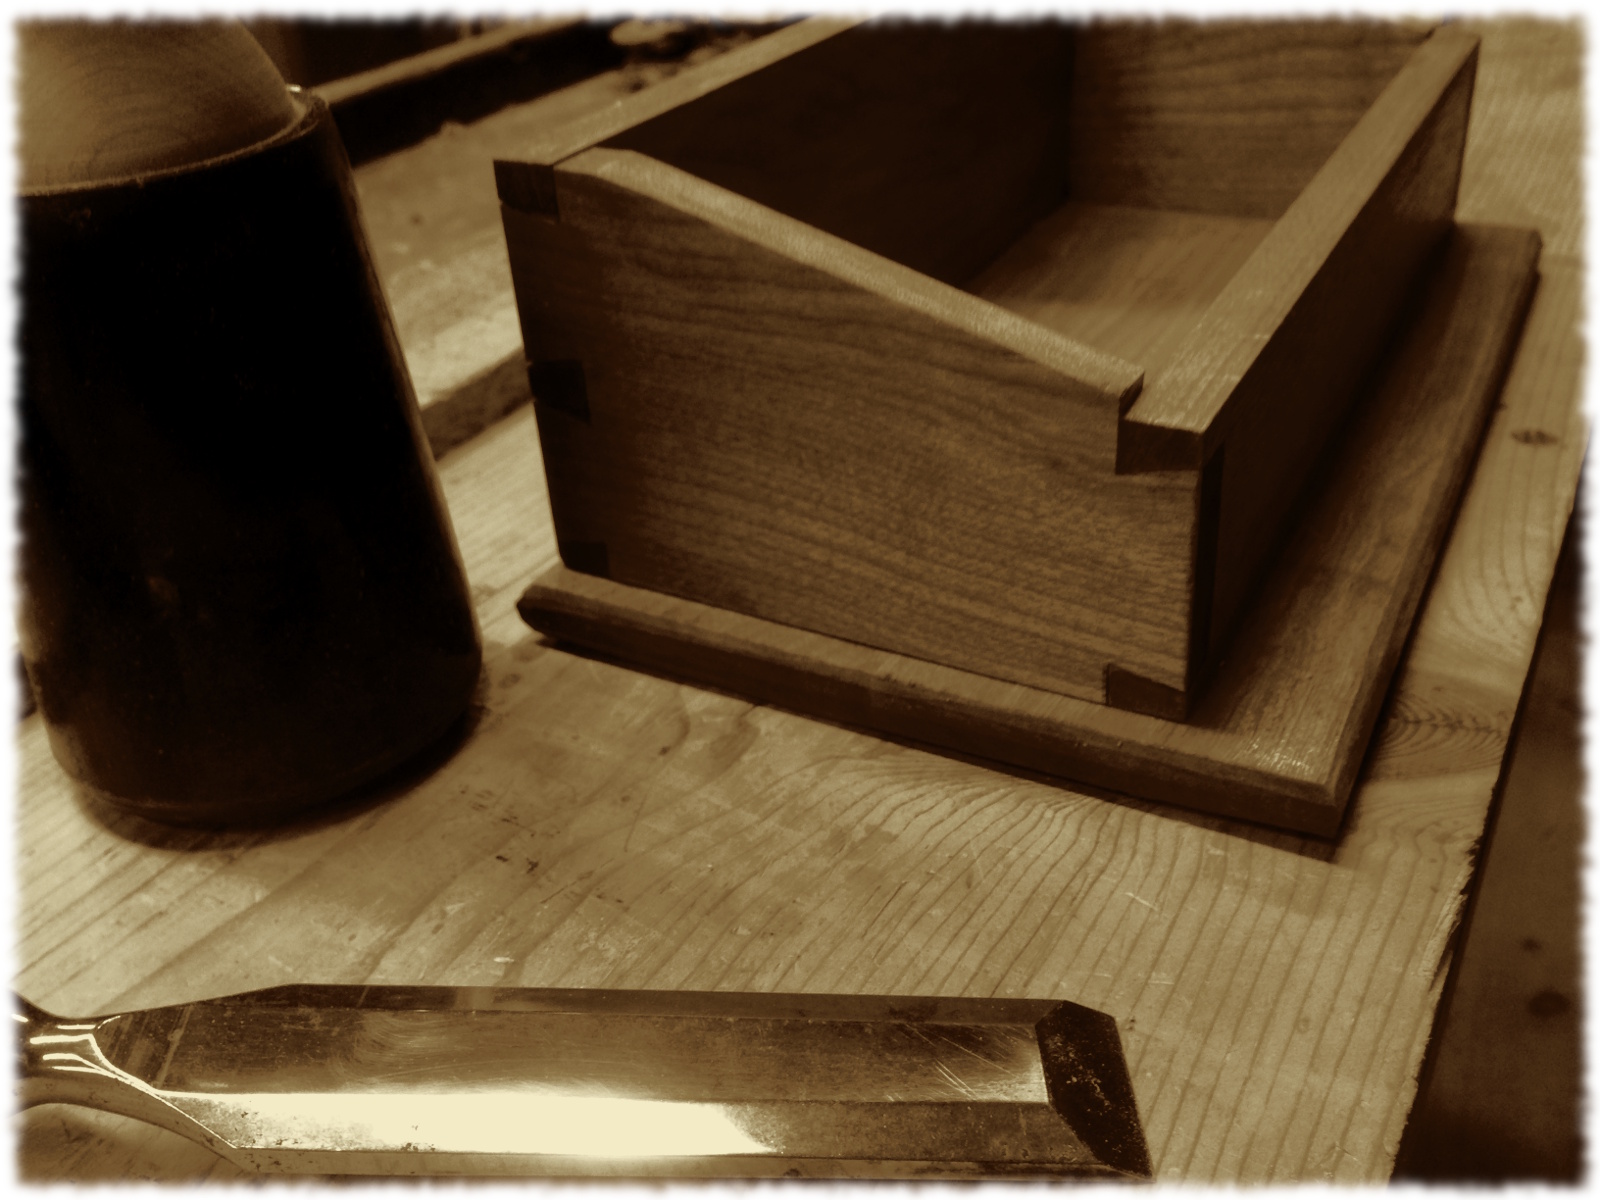
One of the (many) things that I don’t have a lot of experience with in the workshop is making dovetails. Many years ago I purchased a dovetail jig that should allow me to make perfect dovetails using a router. I just never used it and don’t even know if I have it still.
I have only used dovetails on a couple of projects – mainly the drawers on the two night stands that I made for the boys. And I wasn’t too happy with how they turned out. So I decided that it would be good to do a quick project just to practice dovetails. I got the project and instructions from Woodworking Masterclasses.
The project didn’t turn out too bad. The dovetails at the end were certainly better than the first few. Now I’ll just have to make small boxes a couple of times a year until I get comfortable cutting the dovetails. There are hundreds of ways to hand cut dovetails, so I gave Peter Sellers’ method a try (from the video). I liked some things from his video – such as his method of cutting out the waste. But I don’t think I really liked his method for marking out the depth of the cuts.
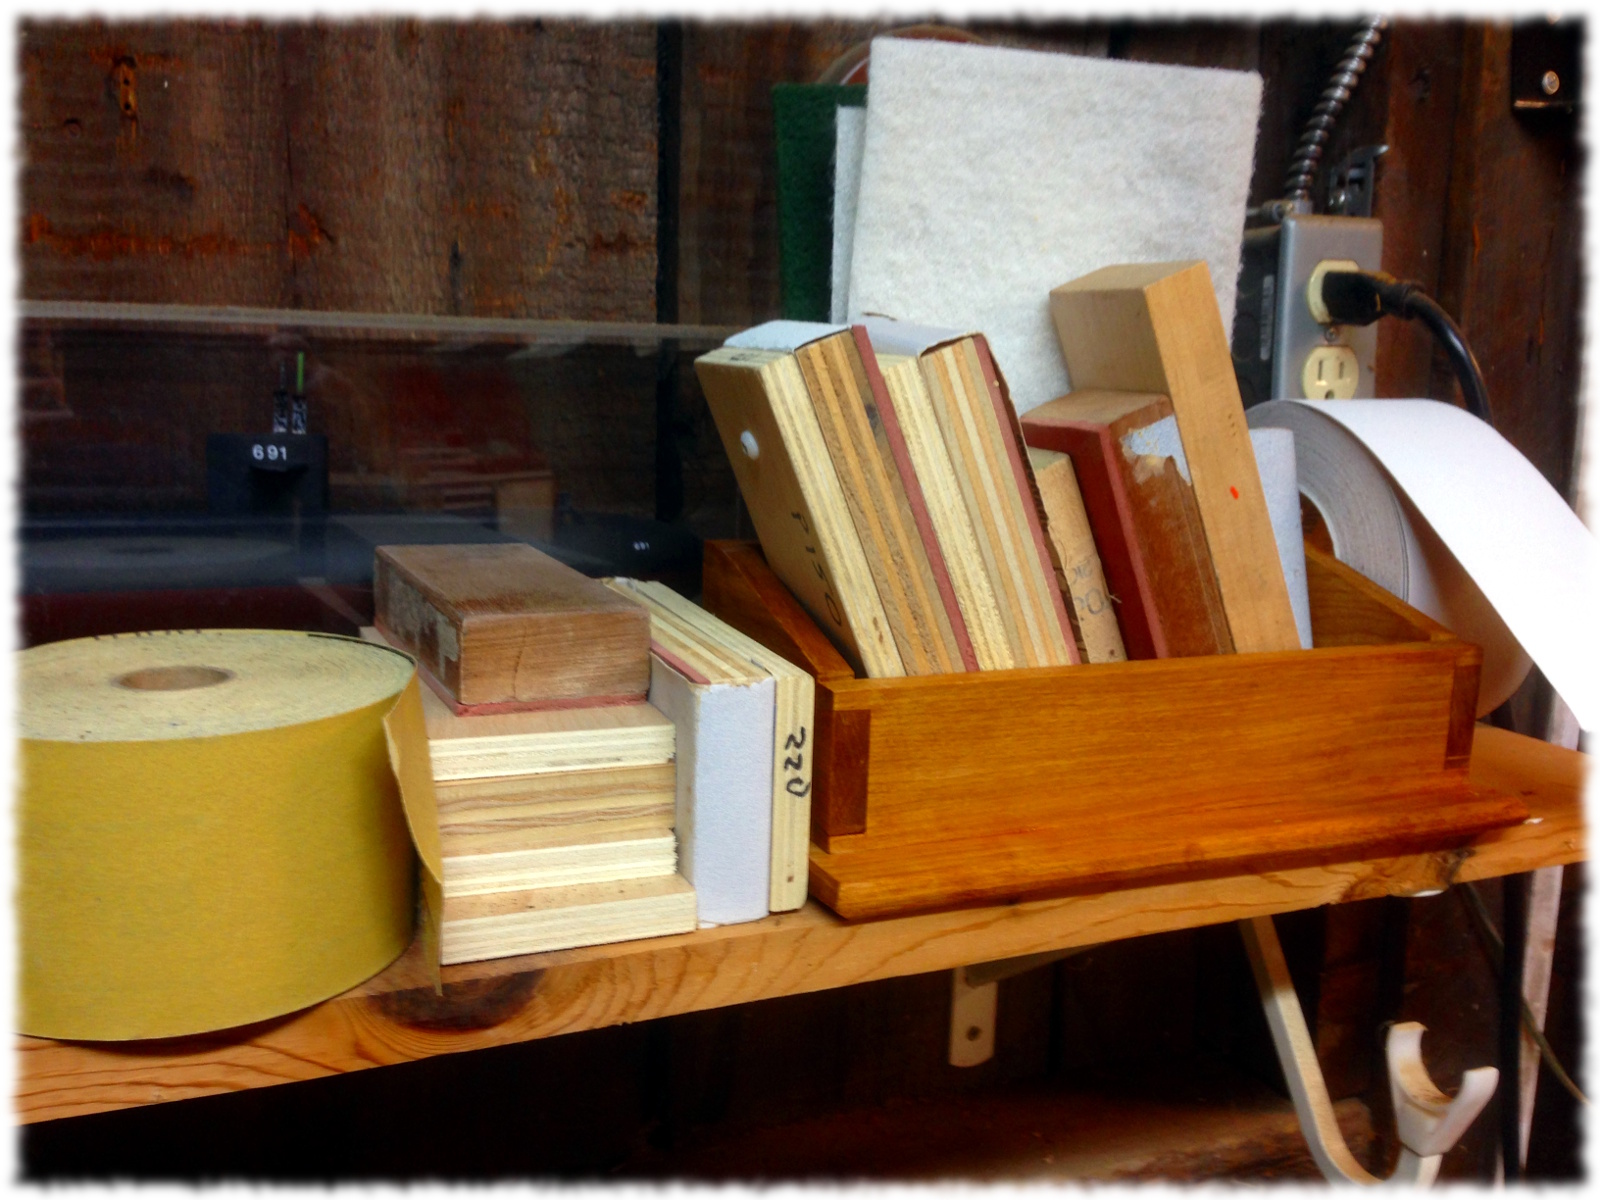
We didn’t really have a use for the box in the house, but there is always room for help organizing the workshop. Tonight I gave the box one coat of shellac and put it to use helping organize the sanding supplies. It looks like I could use a couple more boxes to help out that shelf.
I’m not sure what wood I used. It certainly wasn’t oak, cherry, or maple. It may have been ash or hickory. Though probably not hickory. So, I’ll go with ash. Because who doesn’t like a nice piece of ash.
The project didn’t take too long. I spent a couple of hours working on it around the other projects going on in the house/workshop. Maybe I’ll mill up some cherry and build a second one over the next couple of weeks. I’ll have to make the next one deep enough it can hold the sandpaper rolls. And eventually maybe I can make one where the dovetails look good enough to put the box in the house.
Dovetail Caddy – holding an assortment of sanding blocks. Hiding behind the sanding blocks is a memory from my days on SSN 691.
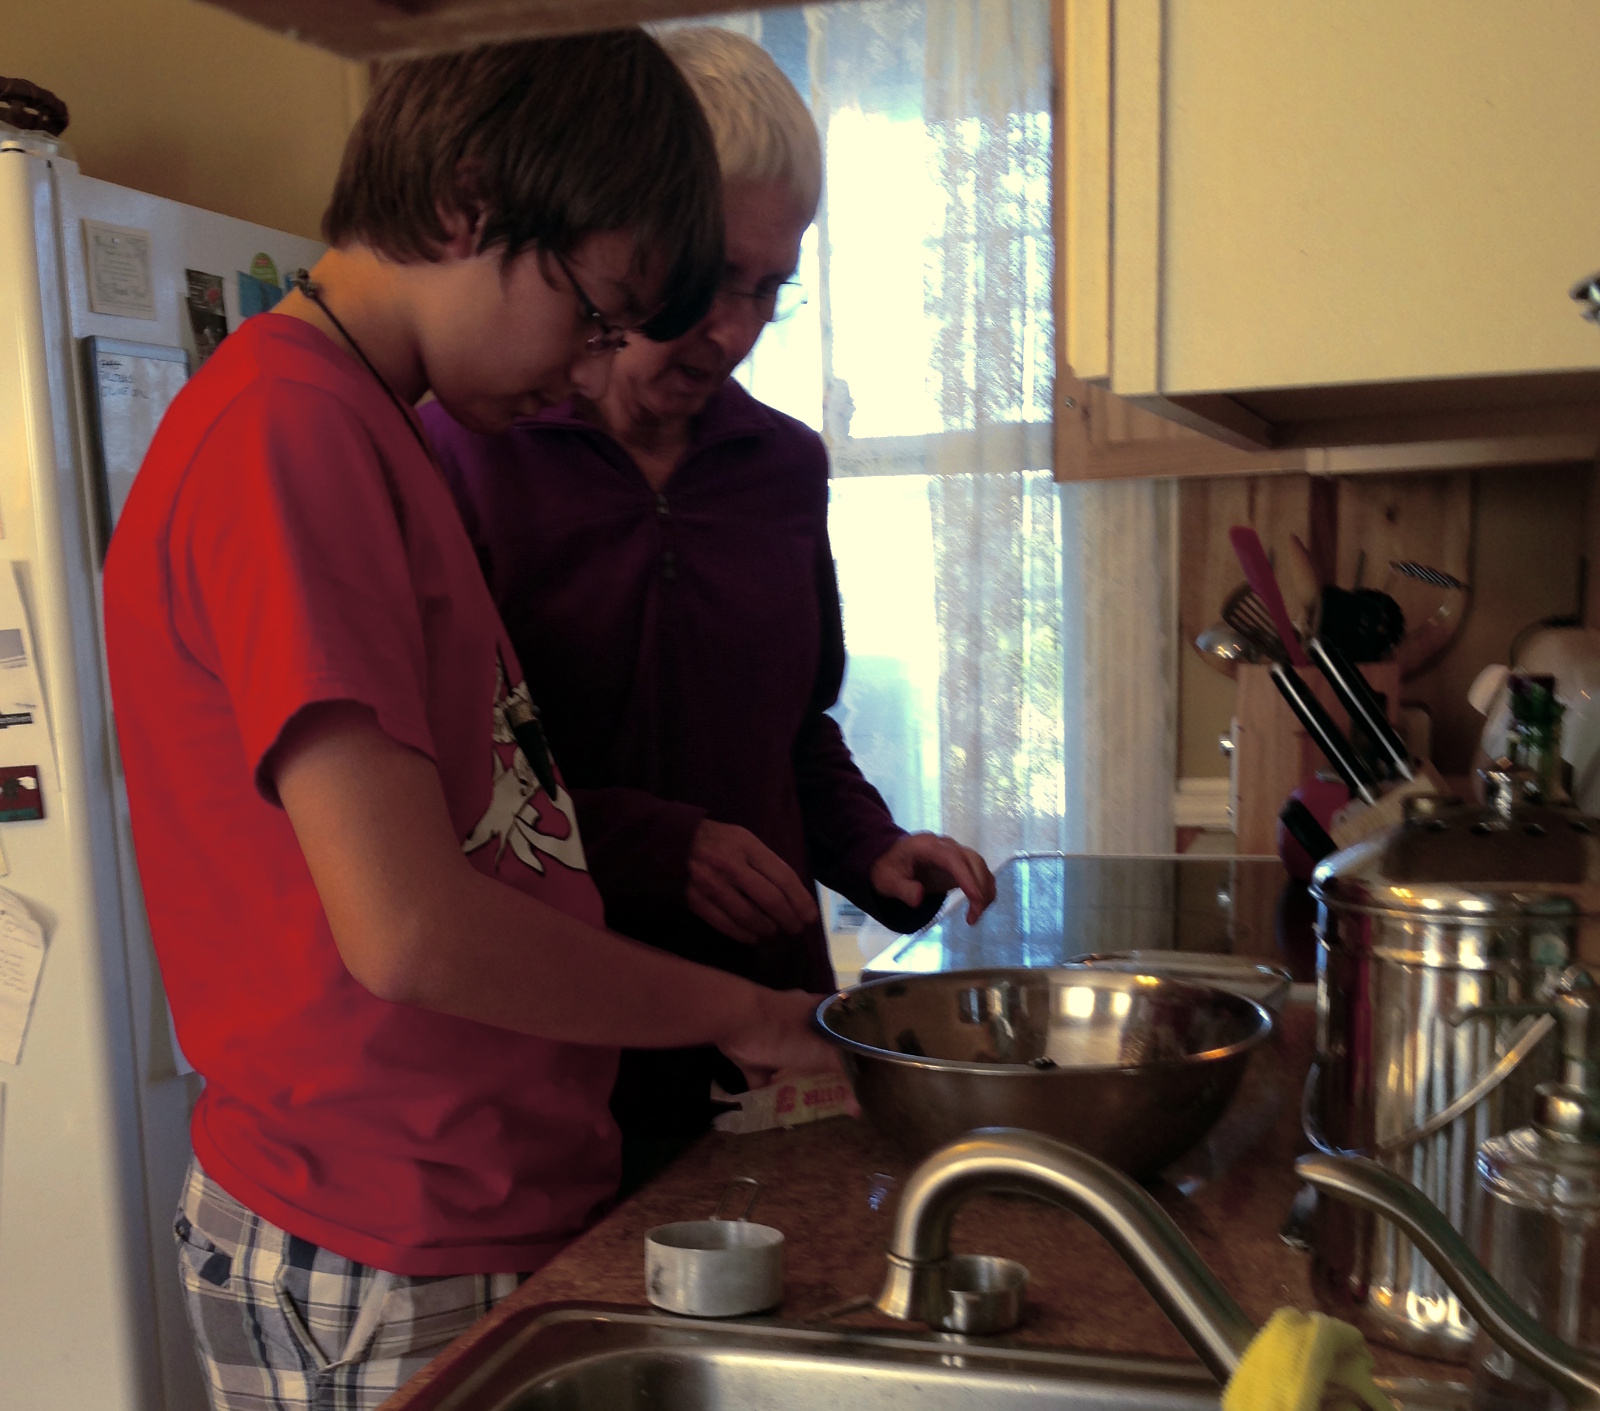
Will and Grandma Mary working on making apple crisp.
We had a busy Saturday. Busy enough we had to split up into two groups.
My mom is visiting for the weekend – a nice way to start off the fall. She arrived on Thursday, and I took Friday off of work. We visited B.F. Clyde’s Cider Mill in North Stonington on Friday while the boys were at school and Susanna at work. It was interesting enough that she and Susanna decided to take Will back on Saturday while I was out with Ben.
Of course, the mill was empty on Friday, but the lines were out the door on Saturday. But they only press cider on weekends, so Will, Susanna and my mom got to see it in operation even if they couldn’t get into the store with the crowds.
That afternoon, Will decided he wanted to make apple crisp – his favorite dessert right now. My mom found a recipe and helped him make the apple crisp. It was even better than the apple crisp we had bought at the local orchard last month. I’m pretty sure Will will be making another batch (or two) now that he knows what to do (considering he ate half of the apple crisp last night after dinner).
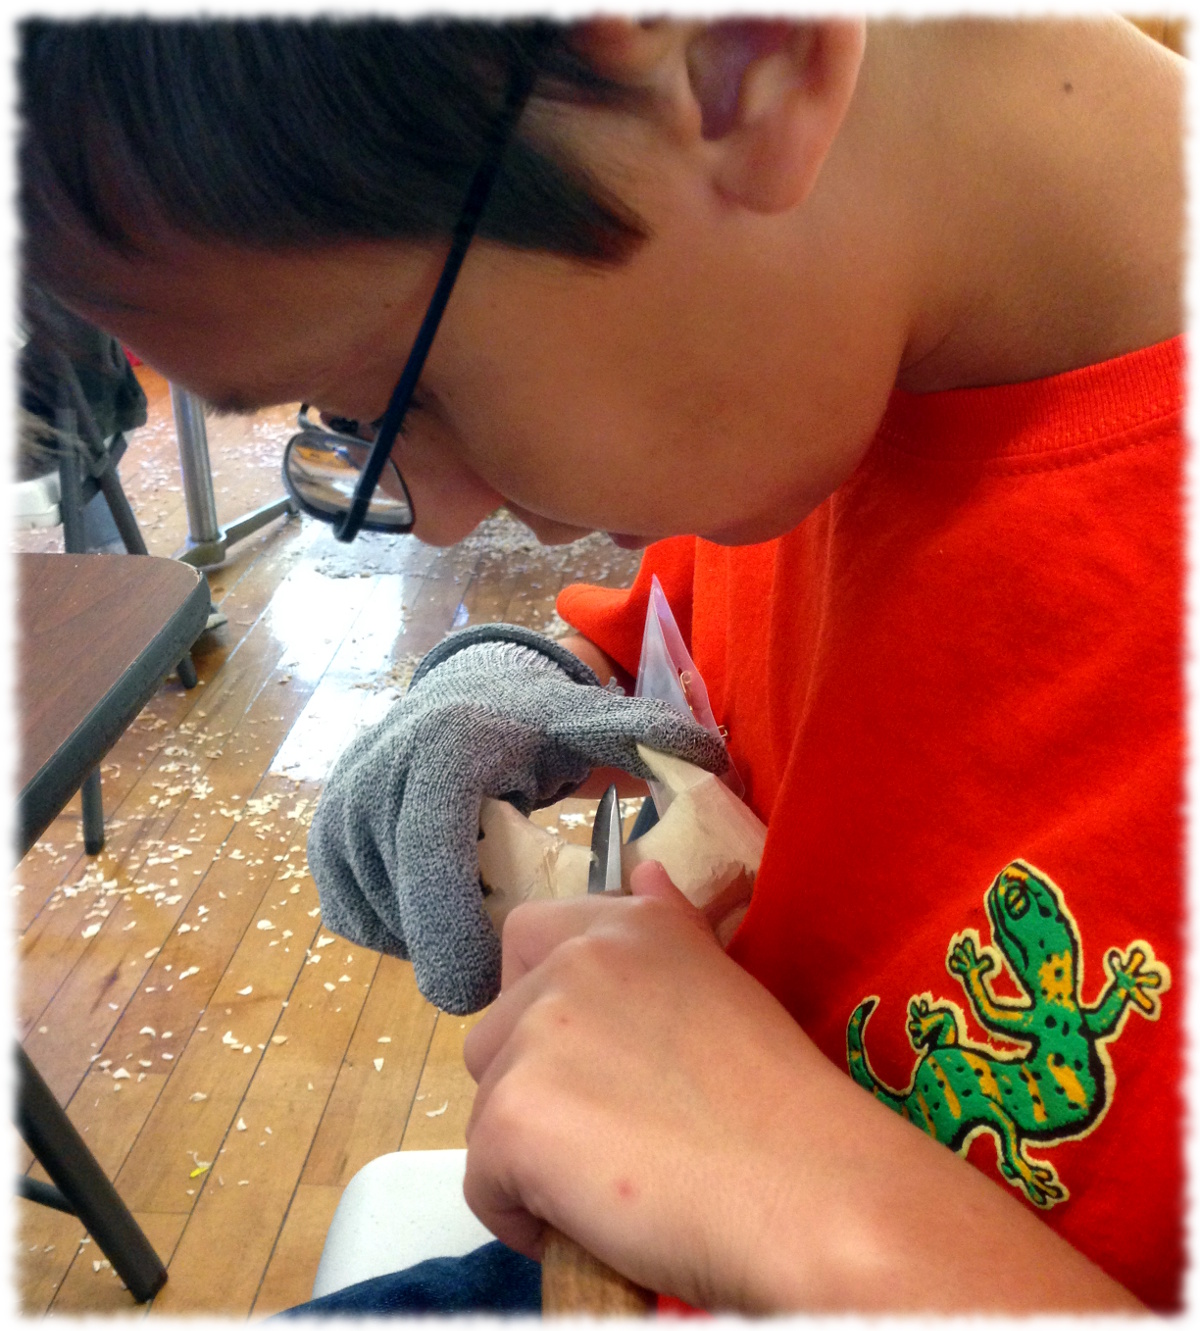
Ben and I headed east for a different sort of adventure. I had signed him up for a woodcarving class for his birthday. It was an introduction to woodcarving at the Rhode Island Woodcarving Retreat (hosted by the Mystic Carvers).
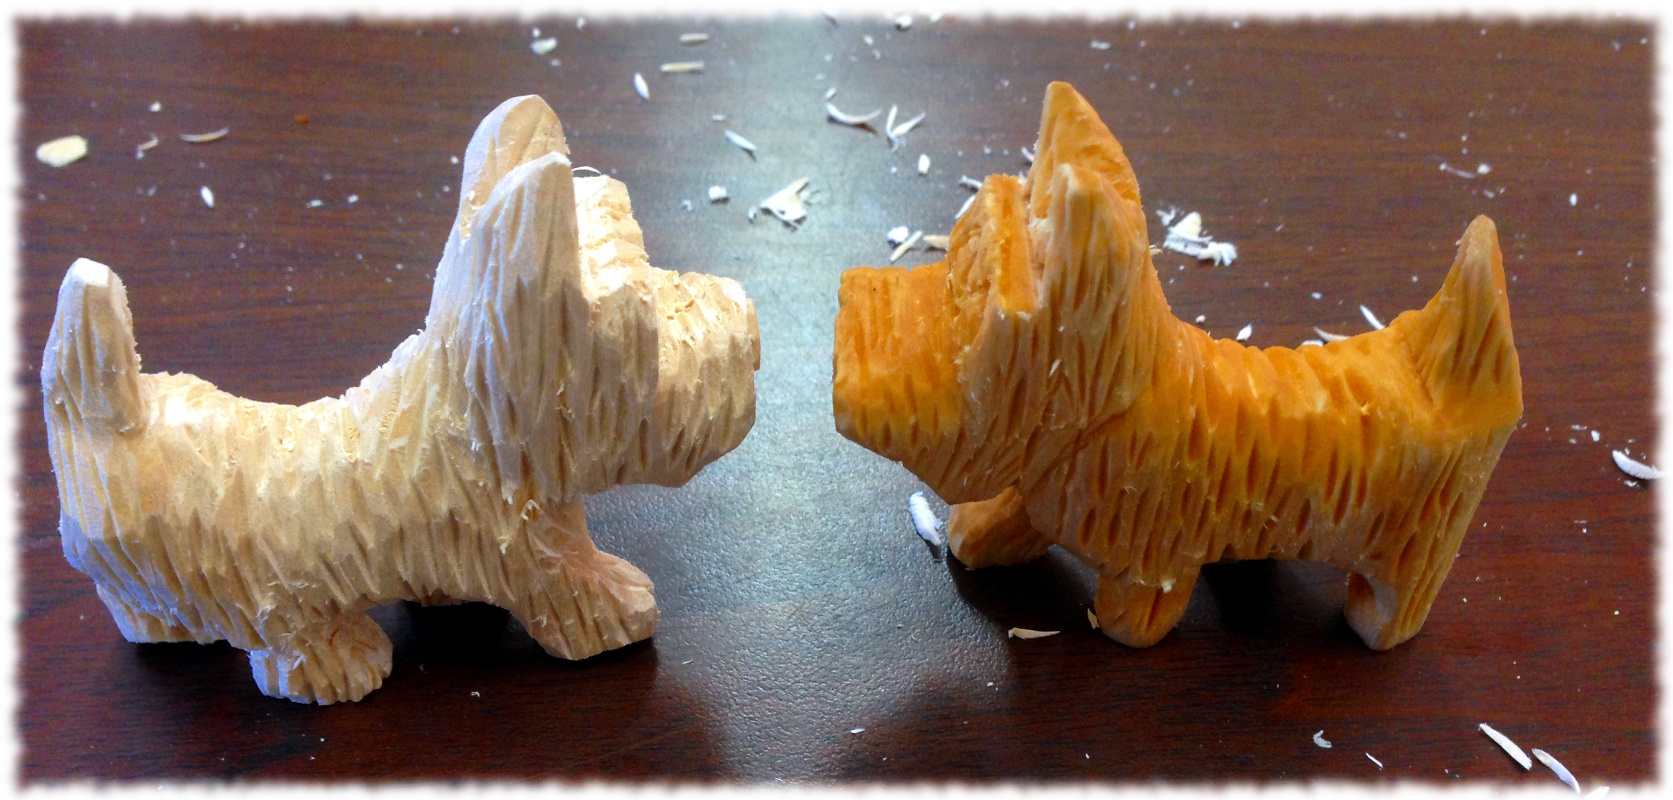
Ben hard at work carving his dog.
It was an amazing experience. We arrived at 8AM and carved until after 3pm (with a few breaks). Ben didn’t get bored or frustrated, he just kept working. Even when I was getting tired, he kept going.
The group of novice carvers worked on a carving of a dog using a carving knife. It was a good pace for a start, and the project was complicated enough to challenge us without being too complicated to complete. Of course Ben was one of two people at the whole retreat under the age of 40, and I think the group thought it was nice to see someone young interested in the craft. And everyone was impressed that he was able to concentrate for over 6 hours on carving. I’m impressed that I was able to do the same (I wasn’t surprised about Ben – he has always been good at those types of projects – me not so much).
He was invited my many members of the Mystic Carving club to join the club. The club meets once a month and offers novice carving lessons at each club meeting. We will probably go to the next meeting (in two weeks) and see if Ben likes it. He loved the class, so I’m thinking we will have fun at the club.
My dog (left) and Ben’s dog (right)
I guess now Ben needs to get some carving knives. Luckily it is a hobby that doesn’t need a lot of tools/equipment to get started. Now I need to spend a day to let my right hand/arm rest from all the work yesterday.