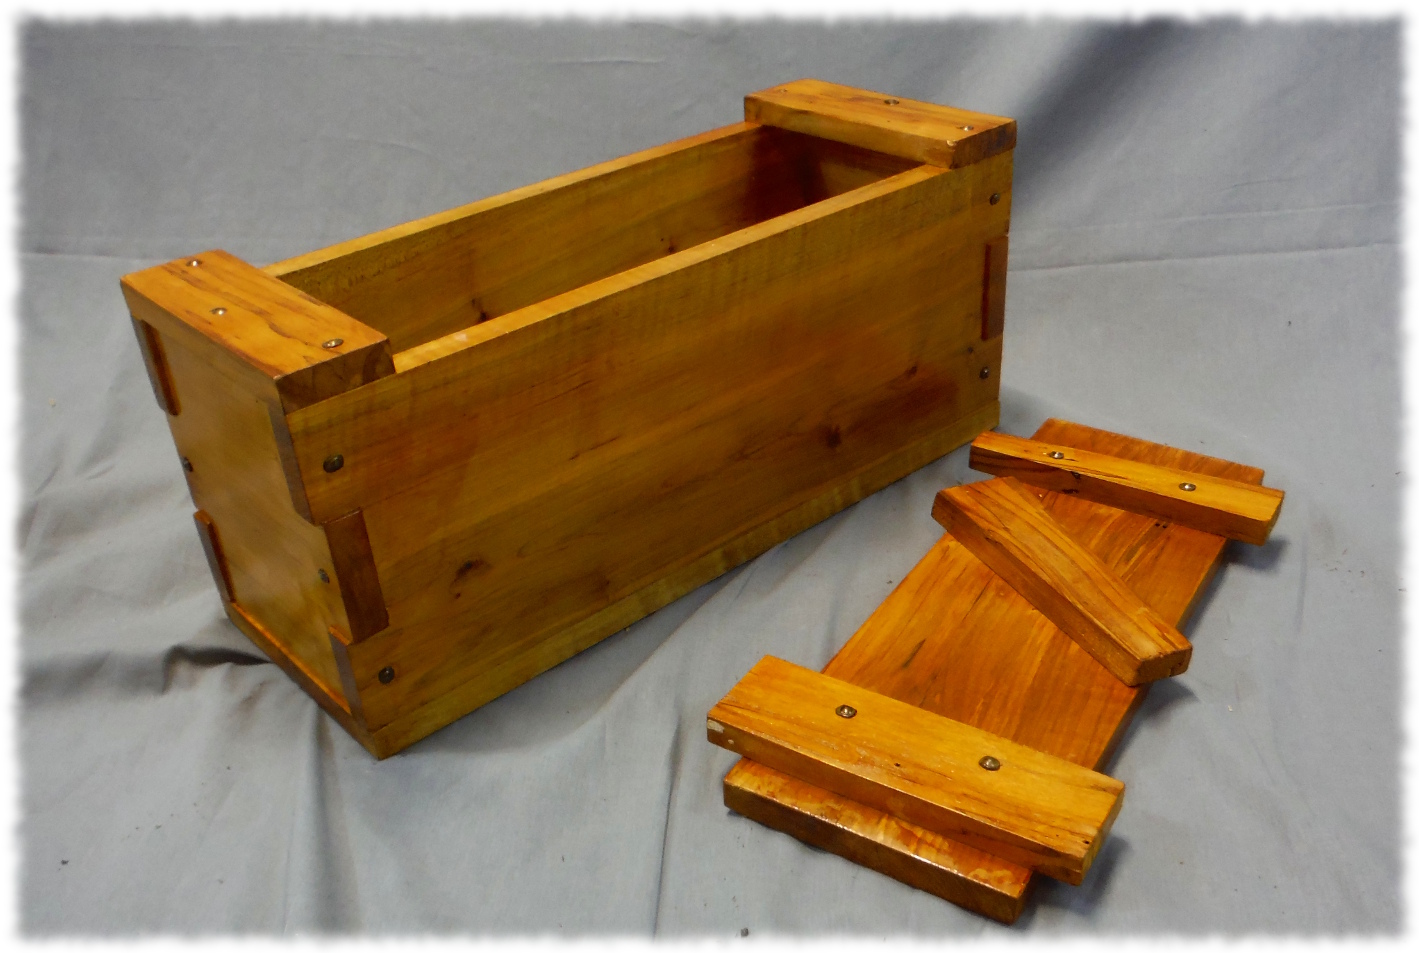
Benjamin’s Japanese toolbox completed (minus handles). Made from maple and finished with shellac.
I try to get the boys into the workshop a couple of times a year and build some smaller projects. It seems that it is an easier sell for Ben than for Will. However, Will does get into the projects once we get started (he just gets distracted easily – but who doesn’t).
This project was a pair of Japanese toolboxes. The boys picked out lumber earlier this week. Ben picked out a piece of maple, and Will picked out what appears to be pine.
The boxes are constructed with a simple box joint and cut nails. We are finishing them with shellac and wax. We were able to get Ben’s box completed today, and hopefully get Will’s finished tomorrow.
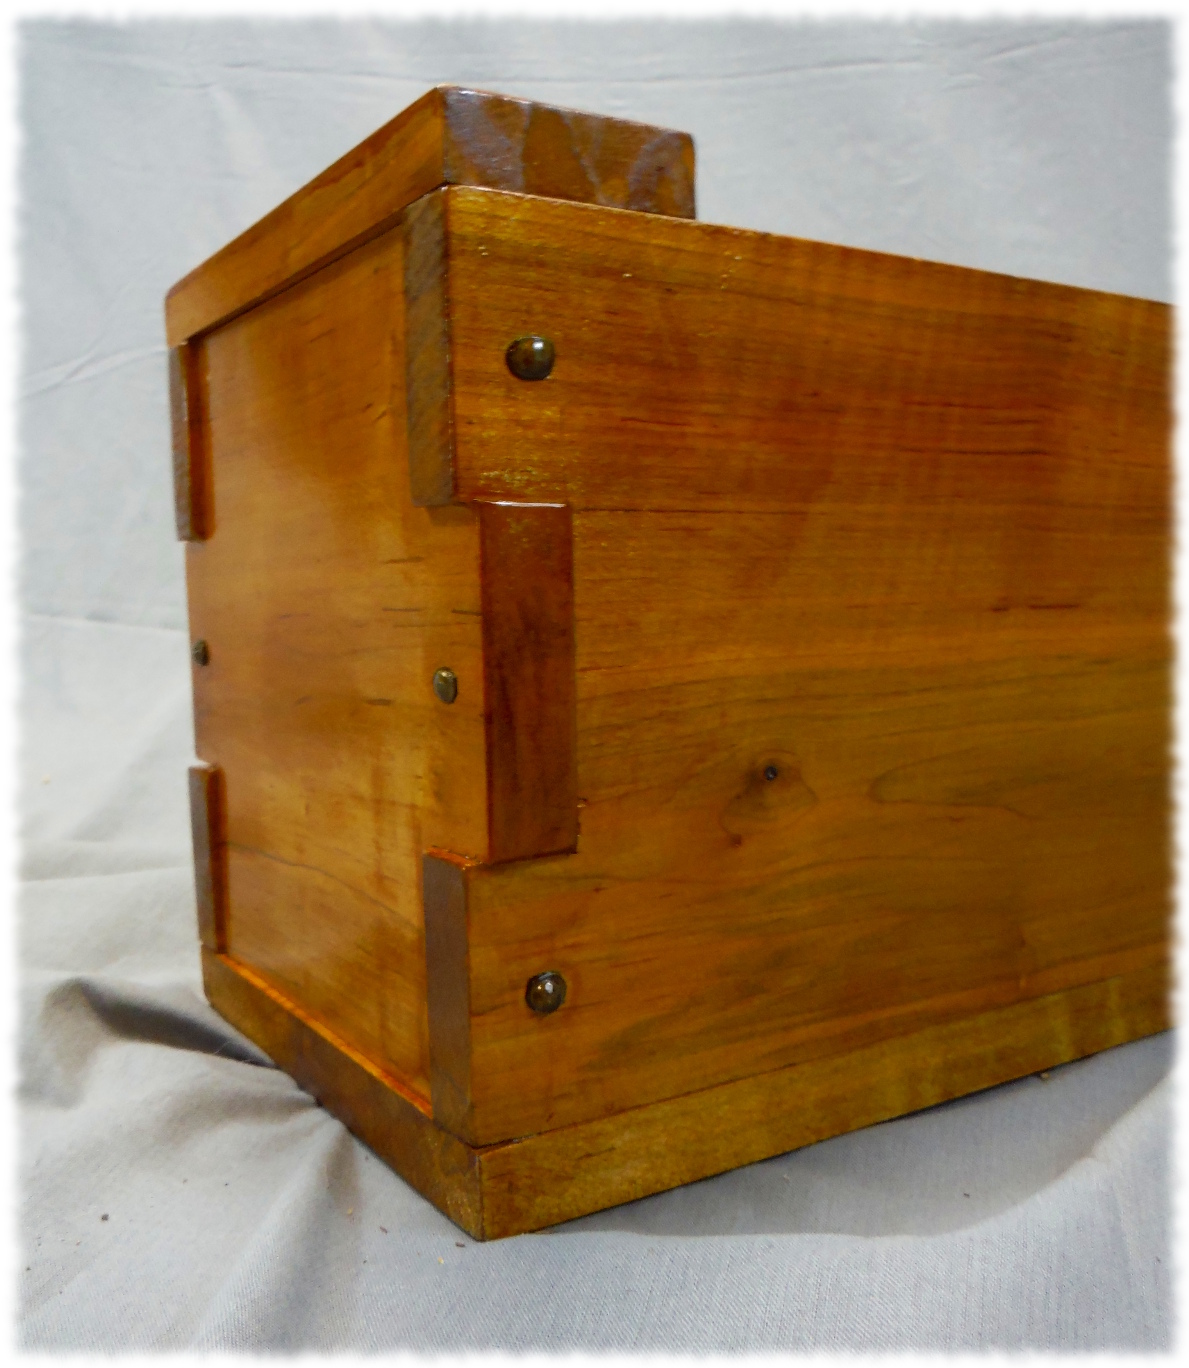
Joinery detail from Ben’s toolbox.
We cut the joints on the table saw. The boys probably could have cut the joints using a hand saw in the pine, but the maple was way too hard to cut by hand. All the pieces were assembled using 2″ cut nails by Tremont Nail Company. I picked up some decorative rose-head nails to add to the character of the box. The battens on the top were nailed and clinched.
The first box turned out pretty nice. Now to find some nice handles to attach to the ends.
This weekend I (quite contrary to my ADHD desires) didn’t start any major projects and instead worked on finishing up some smaller ones. I know. Crazy. Finish projects and not start any. What fun is that? But it keeps the wife happy, so that is worth something.
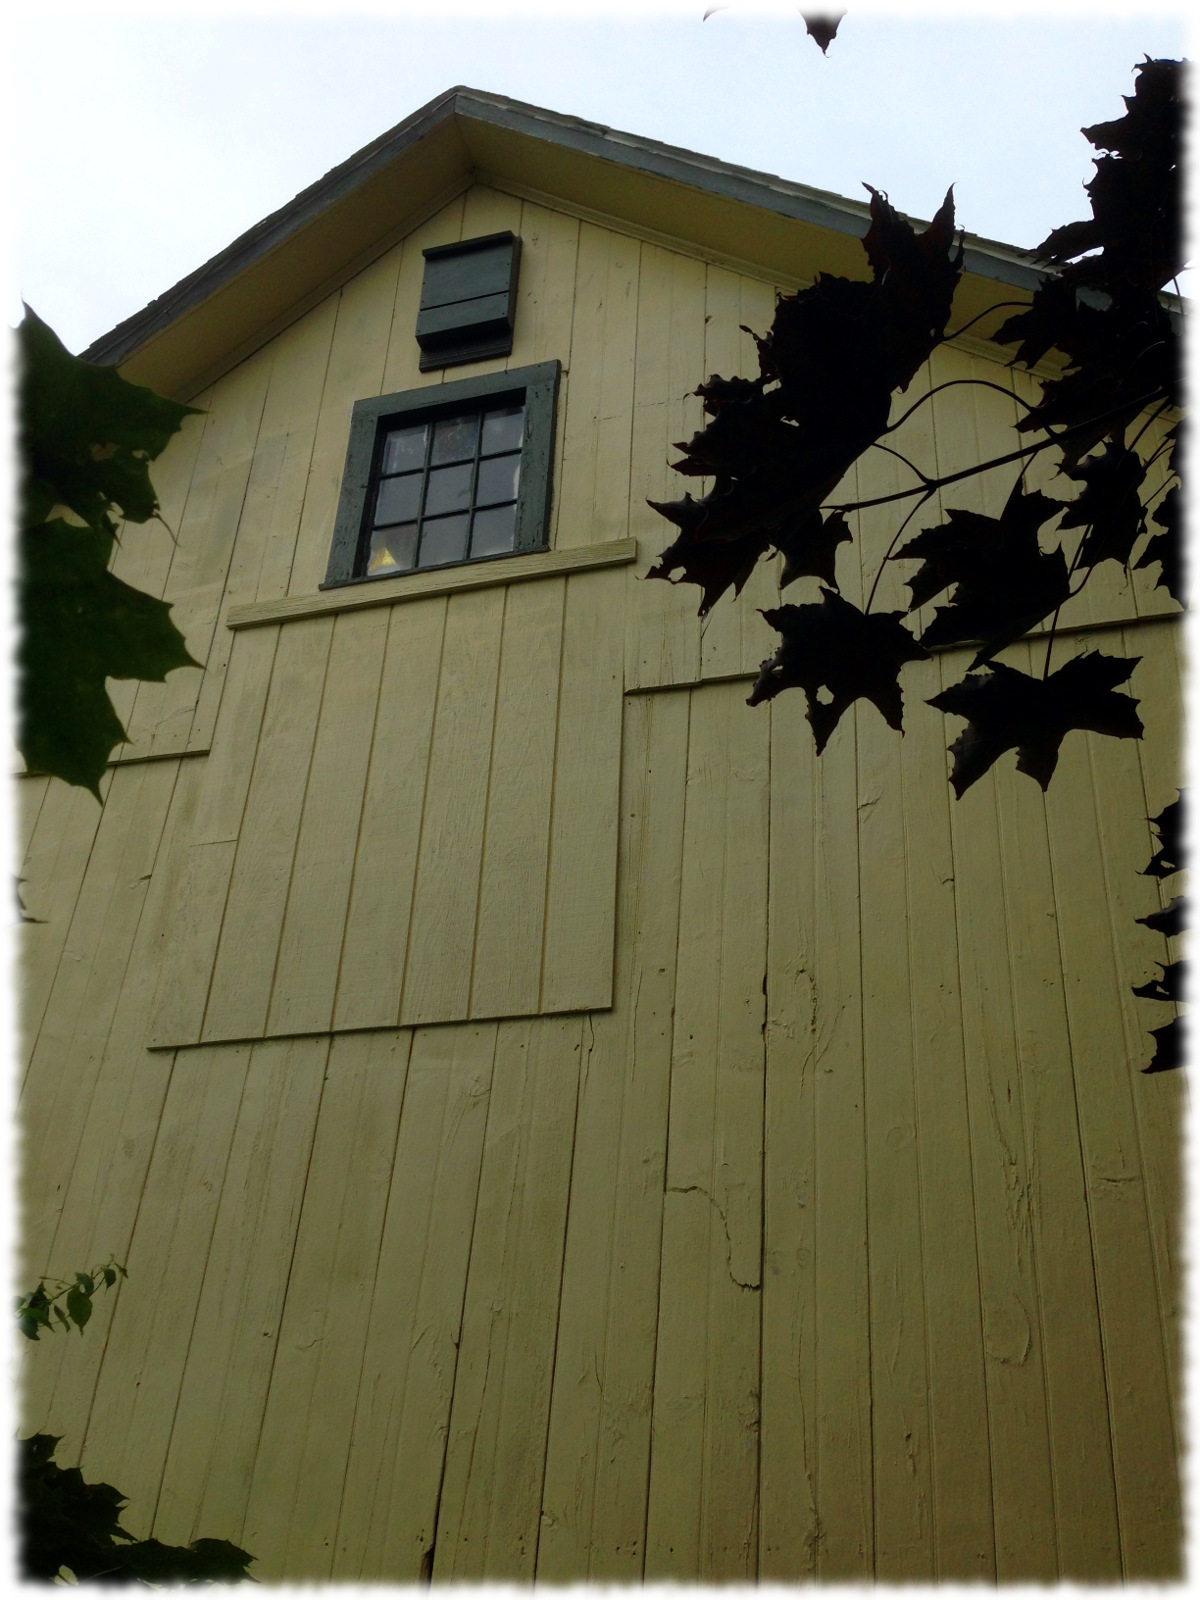
Will’s bat house hung on the side of the garage above the loft window.
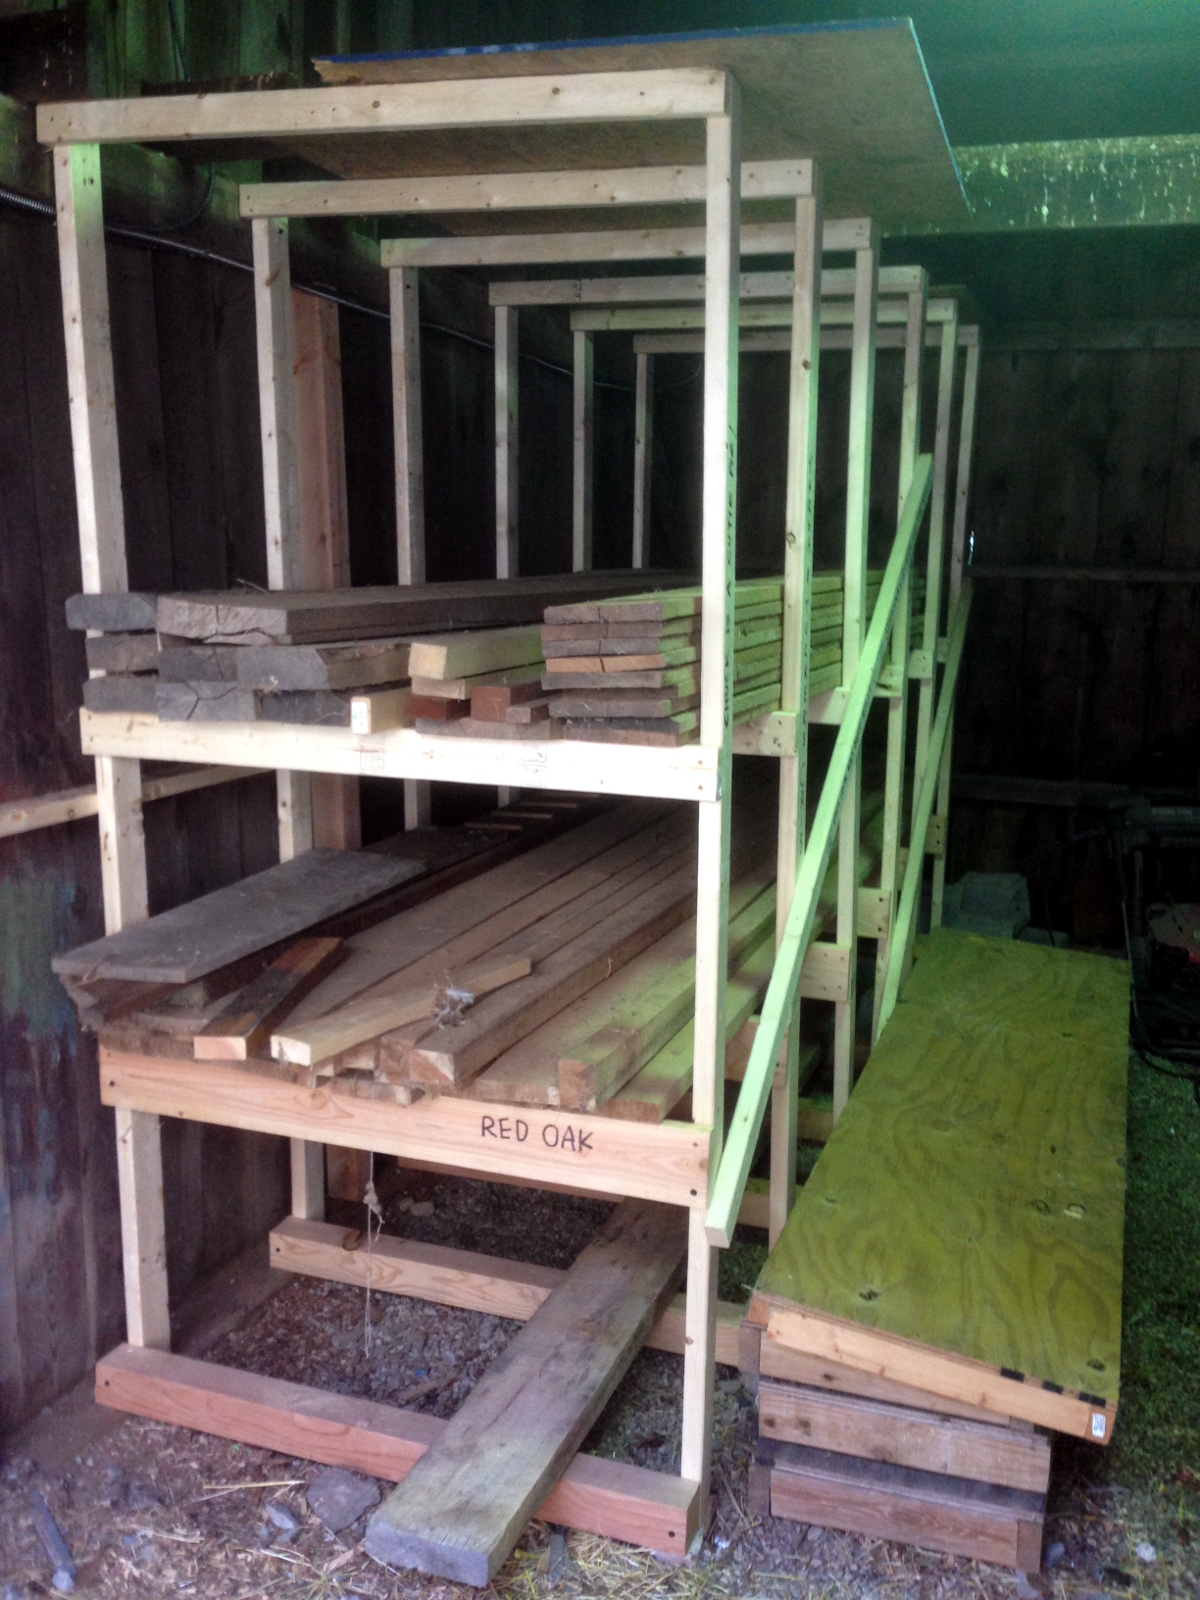
The boys and I added two more shelves to the lumber rack. We brought all the lumber up that was stored under the barn (and wasn’t already on the lumber rack under the barn). That allowed me to clean out a little under the workshop and get the trailer pushed all the way back in.
It was amazing to watch Will and Ben work together to bring up the lumber from under the workshop. Or rather, fail to work together, so each had to drag boards individually. But, I guess that is what brothers are for. Of course I didn’t take any pictures of the upgrades/cleaning so you will just have to take my word that I actually did the project. Susanna even helped by labeling the now-somewhat-organized stacks of lumber. In English and Swedish.
Last week Will and his friend, Morgan, painted the two bat houses that they had made with me a couple of weeks ago. Morgan didn’t have any exterior paint at her house, so both bat houses were painted with the green trim paint from our house and barn. Yesterday Will and I decided to hang his bat house. Will even helped me drag out the tall ladder and set it up. The bat house is high up on the south face of the garage (above the chicken coop). Now all we can do is wait and see if we get tenants.
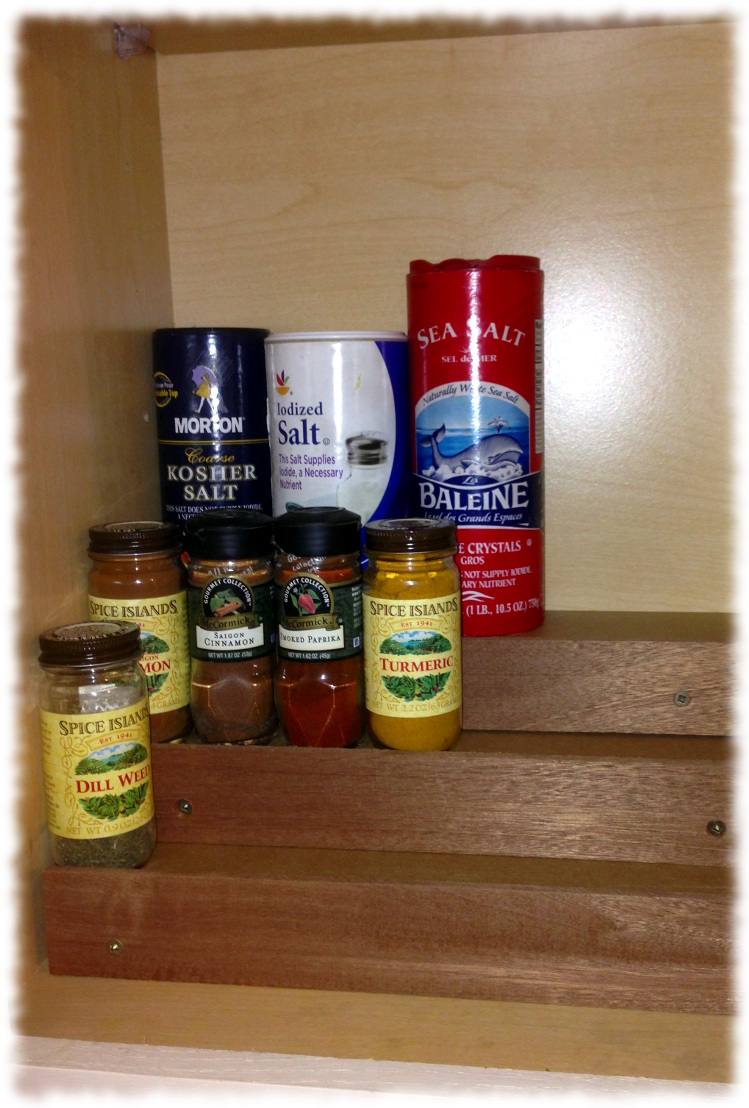
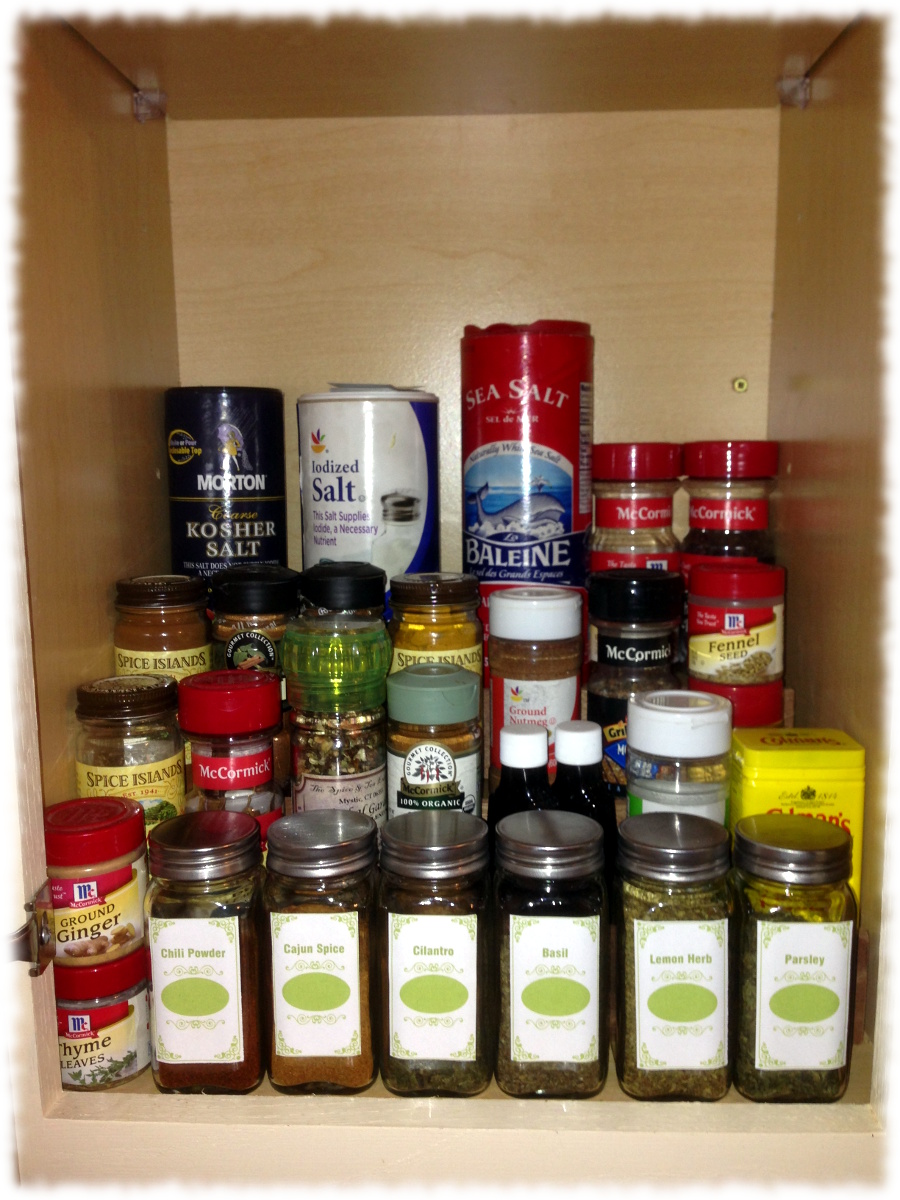
Today I decided to make a quick spice rack. We have been keeping our spices on the bottom shelf of one of the kitchen cabinets next to the stove. It was a pain to find spices – they were a disorganized mess and one had to dig around lifting up bottles to find the desired spices. I had a few pieces of good plywood lying around, and all we needed was some steps in the cabinet to allow us to find the spices in the back. It took about an hour to cut the pieces to size and mill some sapele for the front edge of the rack. I couldn’t find my wood glue to attach the front edging, so I attached the front with a pair of screws. Anyway, the steps will be hidden underneath the spice bottles when it is filled in. The only reason I chose sapele was that I had two smaller pieces in the workshop and I didn’t feel like going out and pulling out something less expensive. And sapele isn’t really that expensive anyway.
And tonight, instead of cleaning up the workshop, I decided to write in my blog and push cleaning off for another day.
Spice rack installed. The back step is 4″ deep for larger bottles. The front two are about 2″ deep, with about 2″ in front of the rack for a final row of bottles.Spice rack complete with spices.
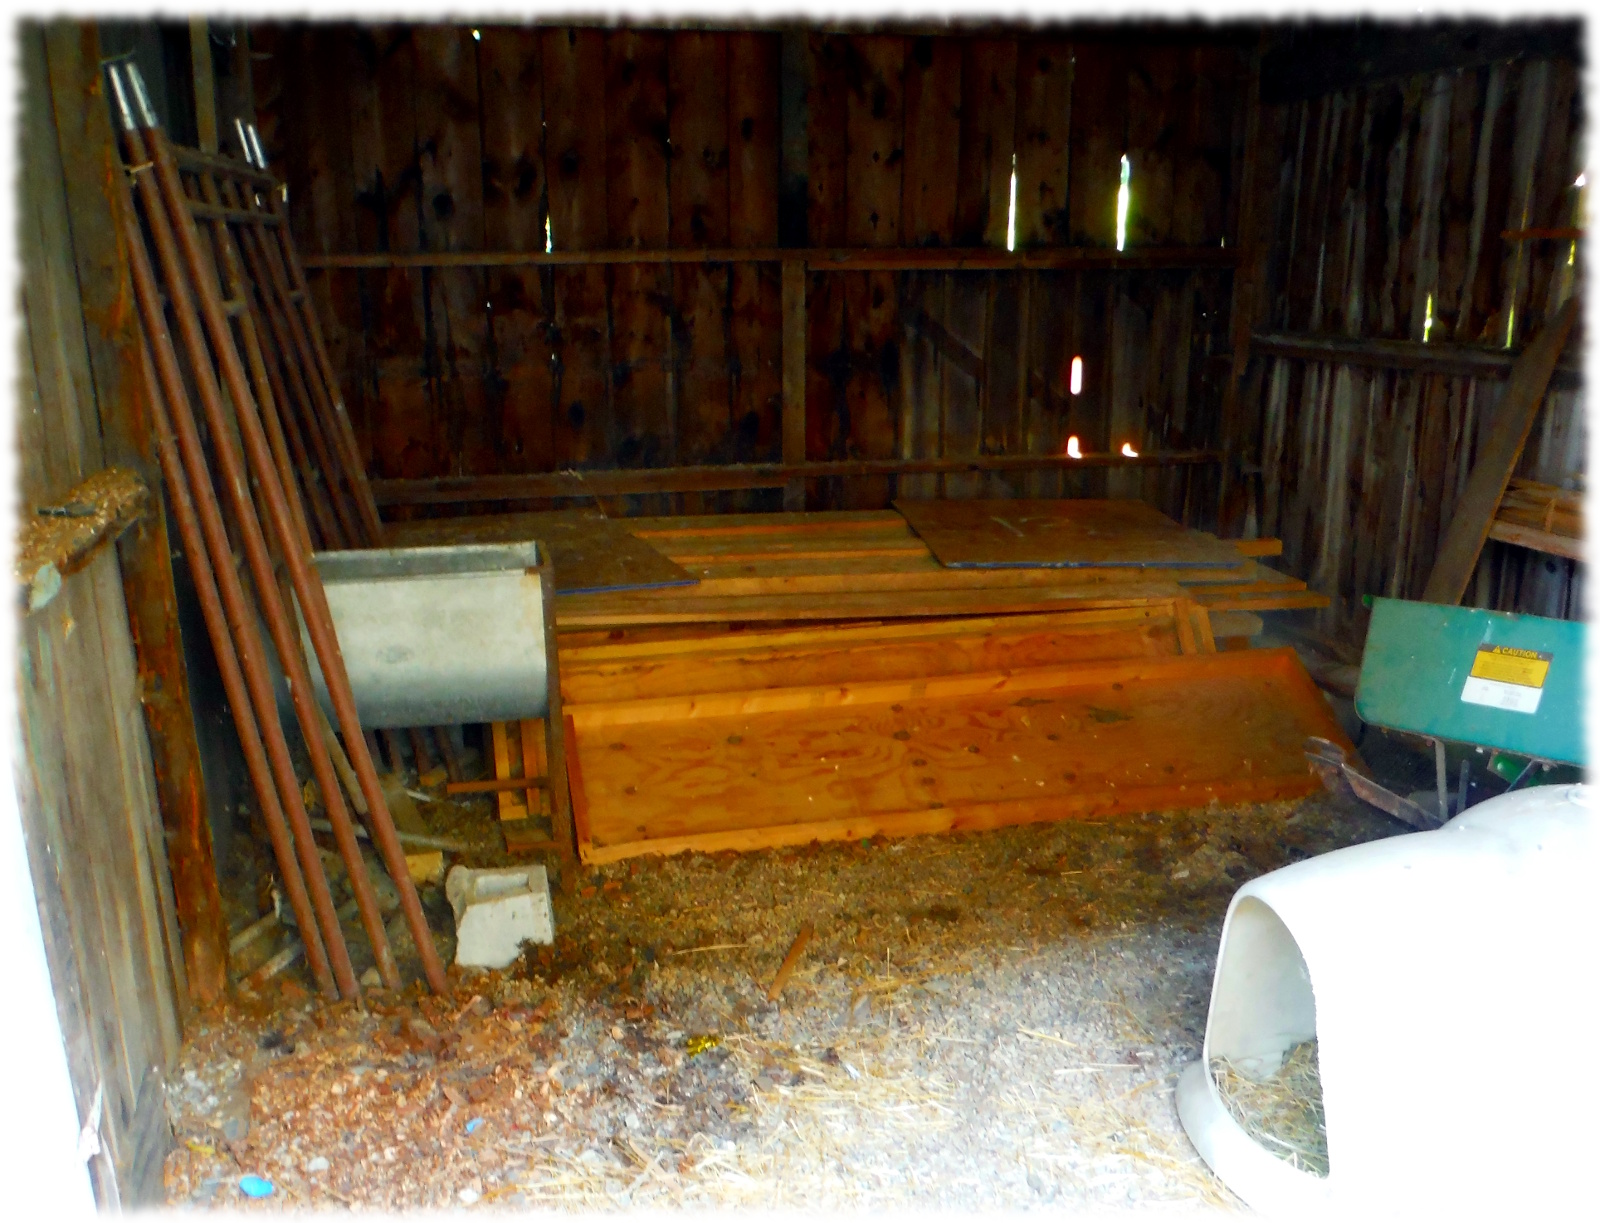
The lumber pile/junk storage/dog pen prior to reorganization.
The last bay of the garage/carriage house is a large, unpaved area. For a long time it just served as an overflow storage area and nesting place for a large group of house sparrows. I had added a gate to the opening so it doubled as a dog pen (in the summer). In the back of the bay I stacked a nice pile of red oak, hickory and maple to air dry. The wood pile wound up being a nice place for Tucker to sit when he got bored staring out the gate and a real pain in the a$$ when I wanted to get a board that was at the bottom of the pile.
A friend of mine is cutting up a large maple tree into slabs and needs a place to air-dry the wood for a couple of months before turning it over to a kiln. We have lots of room, if I just reorganized our stuff a bit. And I just really needed an excuse to build a lumber rack.
I had picked up boards cut from a single oak tree in Ledyard a couple of years ago, and they have been drying in the pile since then. All the other lumber was older and dry. So I could build a proper lumber rack and not worry about keeping the stickers between the rows of boards. Saturday night I headed to the home center and picked up a bunch of construction lumber to build a storage rack.
The lumber rack with most of the wood from the pile stacked on. I have lots of room for additional shelves (to be added one of these days).
Sunday I emptied the barn and started building the rack. Of course, I found one of the posts for the barn had rotted, so I had a little project detour to replace that. But it wouldn’t be a good project without a few detours. I had the rack mostly finished by that afternoon.
Yesterday I added the second row of shelving and stacked the remaining lumber from the pile on the shelf. The boys helped me clean and organize the rest of the space. The next step will be to double up some of the 2x4s on the supports and add an additional shelf or two to help keep the lumber organized.
Today the boys helped carry up a few boards that didn’t fit on the lumber rack under the workshop and were just stacked down there. Okay, I have two lumber racks. I have a problem. I know. I have too much lumber. Of course, if you have a good deal… I’m always looking for more. I wouldn’t want to run out in the middle of a project.
But of course I have plans for the lumber. Though I’m sure I’ll never get around to it all:
Hickory: I have a bunch of heavy 8/4 boards that would make a nice workbench even though hickory is a pain to work with and the beams are heavy and a pain to move around. And I already have a functioning antique workbench. But it seems that making a workbench is sort of rite of passage.
Red Oak: I have a matched set of boards from a single tree. I was going to make bedroom furniture from it until Susanna said she likes cherry better than oak. So it will be used to make the boys furniture (and I already made night stands for them from some of it). I also have some random non-matched boards floating around. Red oak is way too common here and is usually used just for firewood (it is like it grows on trees almost).
Cherry: I have a bunch of cherry that Susanna and I picked up on a road trip to Western Massachusetts a couple of years ago. The cherry is for furniture for us and the house. Anyway, cherry is nicer to work with than oak.
Maple: I have maybe 8 boards left that a friend had gotten cheap on Craigslist before he decided that he had too many hobbies to continue making furniture. It is pretty nice spalted maple. I think the boys are going to claim a couple of boards to make Japanese toolboxes this month.
White Oak: A bunch of 8/4 and thicker boards. Okay, I don’t really know what I’m going to do with it. But white oak is strong and rot resistant, so it may go to outdoor projects.
Sapele: A few remaining boards from a stack that had gone to smaller projects and trim on the sailboat.
Cedar: A bunch of smaller boards that I really have no idea what to do with.
Some random other species: Mahogany (though the plank I have isn’t really mine, I just store it and look at it), Yellowheart, Fir, and I’m sure a few more. The boys keep taking the smaller pieces of wood and re-purposing them into swords and leaving the swords outside until they are no longer usable and become firewood and they need to make new swords.
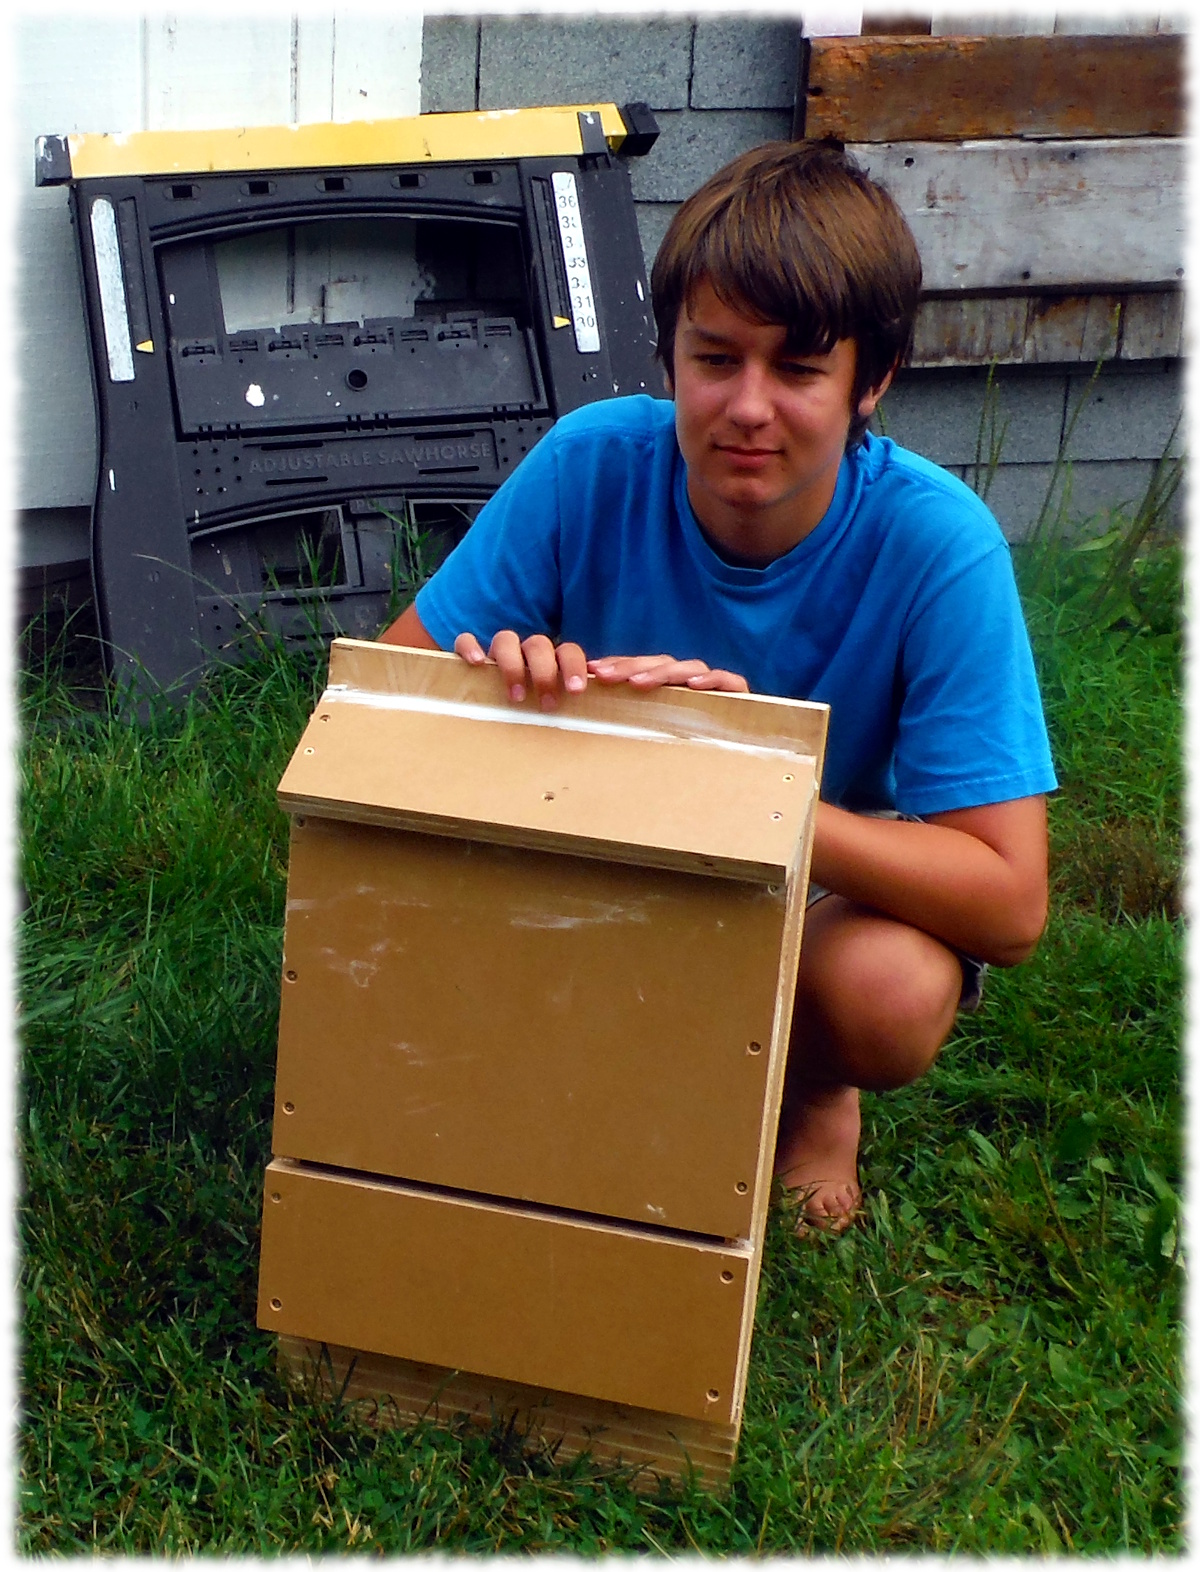
I had been talking to Will about projects he would find fun to do in the workshop. He said that he thought building a bat house would be fun. Today he had is friend, Morgan, over and the two of them built bat houses (one for her house, and one for here).
The project was quick and made from 3/4 plywood (and MDO) scraps I had lying around. The real pain will be hanging it way above the chicken coop after it has been painted. We had initially planned on going sailing today, but the weather didn’t support it.
Will and completed bat house. Once the caulk dries, we will paint it and hang it on the garage.
A three-day weekend! Every weekend should be a three-day weekend!
We had time to enjoy a date night on Friday (Comix Comedy Club at Foxwoods), get lots of house projects done, and even relax a little bit in the evenings.
Instead of starting a big project this weekend, we decided to focus on getting smaller projects finished.
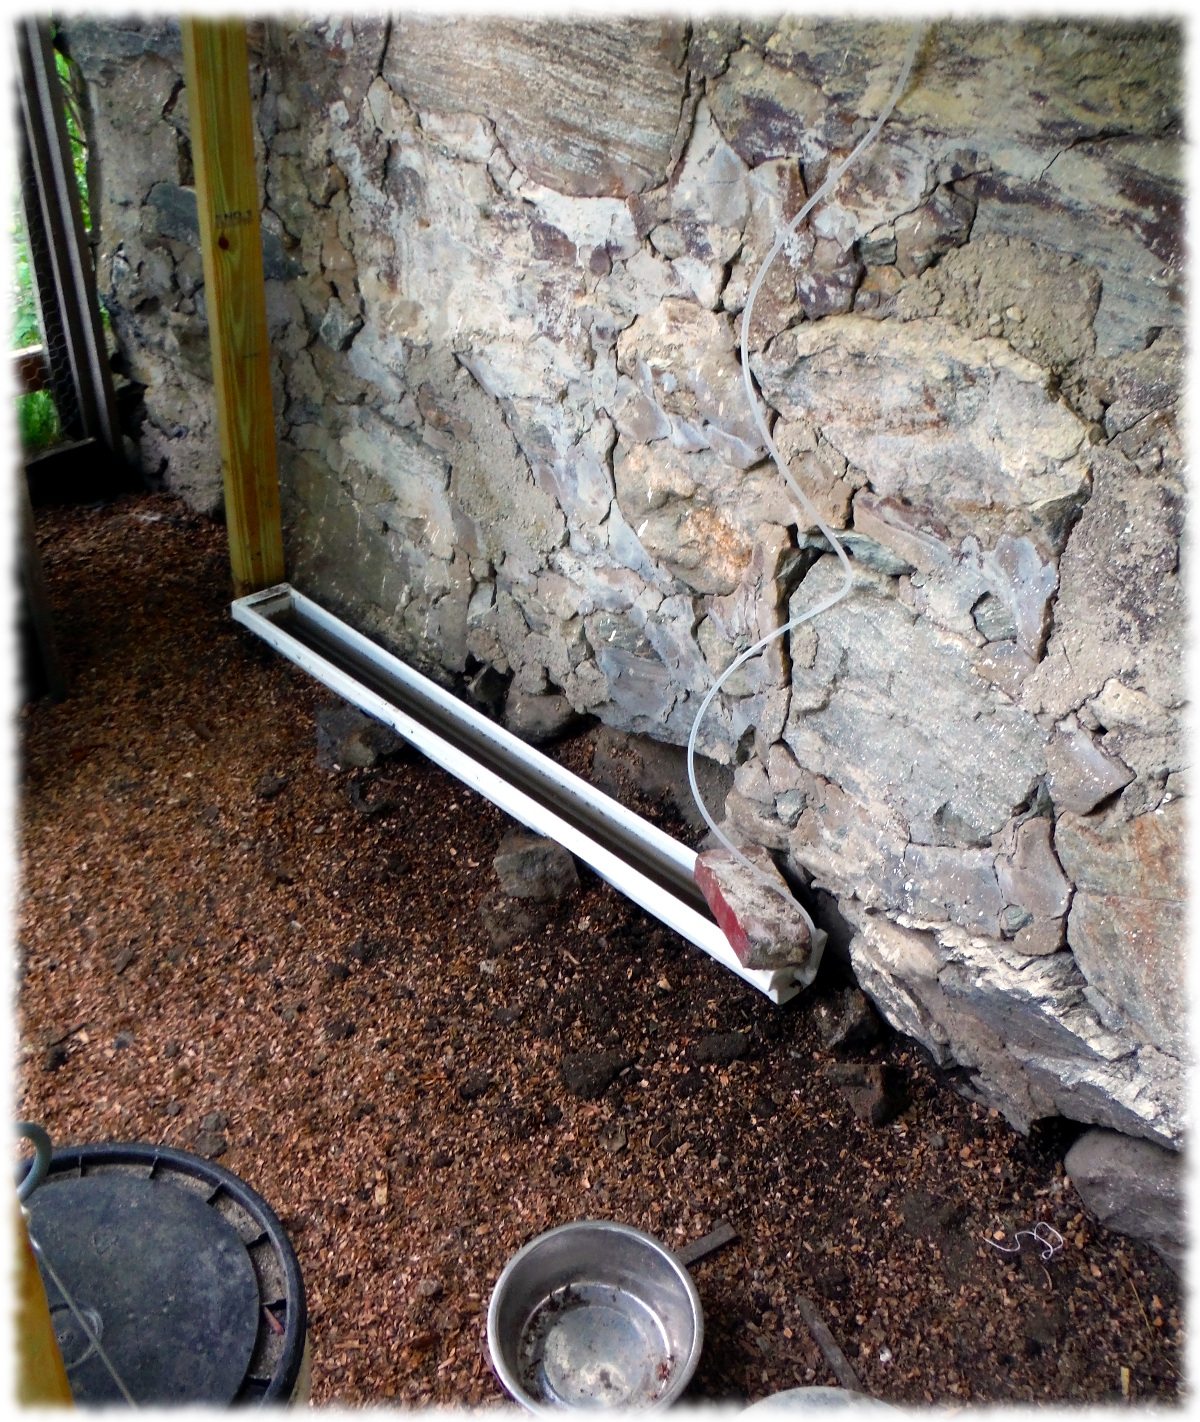
I added a better bird waterer to the coop. The ducks had made a mess of the chicken waterers, so I took a piece of PVC gutter and a cheap float valve and made a new water trough for the birds. I plan on improving it in the future to make it easier to clean out, but for now it is an improvement over the old one.
The new duck/chicken water trough. The trough is fed from a 5-gal bucket in the garage, so I don’t have to go in the cage to refill the water (though I do to clean it out for now).
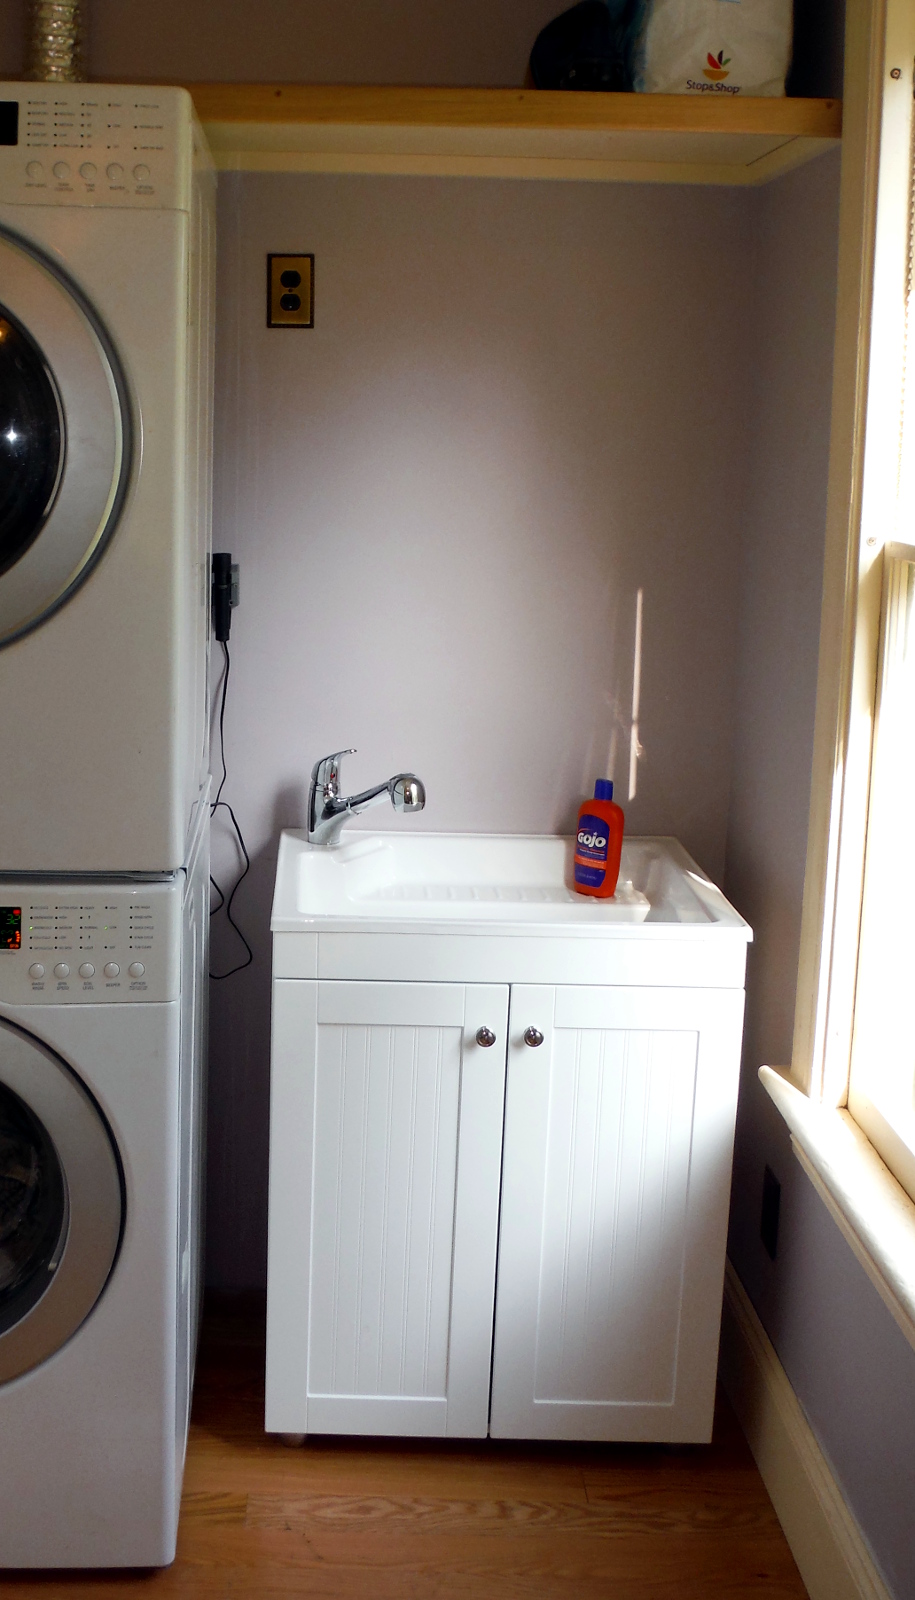
We also decided to add a shelf and laundry sink to the mud room. Susanna and I worked on the shelf together on Saturday, and I installed the sink today.
Susanna working on the finishing touches of the upper shelf. We plan on adding a lower shelf above the sink later this week.Laundry sink installed. We picked up a kit from Home Depot. It took about an hour to assemble and install.
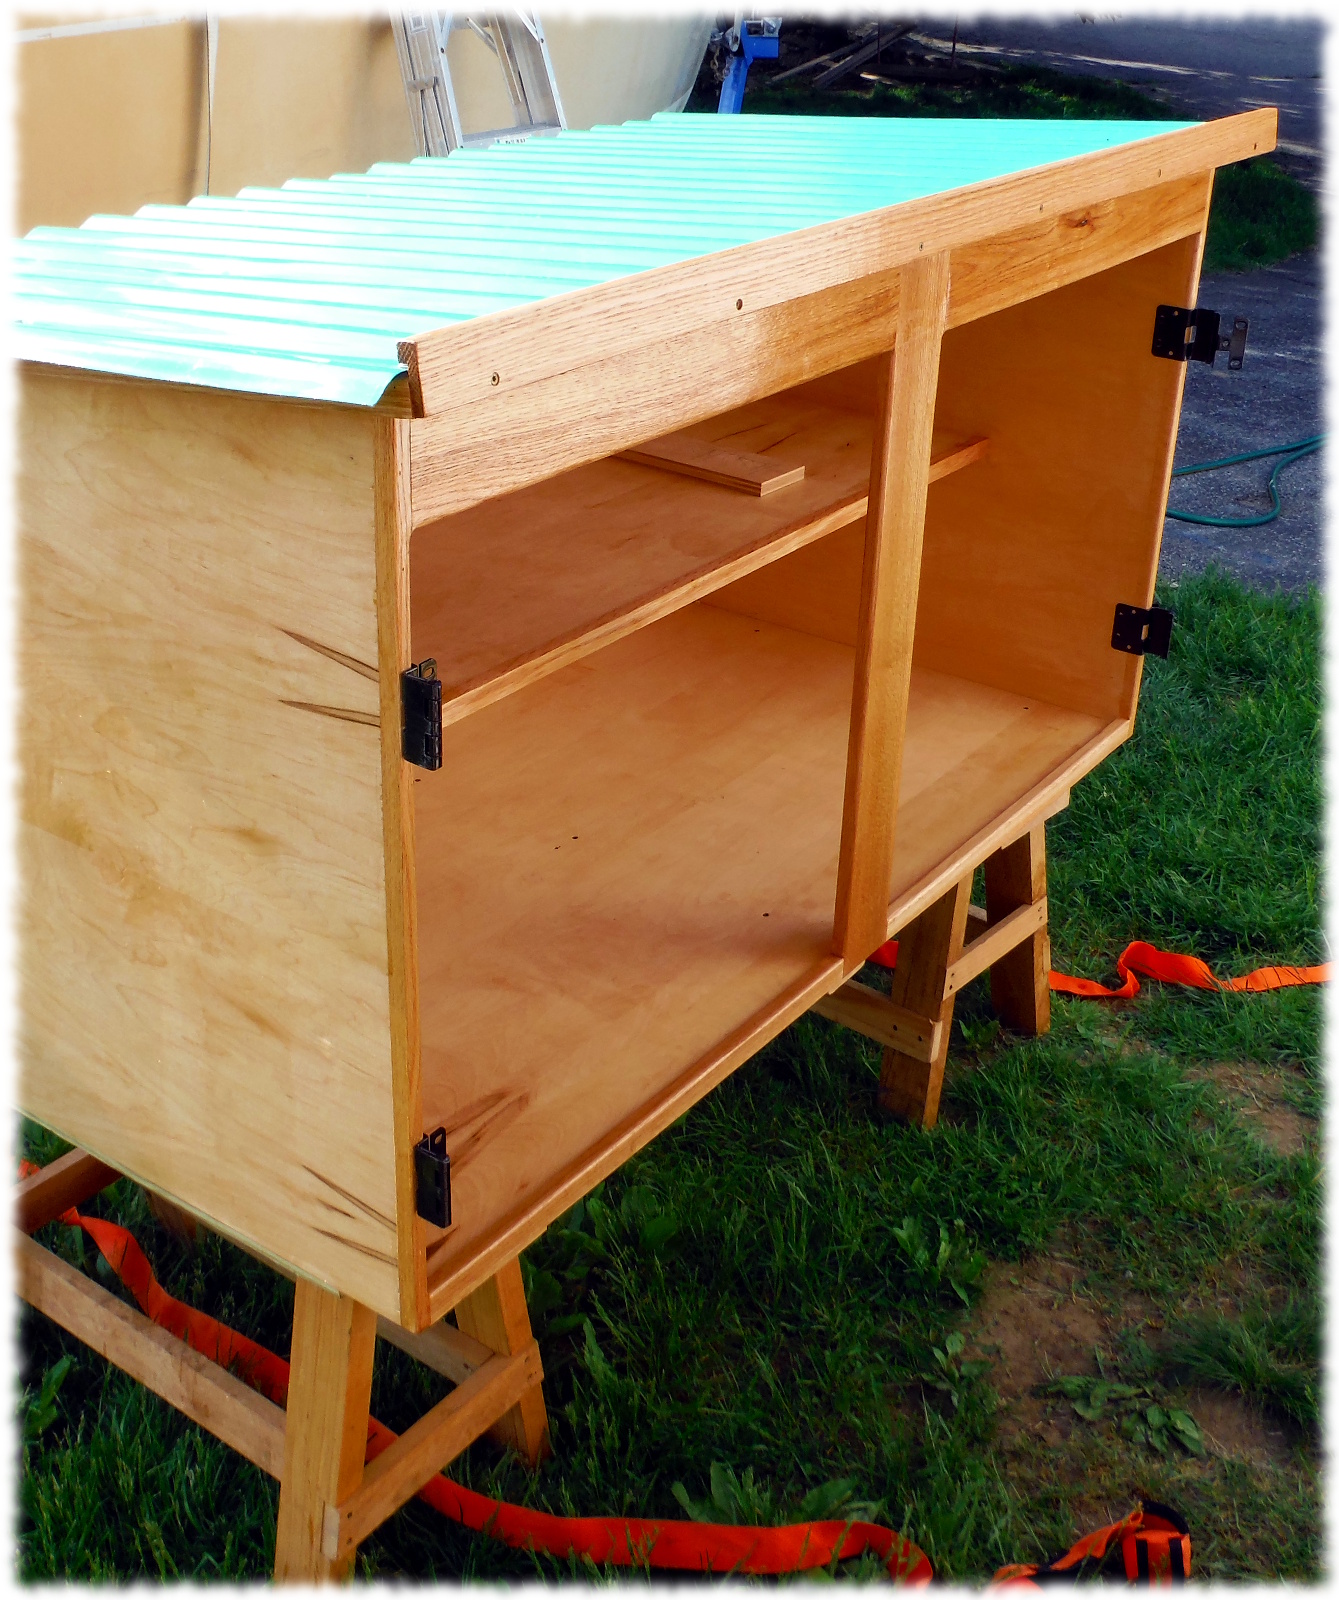
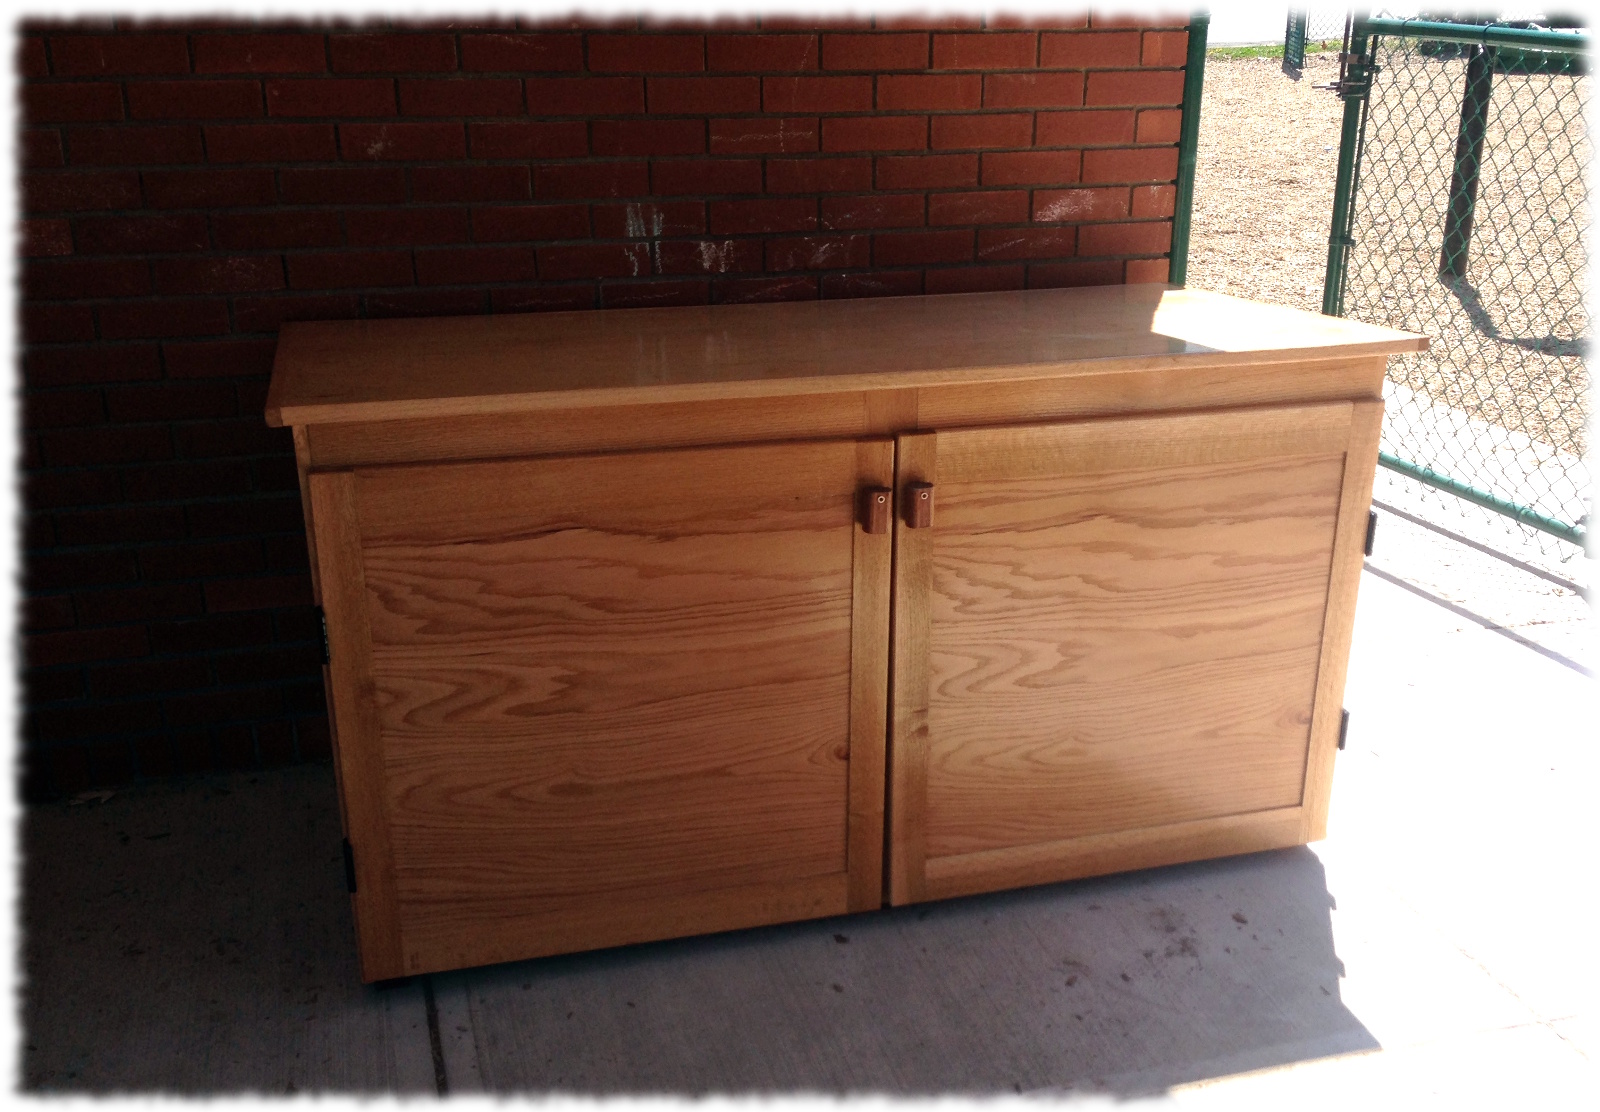
I even got time to work on the third toy box for Susanna’s school. The box construction is complete, leaving only a couple of coats of varnish to put on the doors. Hopefully the weather will support delivering it on Thursday evening.
Third toy box nearly complete.
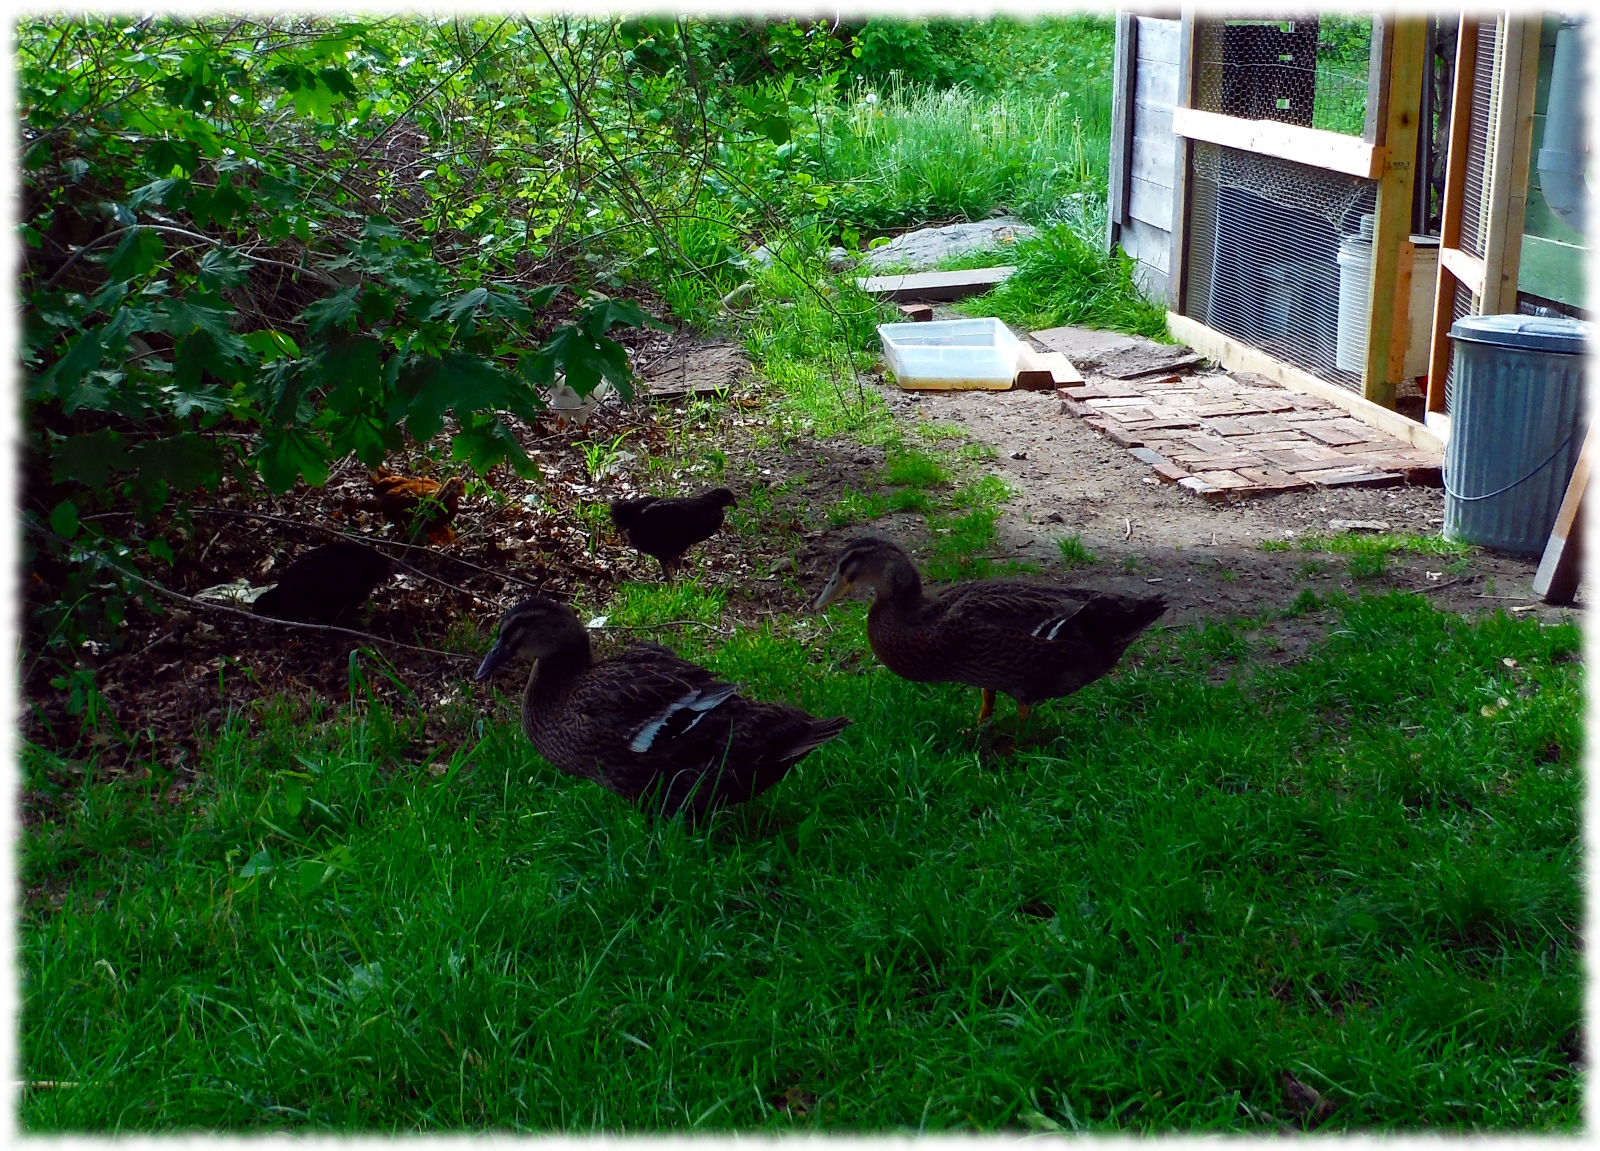
The entire household enjoyed the beautiful spring weather. Perfect for finishing projects, hanging out, or foraging for food (if you are a chicken or duck).
The chickens and ducks enjoying their time out of the coop on a beautiful spring day.
Last Sunday I delivered the second toy box to Susanna’s preschool. The third box is in the shop mostly completed – hopefully I’ll get it out the door in a week or two.
Second outdoor toybox delivered.
The roof on the first box is in pretty rough shape after being exposed to the weather for the winter (as I had expected). I finally got the preschool to agree that a better roof is needed (than just cheap plywood). I’m going to put a corrugated PVC roof on the third box, and will retrofit the PVC roof to the first two boxes.
It is nice to start reclaiming my workshop from the piles of plywood that have been taking up space for the past 6+ months.
It has been a busy couple of weeks here. The snow is starting to melt. It is warm enough for nice afternoon walks and evenings in the workshop without the kerosene heater running the whole time.
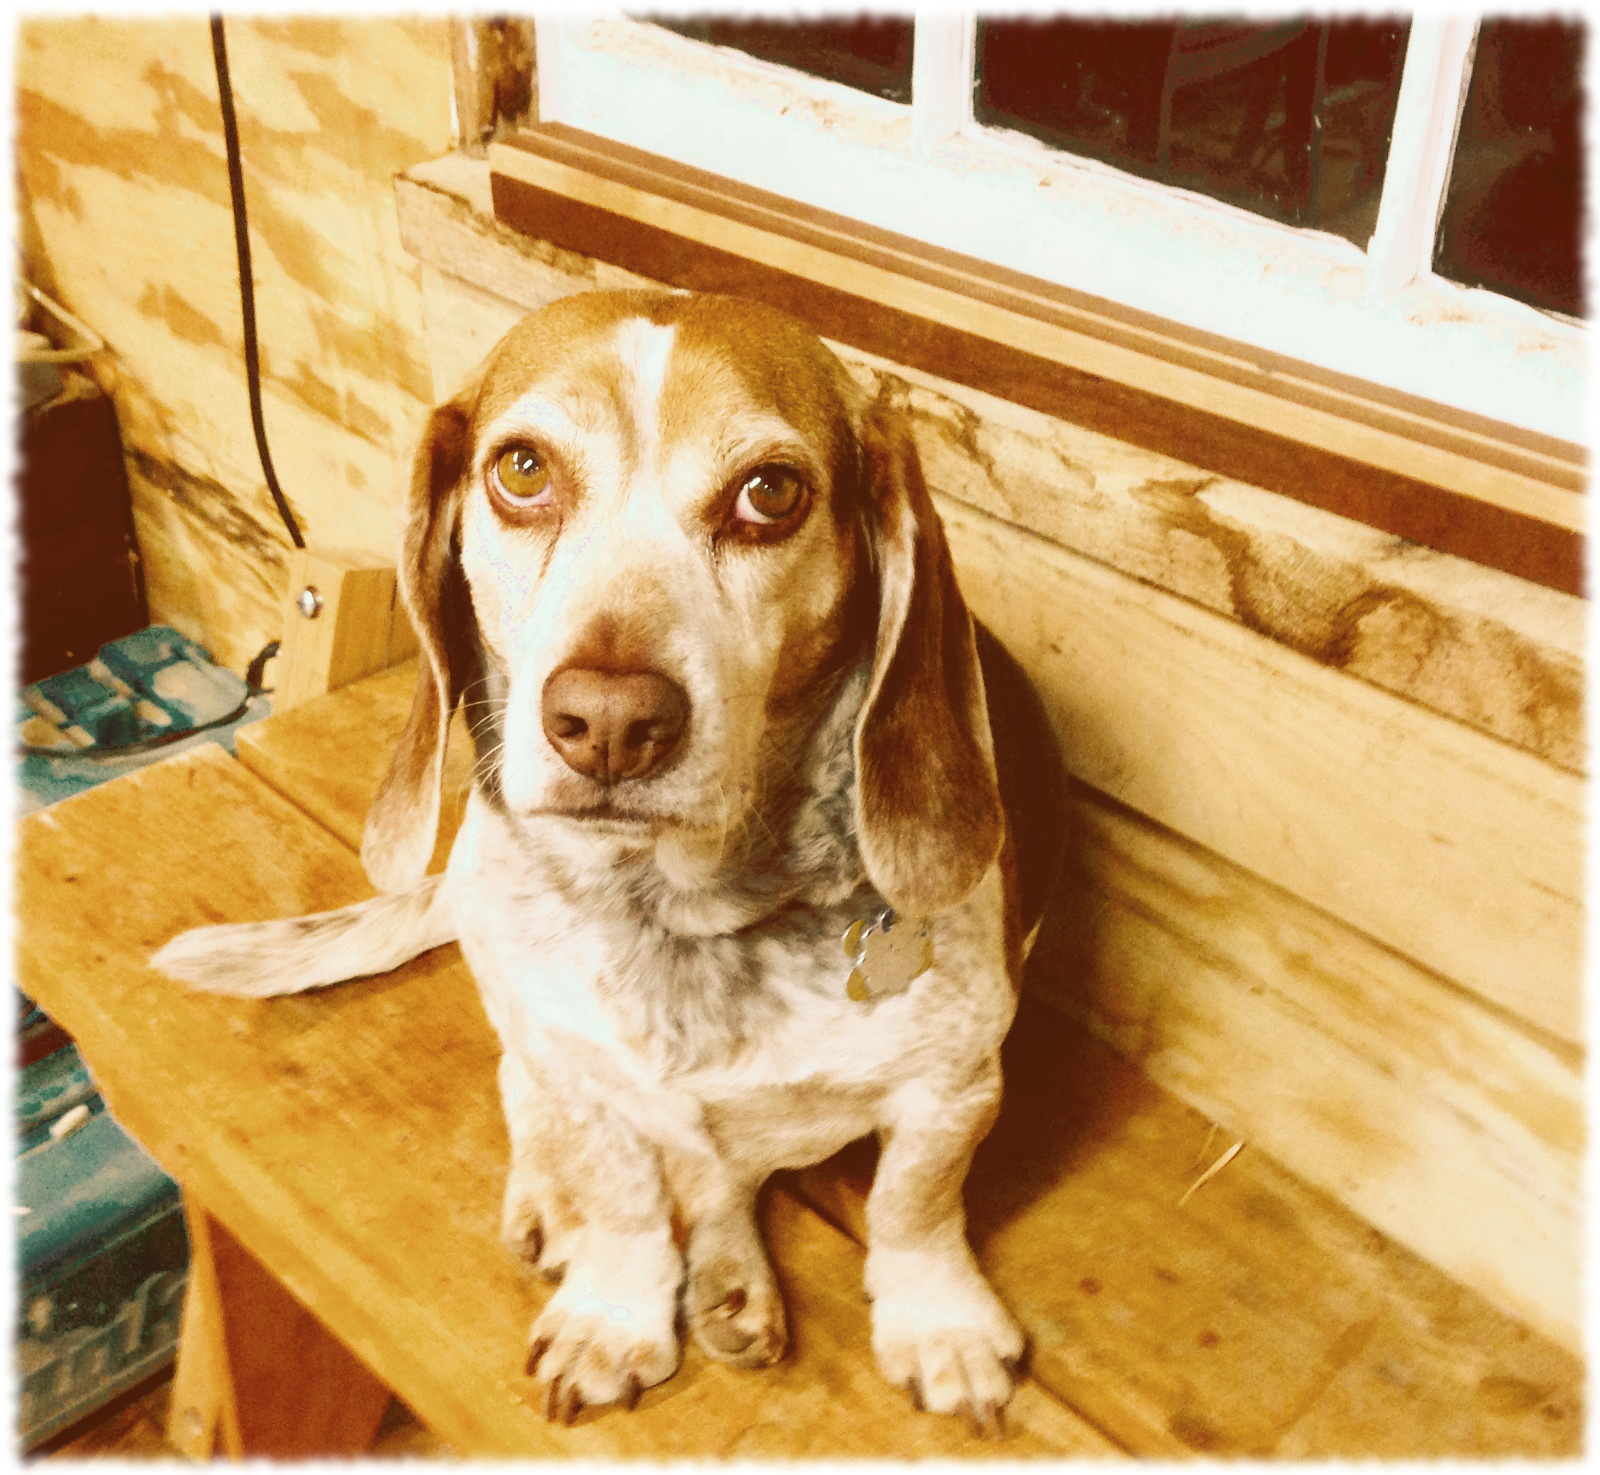
My shop assistant for the evening. He is reminding me to stay focused. On him. And to not drop boxes on his head (Sorry Tucker).
I have one toybox sitting in the shop completed awaiting delivery. It looks like the snow will melt enough this week to get the trailer out and deliver it. The final box is making progress – I can complete it by the end of this weekend if I focus on it. But of course there is a very good chance I will get distracted sometime before Sunday night.
The boat finally thawed enough for me to pump out the bilge. I’m planning on doing some small boat upgrades before launching in May. I would like to add a permanent fresh water tank and plumbing to the sink. I also want to add some cushions in the cockpit and a new cushion on the port settee.
New cushions will require sewing. Sewing required a working sewing machine. We had an old Singer in stuffed away in storage that I’ve been keeping limping along over the years. This year I replaced a drive belt and various smaller plastic parts that have fallen apart over the years. I’ll have to build a table on the second floor of the loft to sew the cushion covers. I learned that trying to cut the fabric on the dining room table just doesn’t work. And we have the space for a full 4×8 table, so why not use the space. And then to YouTube to figure out how to make cushion covers.
Time to get going on the projects so I’ll have enough completed to relax this summer!
Winter is pushing into March with a snowfall this afternoon. That on top of the frozen snow from the past month’s snow. We are starting to get a little stir crazy being stuck in the house. It even seems that Minecraft isn’t exciting Will as much today as usual.
Instead of just sitting around, we decided to head out to the flea market this morning. The boys each picked up a pocket knife (to keep in the workshop).
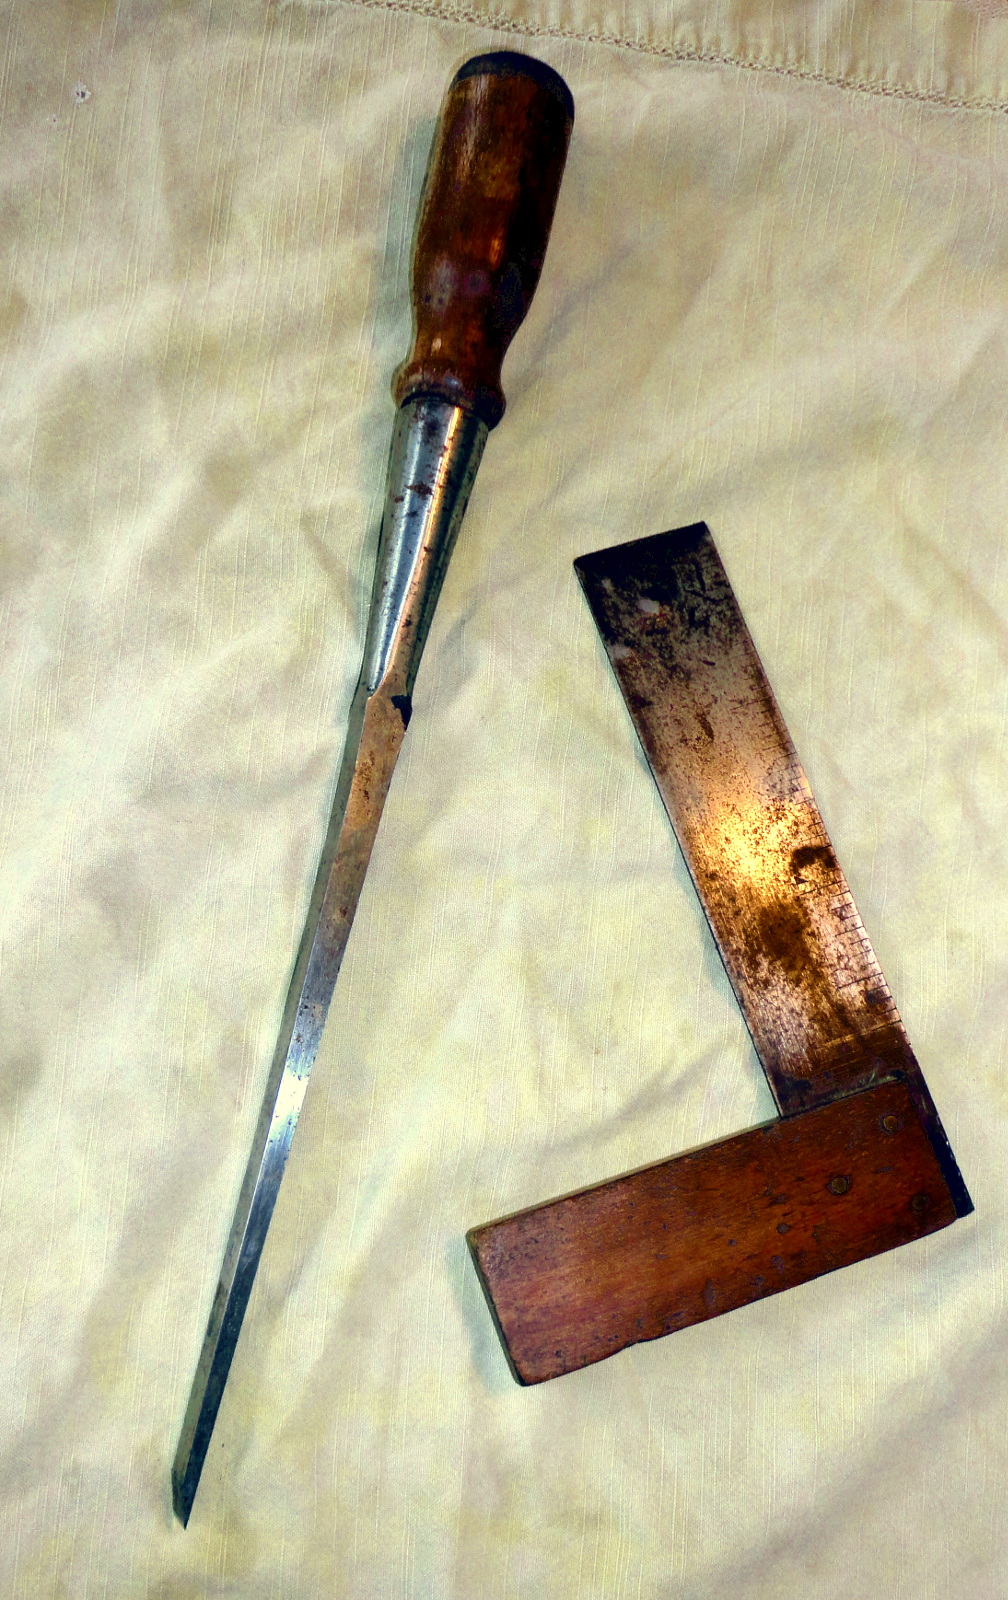
I found a small (6″) square for $1 and a large mortise chisel for $10. Both seemed like a good deal. The chisel was pretty sharp, and only took a few minutes on the water stones to get a good working edge. The square cleaned up to a nice patina. I have no idea if it is square. If it is, I will add it to my usable tools. If not close enough to easily correct, I’ll have to add it to the wall decoration (in the workshop – for no reason I can understand, Susanna doesn’t allow me to decorate the dining room with antique tools).
What a beautiful day. The morning started out with a spring snow. The temperature was just above freezing and the snowflakes huge. This afternoon the sun found its way out from behind the clouds and the temperatures soared into the mid-40s.
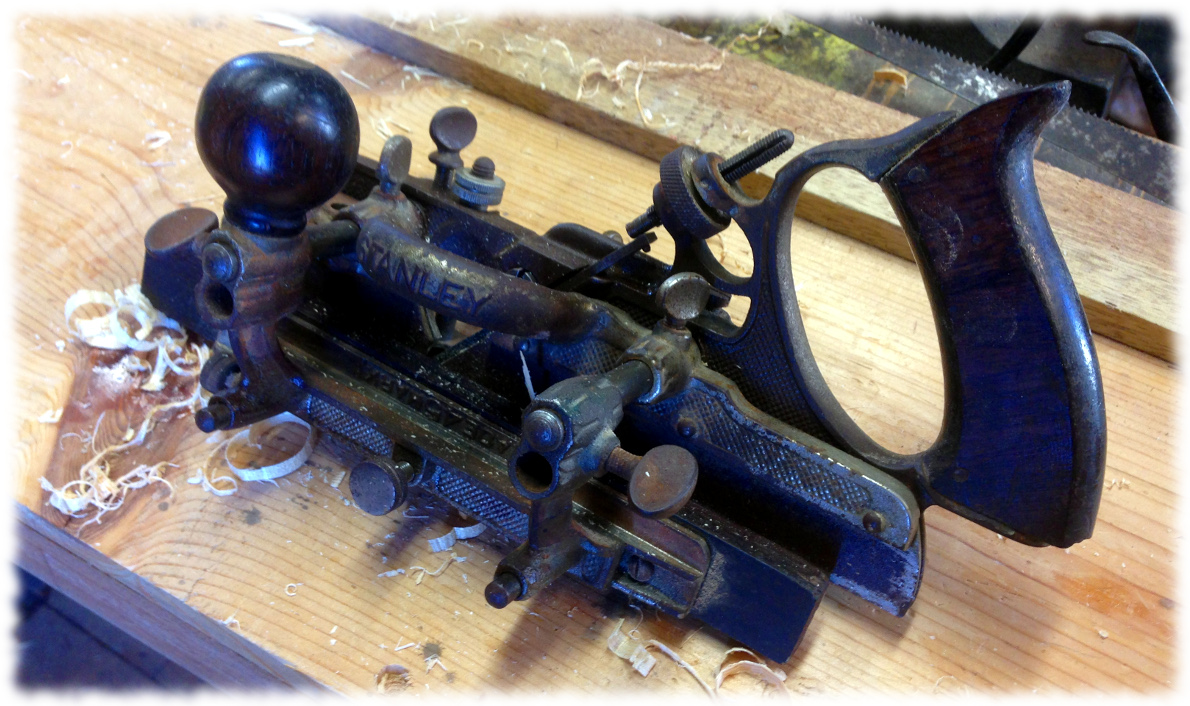
My Stanley No. 45 combination plane after making a 1/4″ rabbet on a piece of scrap pine.
The yard is still covered with nearly 2-feet of snow, but with warm temperatures I am able to keep the workshop comfortable with just a small electric heater. The kerosene heater puts out a lot of warmth, but at a cost. It is loud.
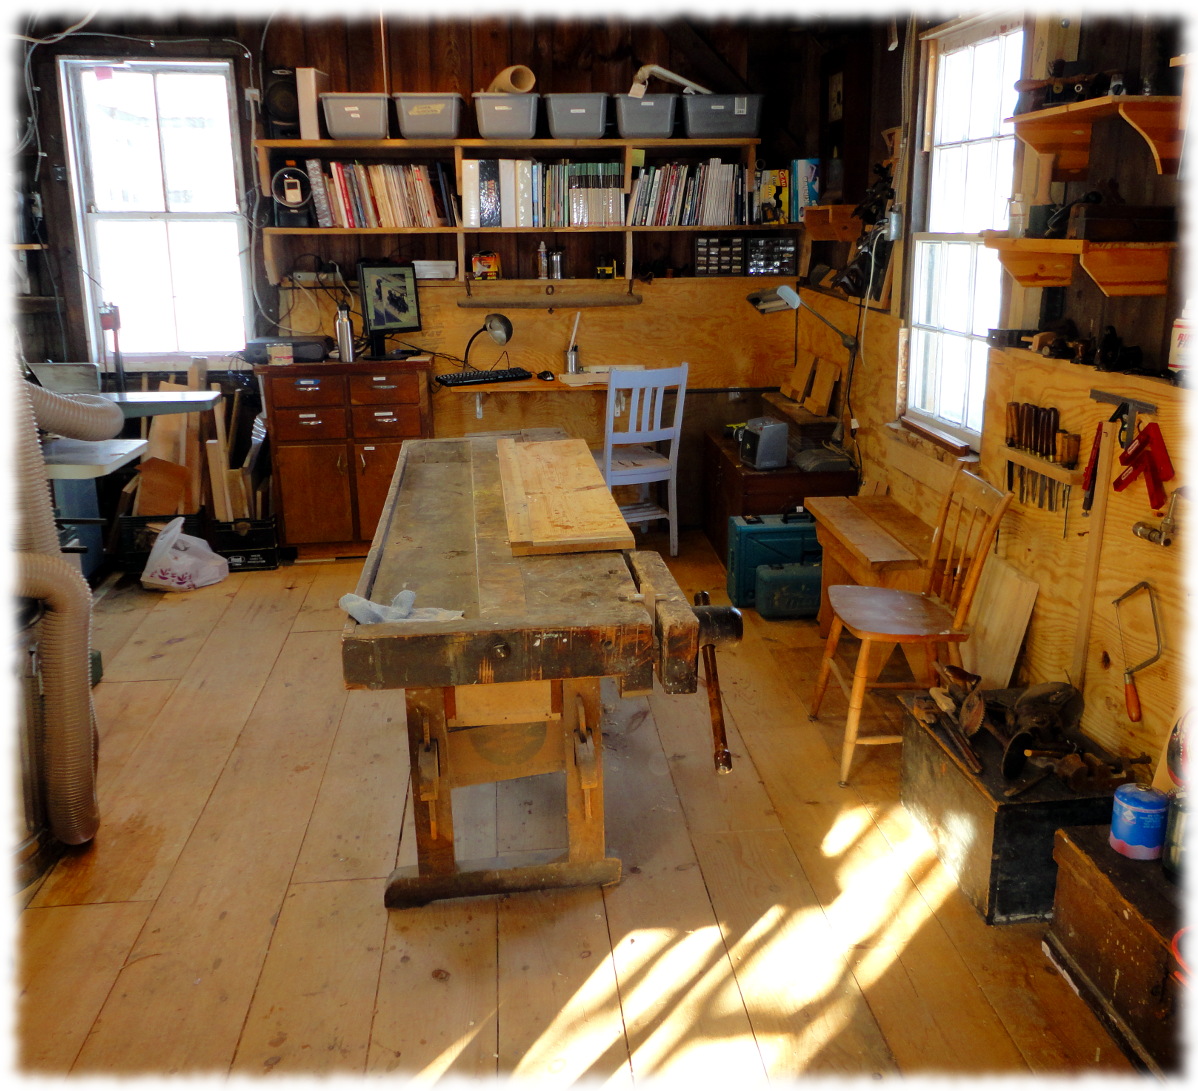
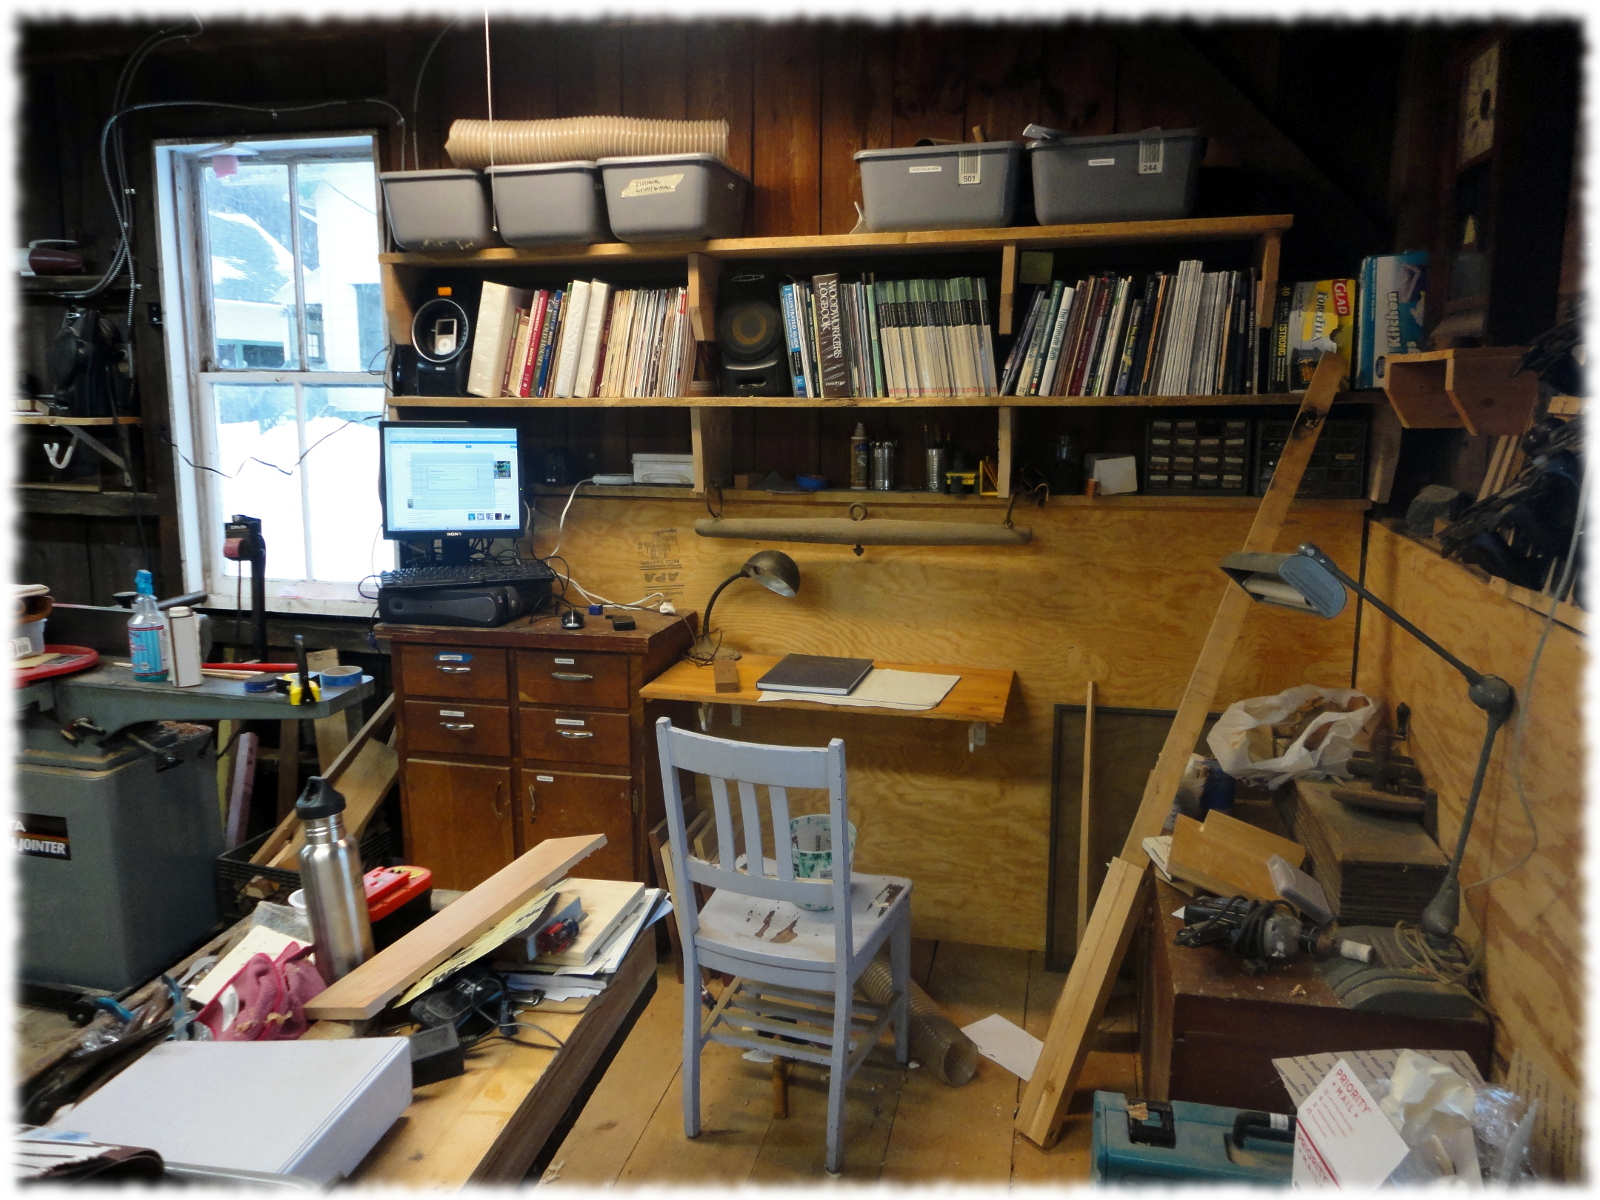
I put Pandora radio on the computer and spent the day cleaning the workshop. And throwing things away. I have way too much stuff in the shop. I didn’t get the font half of the shop cleaned, but I got the back half looking pretty good (for me). I even dug out an antique Stanley No. 45 plane and got it working – though the blade needs to be sharpened.
A reasonably clean workshop. I even vacuumed the floor. I still have more stuff than I need, but it is heading in the right direction.
I decided to reorganize the “office” corner of the workshop. It is too cold to get too much woodworking done, but it is nice to reorganize things.
One of the biggest additions is a computer. Ben and I had picked up a handful of $20 small desktop computes for the boys Minecraft party in March. It is pretty slow, but it works. I set it up and added it to the wireless network. Now I can stream Pandora, write in my blog, and even play Minecraft with the boys. Though the computer can really only handle one thing at a time.