“On October 19, 1944, two Grumamn F6F-5N “Hellcats” were practicing war maneuvers out of the Charlestown [Rhode Island] Naval Auxiliary Air Field when something went terribly wrong. The two planes collided over the Town of Preston, in a heavily wooded area in the eastern part of Connecticut. The young ensign pilots, both dead, were pulled from the burning planes. Reportedly, the Navy buried much of the wreckage in trenches near the impact points.
The Hellcat sites in Preston were well-known to aviation enthusiasts and local residents, but they did not come to the attention of professional archaeologists until SHPO began considering the implications of the State’s divestiture of the 500-acre former Norwich State Hospital. The SHPO requested that a complete archaeological survey be made of the property to determine what prehistoric and historic resources might be impacted by the State’s decision. In addition to inventorying dozens of prehistoric sites and the site of a Revolutionary War period tavern, the archaeological survey, conducted by PAST, Inc., recommended that the two Hellcat sites be considered eligible for the National Register.
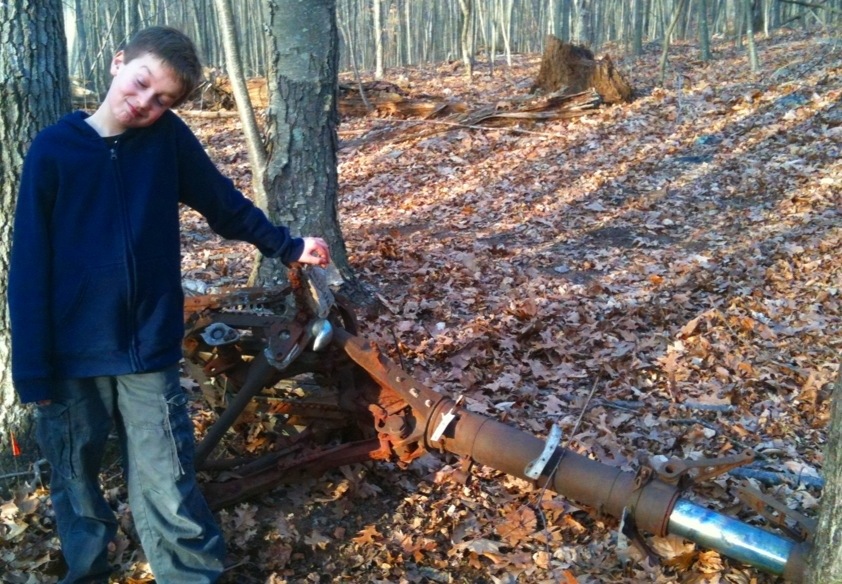
Each Hellcat site has at its center a visible piece of wreckage from the aircraft. One site includes a landing gear strut embedded in the earth and the other site also has a landing gear strut, as well as a piece of adjacent air-frame. The archaeologists excavated a limited number of test pits to confirm that the apparent trenches were in fact where much of the debris from the aircraft was buried. No material was removed from the site. Instead, the locations of the visible remains were mapped using GPS. In order to create a reasonable boundary for each impact site, a metal-detector survey was conducted, working outward from the visible remains. The most frequent and early “hits” were chiefly small fragments of sheet aluminum. After a certain point, the hits dropped off sharply, defining an edge to the debris field.
Both of the Hellcat sites, including the debris fields of 9 acres for one and 1.5 acres for the other, have been designated State Archaeological Preserves. A recent state-sponsored publication on these Preserves was authored by Bruce Clouette.
For more information on the Hellcat sites and the Preserves program, contact Dr. David A. Poirier (dave.poirier@po.state.ct.us).”
-Council for Northeast Historical Archaeology, Newsletter Number 65, October 2006