The bookshelf carcase naked - needs back, face frame, shelves and top...
After assembling the carcase, I started milling and building the rest of the bookshelf. I milled the face frame and shelf fronts from a single 72″ section of cherry. The shelf panels have a 1″ tall piece of 3/4″ thick cherry glued to the plywood. I decided to use a little taller piece of wood than the 3/4″ thick shelf. The wood will be flush on the top, and extend slightly below the shelf. Having a thicker piece of wood will add some rigidity to the shelves so they won’t sag under the weight of books.
Two of the four shelves glued up with a solid cherry edge piece
I glued up the top from two pieces of the cherry. I set it on the top of the shelves and it had a decent overhang and room to cut the board square. However I forgot that the bookcase will have a 3/4″ cherry face frame attached (Duh). Not sure if the top will be big enough. Luckily I have another piece (or two) of cherry milled that I can add to the top panel if needed.
The top panel glued up
The edges to be glued were jointed on the power jointer. However the jointer didn’t leave the best edge for gluing (I think it needs new blades), so I used a hand plane to do the final jointing prior to glue up. The trick is to make sure both edges are perfectly square to the faces (that they aren’t on this panel can be seen by the very slight bow in the panel when I hold a straight edge across it. I’ll have to remember to keep checking the edges with the square when I use the hand planes… I’m hoping that the slight bow in the top will just be a design feature (either to cause water to run off the front and back – if the the convex side is up – or a place to store tennis balls where Tucker can’t get them – if the concave side is up).
I started a new project this weekend. We are in desperate need of a set of bookshelves for the study – all the books are in boxes on the floor for now (or in the barn). I had been searching the web to find a simple plan that allowed a set of shelves to be made from one sheet of plywood.
I found this link. I am using the same basic dimensions for the bookshelves – however the construction of the carcase is using pocket-hole screws not biscuit joints. I looked at picking up plywood from GK Woodworking in Griswold. Susanna and I discussed either making the shelves out of red oak (total cost about $125 – I had plenty of red oak on hand for the face frame and top) or cherry (total cost of about $250). We decided to go with red oak.
On Saturday morning I called GK Woodworking and asked about picking up some red oak plywood. He had sold his last 3 sheets of red oak that morning (apparently he sells very little red oak, but of course in one day he had two people interested). So cherry it was. Will and I headed off to pick up the lumber (while Susanna took Ben to his piano lesson). Twenty minutes and $245 later I had a piece of 3/4″ cherry plywood (for the shelves), a piece of 1/4″ cherry plywood (for the back) and 9 bdft of 4/4 (1″ thick) rough cherry. Not exactly low cost bookshelves – but I imagine that to purchase shelves already made would cost much more.
Cherry lumber for low-cost bookshelves
Saturday afternoon I spent a couple of hours cutting up the 3/4″ sheet of plywood (2 sides, 1 top, 1 bottom, and 4 shelves). I cut the rabbet on the two sides to hold the back, drilled holes for the shelves (I will use pins to make the shelves adjustable) and assembled the carcase. I will use solid cherry on the top to cover the top piece of plywood (and hide the ends of the sides).
The pocket-hole joinery is quick and easy – if you can hide the screws. On this project the carcase is made from two shelves (top and bottom) and two sides. The pocket hole screws are on the top side of the top. That surface will be covered with a solid cherry top (not yet sure how I’m going to attach the top yet – but hey, why plan everything at once). The screws are attached from below the bottom shelf. That shelf is 2 1/2″ from the bottom of the sides, but won’t be visible unless one turns the shelves upside down.
Shelf pieces cut from plywood sheet
Tonight I milled the lumber for the face frame and the shelf fronts. The next step is to clean up the face frame, cut to length and glue the frame to the carcase. The glue is plenty strong to hold the face frame to the carcase.
A couple of things I have noticed so far in this project:
My shop is not designed to easily handle 4×8 sheets of plywood. When I rearrange, I will have to leave a space large enough to cut down sheet goods.
The 100 tooth saw blade that came with the table saw does a beautiful job on cutting the plywood.
The cabinet grade plywood is MUCH nicer to deal with than the crap you get at the home center. No voids in the middle, and the veneer is significantly thicker than the cheap stuff
I had to crosscut the sheet with my circular saw – the blade on that saw did not leave the nicest edge
I have a couple of variations of this shelf in my mind to try. The shelf might look good with corner posts, though I would do them a little differently from the Woodworkers Guild of America link above – I would make them out of the same material as the shelves, and most definitely taper the legs. I might make the decorative top out of plywood, edged with solid wood – it would make attaching the top simpler and more sturdy. The problem with attaching the solid top to the plywood carcase is that the solid top will shrink and swell with the room humidity. The plywood is stable with changes in humidity (which is why the carcase and shelves are made from plywood – much better for this type of project than solid wood).
I think a shelf pin drilling jig, such as this one from Woodpeckers would make drilling the shelf pin holes much simpler and more accurate.
Looking ahead, I am thinking about building a kitchen island. Again, I want it to be simple and inexpensive – so I’m still thinking of options.
Here is the crown molding in the living room. The colors didn’t come out the best – I may have to retake the picture during the day. I finished touching up the wall paint tonight. The trim has a dart and egg pattern on it, but it is subtle. I also felt that the ceiling was too low for “normal” crown molding. The corners are mitered (no coping this time) and the edges caulked where the trim meets the wall and ceiling.
Living room crown molding
And yes, as Susanna pointed out, I still have one project to finish (I did notice that it didn’t take long for her to comment on my post pointing out that I needed to work on patching one of the walls):
Wall repair in progress (the plaster crumbled when I replaced the outlet)
Also, here is the new boiler. I took pictures of the new steam piping as well, but I’m pretty sure just a picture of a boiler is enough to bore everyone. Yesterday we also got a delivery for 245.6 gallons of oil. That is cutting it pretty close on a 250 gallon tank. And will also cost a small fortune. I will spend time this summer doing more work on the windows to hopefully reduce oil use even more next year.
The boiler is a Peerless ECT 03 with a domestic hot water coil. The project included installing the boiler, the direct vent through the window, installing a Hartford loop and replacing steam pipe above the boiler to correct the pipe pitch. The furnace was installed by Curries Heating and Plumbing.
We had a new boiler put in this week. I’m very thankful that the weather wasn’t too cold – there was no heat for two days (okay, really for one night). The heating company did give us portable heaters, and hook up a temporary hot water heater, so we weren’t totally left in the cold. The new system was on-line yesterday evening, and today they finished flushing the system and adding new air valves to the radiators.
It should be a major improvement. The installer said I would probably get a 40% savings on oil from the new system (I’ll have to wait to see on that one), and we won’t have problems with hot water. The old boiler also had a hot-water on demand system, but it couldn’t heat water up fast enough for the normal usage in the house (it worked for a shower, but not if anyone else used any hot water). The new one is working much better (we tried it last night). The other big change is that it is power-vented out the basement window. I can now have the chimney taken down, which greatly eases the next renovations in the house (putting a bathroom on the second floor and redoing the kitchen). The chimney went in the middle of one of the upstairs bedrooms and in the wall between the kitchen and pantry.
I probably will wait until later this summer to have the chimney taken down to below the roof line (I’ll take it down the rest of the way as needed for renovations).
My dad visited for the weekend and helped me finish one more of the outstanding projects. We installed the crown molding in the living room. I painted the trim on Monday evening. Tonight I’ll touch up the wall paint were the tape pulled a couple of (small) sections off.
So, for once, I don’t think I have any ongoing projects. All the house projects are done, and I don’t have anything in the workshop. Maybe I’ll go with Will on Saturday to the lumber yard, and we can get plywood for the bookshelves.
I finished the piano bench today. The first project of the year is done. I didn’t actually start it this year, but I think it still counts. The next woodworking project will be bookshelves for the study. I’ll wait to start until I finish the crown molding in the living room and the weather warms up enough I won’t get frostbite in the workshop (it was a chilly 10 degrees F this am).
Over the past three days I stained the bench. It is made from red oak, so to more closely match the piano, I added a dark stain. I put 3 or 4 coats of stain on after the wood was prepared with grain filler. I used a single coat of dewaxed shellac on top of the stain prior to the water-based top coat. The top coat is two coats of Agualente (by ML Campbell) sprayed on. The finish is a pre-catalyzed top coat, so I was able to recoat within 30 minutes (dry to the touch in 15 minutes).
Susanna and I had completed the fabric and batting on the top last night. It was the first time either of us had put fabric on a bench seat, so it isn’t the best job, but it turned out pretty nice. I made 4 tabs to attach the top to the bench out of scrap oak.
Completed Bench
Overall, I’m pretty happy with the project. The base was constructed with mortise and tenon joints, and the legs tapered. I’ve moved up from pocket-hole screws. I’m not thrilled about the stain – I didn’t do the best job on the finish. However I used a lighter setting on the spray gun, and I think the top coat came out better than on the boys shelves.
Lessons learned from this project: Make sure to count the height of the padding and fabric when figuring out the height of the bench. Take the time to adjust the fence on the router table when cutting the mortises the first time (saves having to mill 4 new legs and re-cut the mortises). If one wants a dark bench, use dark wood.
My personal critique of the project: The mortise and tenon joints are okay – there are a couple of small gaps between the tenon shoulders and the legs. I think tight joinery comes from practice practice practice. There are definitely spots where the stain isn’t even. I should stain the project prior to assembly – the inside corners are difficult to stain evenly. Spend a little more time doing the corners on the fabric top.
Well. I’m almost finished with a couple of projects. Hopefully tomorrow I can finish at least two of them, and keep working towards my goal this year of finishing projects (instead of just starting them and almost finishing them).
The piano bench is in the final finishing stages. I made it out of red oak, and am trying to stain it dark to more closely match the piano. I know, if I wanted dark, I should have started with a darker wood (walnut or cherry). But nothing beats making projects from lumber already in the lumber pile. I do have cherry, but it needs another year or so to dry. Maybe sapele. Of course I could always build another one – but that will need to wait until some other house projects are done.
The bench after a first round of staining
I’m not too happy with how the staining turned out. The test piece of wood turned out darker. I applied a coat of Aqua Coat grain filler, then the dark stain. The test piece of wood turned out darker. I think I sanded the bench more than the test piece.
Testing the finish (from L to R) - Shellac then stain, stain on bare wood, Aqua Coat grain filler then stain
I think I’ll add one more coat of stain tonight, then spray the top coats on tomorrow.
I also almost finished the bridge…. One more plank to cut and nail to finish the entire bridge. It was just getting a bit too cold this afternoon to spend more time outside (18F or so). It isn’t the nicest bridge, but it is a way back in the woods, and it is too cold in January to spend a lot of time making a nice looking bridge. It did use up a bunch of the red oak I had sitting around (and some of the white oak).
An almost finished bridge
Just to be fair, I do have more unfinished projects hanging out there. I have the crown molding for the living room sitting in the basement primed. Hmmm… I probably have more – I just can’t think of them right now (ok, there are yard projects, but it is January – so I won’t count them).
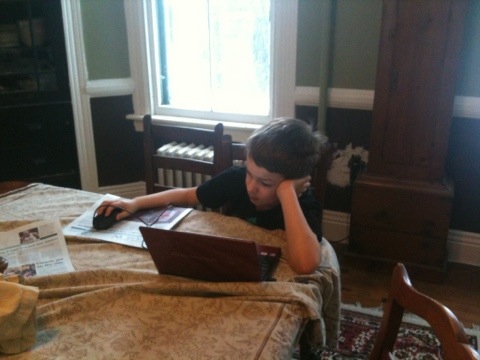
The boys are here for the long weekend, so we get to take a slow Saturday morning. Will has been starting to get into his music. His song for today, is Joan Jett’s “I hate myself for loving you.” It is funny to watch him sing along while watching the music video on his computer.
Will watching Joan Jett on his computer
We hit the Hair Cuttery early – there is not line before 9AM. Will came along to show Ben the hair cut (from the hair style card at the store) he got last week so Ben could get the same. Ben wanted hair gel. Will didn’t . We may have to pick up some gel.
Ben with his new hair cut (and a crazy smile)
Now time to head out and finish the bridge while Susanna does her yoga…
As promised (threatened). Pictures from last night and today. Maybe too many posts for a day – it is because I’m tired/lazy and don’t feel like doing any more work around the house…
Will at the Foxwoods Casino arcade on his night out with SusannaThe bridge under construction. As far as I got today...
The stream isn’t very deep, just muddy. After the bridge is done, we will have to clear a trail looping back to another part of the yard (to meet up with the other bridge).
Not a bad day today. Not as warm as yesterday, but nice enough to work outside. Tucker stayed in the yard for two days in a row – a nice change. Now to head out to meet some friends at the Mews Tavern in Wakefield RI.
A good morning for the cats. Today’s body count: 1 whole mouse in the driveway. 1 in parts. 2 whole mice in the basement and 1 in parts. I’m glad they are doing their chores. Now mine is to go pick up the carnage. If only the dogs could find something as useful to do.
On a positive note, it seems that we don’t have mouse problem anymore. However, the mice might argue that they have a cat problem.
This is Tucker’s idea of helping around the house: